Striped furniture
Applique:
Striped furniture.
To consolidate children’s knowledge on the topic “Furniture”, to activate the vocabulary on this topic;
Develop children's creativity and imagination;
Foster independence and activity;
Reinforce techniques for careful use of glue;
Learn to compose an image from strips of different lengths, following a certain sequence; place it correctly on the sheet;
Materials:
strips (10 cm and 5 cm * 11.5 cm), flannelgraph, strips of velvet paper, glue, napkins, maples, brushes.
1h
. Creating a game situation.
Reading the fairy tale “The Three Bears.” Remember the fairy tale “The Three Bears” with your children. Find out what Mashenka broke.
Show the children the stripes (one long, one short, for each child) and say that such stripes remain after the application and should be thrown away. But one day the stripes “revolted” and said that they could also be useful: “We can make different furniture,” they said.
Conversation with children about furniture. Find out what kind of furniture can be made from such strips.
You can sleep on the bed,
Chairs, table - rearrange.
I will put books in the closet,
I will cover the chairs.
Invite the children to draw an image of a table or bed on a flannelgraph. The teacher accompanies the drawing of the image with a comment, while naming the parts of the furniture: table top, legs, back, etc.
When laying out an image on a flannelgraph, the teacher asks the children to lay out the same image on sheets of paper.
We slept on the bed
Things have already been put away in the closet.
We sat on a chair
And we ate at the table.
3h
. Independent work.
After the children have posted all the images, offer to stick on the piece of furniture they like and give it to the three bears in the hut. When doing the work, the teacher reminds you of the sequence of laying out: first you need to lay out the long strip, and then the short ones; about the correct location on the sheet - in the middle, about accuracy. When gluing, learn about the rules for working with glue.
Ask the children what they did? What is this or that furniture for? Name the parts.
How to make a 3D paper house: step-by-step craft instructions + printable template
This cute 3D paper house will be very useful as a craft for absolutely any holiday, be it New Year or Valentine's Day, or you can make it yourself just for fun at any time of the year!
These paper houses are really easy to make with a free printable template, so you can build an entire village in no time! You can make this paper house craft in any color you like. We decorated the craft with a heart, but you can add absolutely any other decoration to create different effects.
Have fun exploring and experimenting with different ideas and you won't go wrong!
What do we need:
- Colored cardboard
- Scissors
- Glue
- Pencil
Paper house making process:
First, download and print the free paper house template below. Here is our cardboard house template for crafts:
All we have to do is print it, cut it and glue it:
Step 1 . Trace all 4 pieces onto construction paper in the color you like best and cut them out.
Step 2 . Glue the door to the bottom of the house template just below the tower.
Step 3. -Glue a heart shape (or any other shape of your choice) above the door.
Step 4. Fold the four corners of the house vertically. Use the template for clarity.
Step 5. Add glue around the perimeter of the end side like this:
Step 6 . Glue the entire shape together to create a three-dimensional structure.
Step 7. Fold the roof rectangle in half and open it.
Step 8. Glue the roof to the top of our 3D paper house.
It turned out great, didn't it? Why not try turning them into small home lanterns by cutting out a door and a window to allow the light of the lamp to pass through? Here's another option, only in a different color.
Winter ball
The glass ball is a popular souvenir. Using a minimal set of decorative paper, cotton wool and glue, you can create a paper version. Inside the winter ball, using colored paper, it is easy to arrange fairy-tale scenes: houses, Christmas trees, a palace or a snowy landscape.
Note!
New Year's decorations for windows 2021: 150 photos of beautiful templates for do-it-yourself window decorations for the New Year
Stencils and templates of houses for windows for cutting out of paper
New Year 2022 is just around the corner, so let's make window decorations! Compositions of several elements look very harmonious on windows, rather than lonely patterns of a house or a Christmas tree, for example. One of these compositions could be a house made of paper with other images of snowflakes, snow, and so on.
They fit perfectly into different scenes: winter, blizzard and, of course, a snowman. Also, another option for drawing from stencils on the windows can be the New Year celebration: there is a little mansion-hut, and in the window in the distance you can see a Christmas tree and the children who are decorating it. Or this: children are making a snowman in the yard to give it to Santa Claus!
How do you like this winter landscape represented by a cardboard cutout? It looks more than worthy, don’t you agree?
But a very simple option will not complicate even the smallest ones:
How do you like this starry night? This stencil can easily be printed on a black A4 sheet. During the day, such a window decoration will look simply magnificent, I assure you!
Or this option, but only on white cardboard, is also not bad:
And this is a whole 3D village made of paper, didn’t it turn out great?
Cut-out of two houses and a snowman with a broom:
And here it’s the same, but there’s one house, and also Christmas trees.
And why not make a sweet gift for the New Year with your own hands?
Craft "winter"
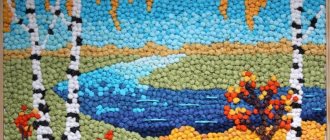
A technique for depicting a winter landscape using small balls and a glass will be very entertaining for a child. To work, you will need several balls and a cylinder-shaped object, such as a cup.
A colored sheet is placed in the container, and the balls are dipped in white paint. Painted figures are poured into a glass and covered with a lid. Shake well and you will get a colored sheet with white streaks.
Note!
How to decorate a Christmas tree for the New Year 2021 with your own hands: TOP-200 photos of the best ideas, choice of color, toys and style
How to make a New Year's toy - beautiful and interesting ideas for New Year's toys. DIY instructions for beginners + 100 photos
How to make snowflakes: TOP-160 photos of the best ways to create snowflakes from different materials. Simple work plans for children
By analogy, you can experiment with colors. Parts for appliqués are cut from finished sheets.
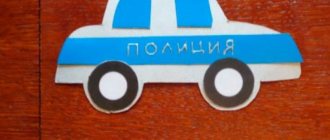
Snow collecting machine
Boys will appreciate the snow blower. To make this craft you will need colored paper, a cardboard sleeve, cotton wool and bubble wrap. To create a background, the air film is painted with white paint. The material is tightly fixed on the blue sheet.
When the paint is dry, the car applique is placed on the background. The transport bucket can be made from a cut bushing. Cotton wool is used to imitate snow.
Hat with mittens
An applique is created from winter accessories. To make the details more realistic, they are decorated with pom-poms made from cotton wool. You can decorate the mittens with felt, bugles or beads.
Snowman
To form a snowman, you will need to cut out the base from a white sheet. Cotton balls are glued to the prepared material. A cap, eyes and a nose are attached to the snowman. Handles and pom-poms can be added if desired.
Progress of the lesson
Guys, guess the riddle
Everyone loves me very much
I'll tell you honestly.
After a working day,
How to sit well in... (Chair)
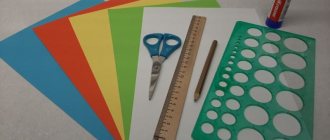
That's right, guys. And today we will make an appliqué of a beautiful chair . To do this, take colored cardboard and a chair template. Using a simple pencil, outline the template. Then let's check that we got everything right. Now you can take scissors and carefully cut out the chair.
Let's remember the rules for using scissors so as not to hurt anyone. Independent work of children.
Let's go to the store in the morning (walking in place)
We'll buy furniture there:
Tall cabinet (stand on toes, stretch arms up)
And a stool, (squat)
Bed - we will sleep on it softly (put folded palms under the left cheek)
Let’s buy a chair (a bent left palm is attached to the straight right palm to make a “chair”
)
And the table is big (they spread their arms to the sides)
And we’ll take you home (turn the steering wheel)
It's time to decorate our chairs. We have colored squares that we will cut into strips.
To do this, you need to take scissors in your right hand, and a square in your left hand and cut it into narrow strips of paper. To make the stripes different colors, children sitting at the same table can exchange cut out strips. Then advise the children to arrange the stripes in alternating colors and stick them on.
Independent work of children
The children begin to do their work. The teacher pays attention to accuracy when working with glue, recalls the techniques for careful gluing, monitors the children’s posture when working, and recalls the rules for working with scissors. Helps children who are not doing well.
- Guys, let's remember what we did today?
— Are you satisfied with your work?
Look what wonderful chairs we have made. Everyone did a great job. Well done to all of you!
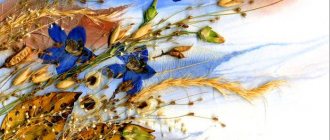
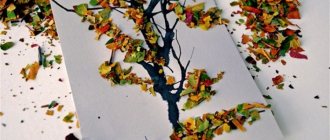
Photo report of the creativity of middle group children together with their parents. Application using torn paper technique and mosaic application. Photo report of artistic creativity of the middle group of children and joint work of parents with children. Elena Vladimirova. One of the non-traditional types. Photo report “Butterfly application in the middle group” Purpose: To create conditions for working with paper, scissors and glue. Objectives: - Expand color perception; - Reinforce careful handling.
Calendar planning for the thematic week “Furniture” in the younger group December, week 2 Goals of the teacher’s activities: to broaden the horizons of children through acquaintance with the objective world, to form ideas in children.
Collective application “It’s Summer!” in the middle group It is in the summer that a child gets inspiration to create bright creations. In the summer, everything around us is as bright and contrasting as possible. Very. Summary of direct educational activity “Furniture” for children of the middle group Pedagogical intent: To cultivate respect for people’s work and respect for the man-made world. Cognitive development: Improve.
"Furniture". Summary of GCD on the surrounding world in the senior group Summary of a lesson on the surrounding world in the senior group on the topic “Furniture” Goal: to clarify and expand the vocabulary on the topic “furniture” Tasks: - to clarify.
Abstract of the educational activity "Furniture" in the senior group of compensating orientation Abstract of the educational activity in the senior group of compensating orientation on the topic: "Furniture" Main educational area "Speech development" Educational.
Summary of a lesson on speech development on the lexical topic “Furniture” with children of the middle group 4–5 years old. The summary of the lesson was compiled based on the methodology of O. S. Ushakova. Prepared and conducted by the teacher of MBDOU kindergarten No. 76, Ryazan, first. Lesson summary in the preparatory group "Furniture" Lesson summary in the preparatory group "Furniture" Elena Vladimirova. Goal: To reinforce the general concept of furniture in children. Objectives: Educational:.