The “mushrooms” applique is one of the simplest themes available for children’s creativity from 3 years old. A strong mushroom with “baby”, autumn leaves, green grass, insects or a hedgehog will not leave anyone indifferent.
In general classes or at home, children are given the task of making an appliqué from paper or fabric. Fly agarics and porcini mushrooms are made according to patterns, but it is better to give the child the opportunity to work arbitrarily until the perfect sample is obtained.
The simplest fungus application
Preschoolers can make a mushroom from different materials. To complete a creative task, you will need a dense base - a sheet of cardboard or plywood on which mushrooms will “grow”.
A simple application of colored paper “mushrooms” is the most affordable option. There are other methods - using natural and available materials:
- “mushroom” applique from cereals (semolina, buckwheat);
- smooth made of fabric (on glue) and voluminous (sewn with overcasting over a layer of padding polyester);
- from cotton pads;
- break appliqué;
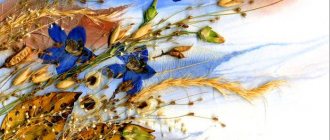
- combined works (using dry leaves and herbarium, fabric and paper).
To make the paper work beautiful, it is done according to the white mushroom template for applique. This is a popular theme for exhibitions of work, which are often held in kindergarten and junior school groups.
fly agaric
For beginners, we can recommend an even simpler origami mushroom made of paper, which is folded based on the basic “Kite” shape. You will need one square sheet with sides of different colors: white and red.
Step-by-step instruction:
- Let's start with the color side. We outline the diagonal.
- We bend the right and left corners towards the center.
- Turn the product over.
- Make a zigzag fold along the dotted line.
- We bend the corners. Straighten out the folds.
- We open the right side along the arrow, while simultaneously making a “valley” fold along the dotted line.
- Repeat step 6 on the left.
- Raise the bottom part.
- We turn in the corners indicated by the arrows.
- Turn the mushroom over to the front side. On the visible part under the cap we strengthen the folds.
The model looks good in different designs. Patterned kami paper makes the mushrooms decorative - just what you need for a gift tag, guest card or postcard:
The classic “fly agaric” version is no worse.
Mushroom applications for the middle group
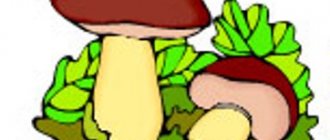
The simplest image is made of white and brown paper - a leg and a cap.
We round the rectangular workpiece at the leg, gently cutting off the corners. It can be slightly narrowed at the top. If the top part goes under the cap, you don’t have to round it. The bottom can remain without a cut if the leg is covered with a leaf or grass.
The hat is a semicircle or half an oval with curves. If there are several mushrooms in the composition, it is better to make them of different sizes, but of the same shape. The legs, accordingly, will be of different heights.
Important! Symmetrical parts are made from paper folded in half, cutting along the fold line.
If the mushroom is made using a more complex technique, the cap should be deflected, the stem entering the white part of the top. The finished porcini mushroom should look like the paper applique in the photo.
Bulk applique of cereals
Craft “Boletus Mushroom” – applique made from cereals. She develops perseverance and accuracy in her work. Cereals are poured onto parts soaked in PVA glue. The task develops fine motor skills, creative abilities and imagination of children.
This technique is proposed to be used in the middle and senior groups of kindergarten. Bulk appliqué is also recommended for extracurricular work and home practice (during vacations and weekends).
To work you will need:
- base (a sheet of colored cardboard in A-4 format or a small piece of sanded plywood);
- paper for the template on which glue will be applied;
- dark-colored cereals (buckwheat);
- semolina or other light cereal;
- split green peas;
- PVA glue with a brush;
- scissors and pencil.
Completing of the work:
- Cut the mushroom according to a template or any shape, with recognizable contours of the boletus mushroom.
- Glue the stem and cap in the center of the base.
- When the template is fixed, saturate the surface well with glue.
- Sprinkle the coated mushroom cap with buckwheat or other dark-colored grains. If gaps have formed, lightly brush with glue, pour in the cereal and press lightly with your palm. Shake off any excess when the glue has set.
- While the cap dries, soak the stem with glue. Sprinkle semolina or finely ground light-colored corn grits onto it. Brush off excess.
- Apply glue in random order under the mushroom, depicting grass. Pour split peas onto the soaked base (they can be ground in a coffee grinder or cereal crusher). After drying, the work is ready.
Note! If in your picture the cap is open, the pulp of both the top of the porcini mushroom and the stem should be covered with a different type of cereal.
Fungus applique from autumn leaves
Teachers have developed many interesting autumn-themed techniques, including an image with a porcini mushroom and fly agarics.
Helpful advice! Upon completion, complement the traditional “mushroom-boletus” work made of colored paper with natural materials. Small autumn leaves of different colors, acorn caps, and dry berries will add a “natural” look to the picture.
To add variety to the plot, complement the composition with beaded raindrops, or a butterfly flying over mushrooms. The basis of the autumn composition should be small autumn leaves.
Applique mushrooms in a clearing
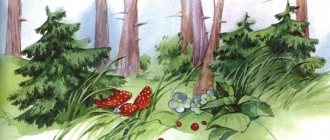
By removing the yellow leaves and replacing them with green grass and flowers, the work becomes summer-like. Add a mushroom with a snail or a bug to liven up the picture a little. Green grass is made from different materials:
- cutting yarn, including special “grass”;
- chopped green beads;
- a strip of silk (any thin fabric) finely chopped;
- green colored paper.
Note! If a strip of fabric is cut diagonally, it will not delaminate and crumble. By gluing the cut tape up with a “fringe” in 2-3 rows, you will get volume - the grass will sag. It can even be slightly smoothed down for a 3D effect.
You need to place a mushroom in the grass so that it seems to “grow” out of the grass. The color of the cap and the shape of the mushroom can be varied.
It is better to make elegant fly agarics from red fabric with polka dots, and decorate the leg with a lace skirt. It is proposed to “immortalize” the aesthetic application of fly agaric mushrooms by transferring them to children’s clothes or handbags.
If this is a decoration for felt boots or felt boots, the details of the design are symmetrically duplicated according to a common stencil.
MAGAZINE Preschooler.RF
Abstract of the GCD “Break application” - “Porcini mushroom” in the middle groupGoal: to introduce children to a new technique of working with paper: tearing, performing work using the tearing appliqué technique.
Tasks:
Educational:
- introduce children to the technique of cut appliqué
- master the technique of cut appliqué
- expand children's knowledge about various methods of appliqué
Educational:
- develop children's imagination
- develop fine motor skills of hands
- develop interest in artistic creativity
- develop observation, memory, imagination, attention, logical thinking.
Educational:
- continue to develop emotional responsiveness in children
- cultivate interest in nature and aesthetic feelings.
Equipment and materials for carrying out GCD:
- cardboard with an outline image of a mushroom
- colored paper:
- brown (mushroom cap)
- beige (mushroom stem)
- green grass)
- glue
- glue brushes
- oilcloth - lining
Conducting GCD:
Organizational stage
Educator: - Hello children.
Children: - Say hello
Educator: Guys, this morning I met a forest dweller near the kindergarten. Want to know which one?
Children: Yes
Educator: then guess the riddle: “Under the pines, under the fir trees there lies a bag of needles . (Hedgehog)
Educator: That's right, well done.
Educator: The hedgehog told me a very sad story, he didn’t notice at all how autumn had come, but after autumn the cold season of the year, winter, will come. All the inhabitants of the forest have been collecting berries and mushrooms for a long time, but he has not collected anything. So a hedgehog came to our kindergarten to ask the children to help him collect mushrooms for his family, which they really like to eat in winter.
Educator: Guys, do you agree to help the hedgehog?
Children: Yes
Educator: Well then, today we will go to the forest where the hedgehog lives and we will collect only edible mushrooms, namely the white mushroom, because the white mushroom is the largest mushroom in the forest.
Physical education minute:
Kolya walked and walked and walked and found a porcini mushroom. One - fungus Two - fungus
Three - fungus, I put them in the box.
We looked at everything around us, there are no mushrooms anywhere anymore
And everyone sat down quietly. The teacher reads a poem, and the children imitate the movements of a mushroom picker: they walk,
bend down and put the mushrooms in the box.
Educator: Guys, look at what parts does the porcini mushroom consist of?
Children name the parts of the mushroom (leg, cap)
Educator: Well done.
The teacher shows pictures of mushrooms and an application with the image of a mushroom (ceps).
Children: Looking at pictures
Educator: Today we will make a mushroom (ceps)
To produce our works, we will use a very interesting and unusual type of applique: “Break applique”
You and I will not cut the paper, but tear it off, that’s why it’s called “BREAKING”.
Let's repeat it again:
Tear applique is obtained because we tear the paper and do not cut it with scissors.
Educator: Children, there is cardboard in front of you, and what do you see on the cardboard?
Children: Image of a mushroom.
Educator:
That's right - this is the outline of our mushroom. You also have colored paper on your table - brown, beige and green.
Educator: The paper needs to be torn into small pieces to design our application.
And now we will prepare our fingers for work.
Finger gymnastics “Mushrooms”
Amanita muscaria is a dangerous mushroom Children threaten with their index finger
And the second is a fox, a red-haired sister. Children extend their fingers one by one.
Third fungus mushroom, pink ear
And the fourth mushroom is the bearded old man morel
The fifth mushroom is white
Eat it with confidence!
Educator: Well done! We are ready to get to work.
Educator: First, you need to tear up pieces of paper.
We will tear off small pieces of brown paper from a sheet of paper, then beige and green.
Pieces of paper should be placed in different plates:
- brown (mushroom cap)
- beige (mushroom stem)
- green (grass)
Before we begin, we must review the safety rules when working with glue.
Next stage: Gradually fill in the silhouette of the mushroom with colored pieces.
Apply glue to the silhouette of the mushroom and gradually fill in the inner contours of the mushroom pattern (brown for the cap, beige for the stem, green for the grass) in a mosaic style.
Educator: What beautiful work you have done!
The work was done neatly and beautifully.
Hedgehog: Guys, what big porcini mushrooms you managed to find and make for my whole family. Thank you very much, now we will be full all winter.
Educator: Guys, what a great fellow we are, how many mushrooms we collected today. What mushrooms were we looking for for the hedgehog today?
Children: porcini mushrooms
Educator: Our porcini mushrooms are enough for the winter not only for the hedgehog’s family, but also for all the animals in the forest, let’s take the mushrooms to the clearing.
Children and the teacher organize an exhibition in the group or reception area.
Educator: This concludes our lesson.
| Next > |
Mushroom applique for the older group
Autumn mushrooms in a basket - a complicated task for older preschoolers. They are able to make their own version - boletus, boletus, saffron milk caps, chanterelles, using their imagination.
The basis of teamwork is a big basket. It can be woven from strips of cardboard or fabric, adding a braid to the side and handle.
Suitable materials for the joint application “Mushroom Basket” will be needed:
- sheet of colored cardboard A3 (blue or dark blue);
- colored paper (orange, yellow, brown, red, white);
- strips of paper or fabric for grass and baskets;
- glue, scissors.
The aesthetics of the basket will depend on the imagination of the leader in the senior group and the materials. It is advisable to have an adult perform the difficult part of the composition. Ready-made mushrooms made by children are placed in the basket.
Helpful advice! Show the children how to make different mushrooms using a template - chanterelles, russula and “simply edible mushrooms” with caps of different colors from different materials.
It is advisable to complete 2-3 fly agarics and a group of toadstools, but explain to the children that they are not placed in the basket with edible mushrooms. It is proposed to simultaneously show a mushroom picker’s atlas with photos of edible varieties - this is part of the educational process.
In the application, poisonous mushrooms should lie next to the basket.
If you weave a basket from strips of thin colored foam rubber, mushrooms can even be made from plasticine. You can use dry leaves under the basket as decoration.
Make a hedgehog from seeds and “bead rain”. Complex work will take its rightful place at an exhibition or decorate a classroom until the New Year.
Mosaic application of fungus
Children become familiar with the mosaic technique by performing various types of appliqué. Mosaic is a way of filling a complete composition with small fragments of a suitable color.
Many materials are suitable for mushroom themes in the middle group:
- scraps of colored paper;
- buttons of a suitable shade;
- colored beads, beads and sparkles;
- cereals, colored sea salt;
- drunk and bean coffee;
- leftover green powder for Easter cakes;
- seeds and bulk materials of natural origin.
There may be several mushrooms in the picture. Using adhesive impregnation of the base according to the template, show children how to work with bulk materials. Large fragments to fill the stencil must be carefully laid out end to end.
In the same way as filling the mushroom template with cereals, a mosaic applique is made from beads, beads, or rolled plasticine balls. You need material in white, red and green.
The red beaded fly agaric with white buttons instead of spots on the cap looks nice.
Fungus applique from scraps
One of the most common techniques remains scrap paper appliqué. To do this, you will need to prepare finely chopped or torn colored paper.
Traditionally, boletus is prepared:
- brown scraps - cap;
- light yellow – leg;
- green - leaf.
The image can be made on a blue or white background - a sheet of cardboard in A-4 format. If it is a colored background, you need a template for the mushroom cut-out appliqué. On a white sheet of office paper, it is enough to draw in advance the outlines of a boletus with a green leaf.
The first stage of the lesson is to give the children a base with ready-made outlines and show them what the finished work should look like.
The second stage is to prepare pieces of colored paper.
The third stage is to saturate parts of the work with glue and fill the image with pieces of brown, yellow and green.
The fourth stage is to hand over the finished work and clean up the workplace.
Volumetric application of fungus
You can add volume to an image in different ways:
- Make a fly agaric cap from crumpled paper in the shape of an accordion, decorating it with white spots.
- Place the outline of the mushroom inside with pieces of colored cotton wool.
- Roll thin strips of paper into small rolls and glue the tails.
- Make small balls from circles of red paper and place them in the shape of a fly agaric cap.
- Cut the satin ribbons into pieces, roll them up, hem the ends and fill in the mushroom template.
All details of the three-dimensional image are seated on PVA glue.
Mushroom applique using origami technique
A mushroom using the modular origami technique is not an easy job for school-age children who master this type of needlework. Traditional Japanese art is taught as part of extracurricular education.
The whole group can perform identical modules according to the template, and then take turns laying out their part of the composition.
Simple origami is much easier to do - fold a sheet of paper step by step until you get a blank of the desired shape, as in the photo examples. Various crafts are made from them.
Modular origami Toad
In the Mushroom Kingdom of the Super Mario platformer, there is another iconic character - Toad, the servant of Princess Peach. He either helps the main character, or he himself becomes the center around which the plot of the game revolves. Toad resembles an oriental wizard wearing a huge turban. For children, it is better to make this mushroom three-dimensional from paper, using the modular origami technique. An interesting model of Toad is offered, for example, by the Korean origamist Nga Tran:
Mushroom applique for school children
Grown-up children are not interested in making primitive fungus; they are more willing to take on the development of non-standard techniques. They can “revive” the Boletus Mushroom or Fly Agaric by adding facial features to fabric appliqué with a felt-tip pen or using embroidery.
Helpful advice! The fly agaric hat and skirt can be made using different techniques. Invite more talented girls to make an appliqué of fly agaric from satin on burlap (canvas) as part of labor classes. Decorate the hat with pearl beads, crochet the skirts, and embroider the grass with thin ribbons or yarn.
Drawing a background for the applique is one way to complicate the task. It could be a forest or mountains with a river in the distance, and in the foreground of the image there are mushrooms with a hedgehog and a snail. Some students manage to create a realistic image.
Schoolchildren can decorate the grass in some complex way, adding spikelets and felt leaves. Offer to enliven the mushroom appliqué with insects made of beads or three-dimensional characters made of fabric. Creative tasks develop children's artistic taste and reveal hidden talents.
