Pencil drawing of a forest
It doesn't take much effort to draw a forest with a pencil. Even with general outlines it can look like the real thing:
- Draw a path leading to the horizon. We draw a horizontal line across the entire sheet, and draw two vertical ones to it.
- On both sides of the path we draw the bases of tree trunks of different thicknesses.
- Let's continue the trees up. Shade the bottom part. Using strokes we will add grass next to each tree.
- Let's draw the tops with the branches and the crown. Let's add shadows to all parts of the picture.
- Let's apply more pressure and increase the shading of the areas.
A simple pencil sketch of the forest is ready.
Let's make another similar forest sketch, but in a slightly different way:
- Let's mark the road and the horizon. Let's draw a line in the middle of the sheet with a careless hand. Let's draw two wavy lines to it, converging at one point.
- Let's draw tree trunks with vertical lines. The closer (lower on the sheet) the trunk is, the thicker it should be. We erase the horizon line extending beyond the trunks.
- Let's draw branches and leaves for the trees. In the foreground they need to be drawn clearly, in the distance it is enough to outline light outlines.
- On the foreground trunks we draw the bark and roots. We depict stones on the path.
- Drawing grass. We paint over the trunks and the road with a light touch of a pencil.
The result is another forest mini-landscape.
Essay about an autumn forest clearing
At the beginning of autumn, my parents and I went into the forest to pick mushrooms. We arrived at a familiar place, where we had been many times before. In my essay, I will tell you about the autumn forest clearing that we found ourselves in. It was quite large and smooth. Small, very young trees grew around the clearing. There was complete silence, only from a distance one could hear birds singing. Suddenly I heard a woodpecker knocking. He sat on a pine tree and hit its trunk.
We started walking around the clearing in search of mushrooms. There I saw a huge anthill. The ants were constantly moving, carrying pine needles and sticks into their house. I watched them for a long time, and then moved on. I was lucky enough to find a raspberry bush that still had a few berries on it. They turned out to be incredibly tasty. I also saw a fallen tree. Boletuses grew next to him. This was my first mushroom find, which I was incredibly happy about.
Walking through the clearing, we managed to collect a whole basket of mushrooms. After that we went home. For a long time I remembered the autumn carnival in the forest clearing, which I described in my essay.
Colored forest picture
Let's make a cute drawing of a forest that both adults and children will enjoy. This time we will depict the forest in colors. To clearly draw the contour you will need a liner:
- We denote a hilly horizon line. To do this, draw two arcs extending beyond the edge of the sheet.
- Draw the outline of the trees. Add the outlines of the branches to them.
- Let's make a Christmas tree from one tree. To do this, draw light inclined lines with a fringe at the bottom to the trunk.
- Let's turn another tree into a birch by adding touches to its bark.
- From the next tree we will make an oak. Let's draw massive branches and a hollow for it.
- In the background we draw other tree trunks without detail.
- We draw blades of grass and mushrooms in the foreground.
- To make the drawing clearer, outline the sketch with a liner. After this, erase the pencil mark.
- The trunks are painted shades of brown. Paint the hollow dark brown. Cones - with a light brown pencil.
- The birch trunk is covered in light gray and dark gray tones. In this case, there should be unpainted white areas.
- The distant outlines of the forest are not drawn. To depict forest distances, the stripe above the horizon is painted blue-green. The rest of the sky will have a blue tint.
- The grass is painted with a light green shade, individual blades of grass stand out emerald. We paint the mushroom caps in different colors.
- We paint the crown of deciduous trees with a rich green color. We make the spruce needles dark green.
The result is a beautiful color picture that can be hung on the wall in a child’s room.
Instead of pencils, you can use felt-tip pens or paints.
In a simplified version, even a child can draw a forest. Here is a simple example of a forest drawing for children:
- We draw a straight line and place two arcs on it in the form of hills.
- A slightly curved line emerges from the middle between the hills, then smoothly descends. It turns out to be a tree trunk. The same trunks are drawn on the left and right hills.
- Small circles are attached to each trunk, overlapping one another. This is the crown of trees.
- Now let's depict coniferous trees by placing a couple of Christmas trees between the trunks. To draw a spruce, we place triangles on top of each other. The sides are folded inward. Erase the extra lines.
- We add trunks to the trees, or hide them behind the hills.
- All that remains is to color the finished drawing. The color of the crown of deciduous trees depends on what time of year you want to depict. If it is an autumn landscape, the foliage turns yellow, red, brown. If it’s summer, then in green. Spruce trees always remain green, but they can also be made bluish.
Children's drawing of a forest is completed. It's very easy to draw. Even a preschooler can cope with this task.
Paper applique
The paper mushroom applique features a variety of techniques and examples of work. Children can be offered classes of varying complexity, aimed at both the youngest and older ages.
To work you will need:
- mushroom template for applique (this can be a separate mushroom or a composition of several elements);
- colored paper;
- napkins;
- scissors;
- glue;
- colour pencils.
Applying templates
The easiest way to create a paper mushroom applique is to use ready-made templates. For the lesson, you will need to prepare in advance sheets on which the details of the mushroom are printed.
Such classes are suitable for younger and middle groups, where the task is to teach children to create a composition of 2-4 parts. The number of blanks should be 2-3 more than the number of children.
The work is carried out in several stages.
- Children are shown a sheet with printed patterns. They discuss every detail, what it looks like, what part of the mushroom it is.
- In the middle group, where children own scissors, they cut out the blanks on their own.
- All parts are laid out on a sheet of colored cardboard. If the picture is correct, then the template is glued to the base.
The use of different compositions allows you to make the work more complex and interesting. You can invite the children to make an applique of a basket of mushrooms or mushrooms on a forest edge.
Tear-off technique
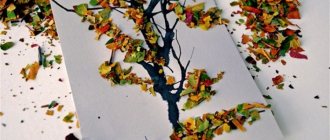
For the development of fine motor skills and the formation of a finger grip, the tear-off technique is of interest. It is based on tearing off pieces of paper that are used to fill out a template.
To apply a mushroom cutout, you will need to prepare a template with an outline, colored paper and glue. The mushrooms should be in the form of a black and white outline, the hedgehog – colored.
Sequence of work:
- Children carefully study the picture. It could be a mushroom in a clearing, a hedgehog with mushrooms, or any other picture. The mushroom is not painted.
- The teacher explains that the children’s task is to fill in the outline of the mushroom. The stem is with pieces of white paper, the cap is brown.
- Children prepare pieces of white and brown paper, opening from a large sheet.
- The prepared pieces are glued with glue (it is better to use a pencil) onto the template.
The complexity of the work and its size are chosen depending on the age of the children.
Lump technique
The lump technique is more suitable for older children. To implement it you will need paper napkins (white and brown or red), glue and a mushroom template.
Sequence of work.
- The teacher explains to the children the features of the technology. To work, you need to prepare a sufficient number of lumps. To do this, open a piece of the napkin and roll it into a ball.
- Children carefully study the pattern. They explain what color the hat is made and what color the leg is made.
- Glue is applied to the leg (PVA is better). The lumps are evenly distributed over the smeared surface and lightly pressed down.
- The steps are repeated with the mushroom cap.
Children in the middle group can be asked to fill only the hat using the lump technique, and color the leg with colored pencils.
Sunny forest gouache
Let's depict a fairy-tale forest, speckled with sparkling sunlight. As a result, we will have a beautiful forest edge, covered with greenery and illuminated by the sun. For this painting you will need gouache paints:
- Divide the top half of the A4 sheet into two equal parts. There will be tree trunks in the middle.
- To depict the sky we use white and yellow shades of gouache. Areas of the sky are painted with mixed yellow and white shades, blending into one another.
- Trunks are drawn in the center of the sheet. To depict them we use brown gouache. The first trunk is depicted by three lines emanating from one. These are thick tree branches. The second trunk is indicated by two smooth lines.
- The left branch is brought to the foreground due to lightening. While the gouache is still wet, you can add yellow and green tints to it to lighten the brown.
- Let's add small branches to the trunks. We create a texture on the bark without detailed drawing. Let's mark the highlights with white paint.
- We paint over the second unbranched tree using the same principle. Add small branches to it.
- Let's depict the crown of trees. To do this, take a large brush and apply gouache in large strokes, without going into detail. The desired shade is created by mixing green, blue and yellow paint. For depth of painting in many areas of the picture, it is worth using a dry brush.
- In the background, other trunks are drawn with a thin brush.
- Foliage details are sprayed onto the sheet in small dots. To do this, you can use a toothbrush or a flat hard brush. To create splashes we use mainly dark green gouache. You can add yellow and white shades to the main color.
- To create smooth color transitions, use a thin brush. We dip it in dark green, white and yellow paints and tint areas of foliage.
- Let's depict a distant forest on the right side of the picture. To obtain the desired shade, mix bluish, yellow and white paints. We mark the edges of the foliage with light yellow.
- We create sun glare in the gaps between the branches. To do this, we put yellow spots over the entire area of the foliage, then add white paint on top.
- A thick yellow line is drawn to indicate the grass line.
- Draw a forest on the background on the left side of the picture. The foliage is created by mixing green and yellow paint; a blue tint is used to draw the branches. Spray some white highlights.
- The earth is drawn with broad strokes going up to the roots.
- Under the tree we put yellow highlights with white strokes. Sprinkle white gouache on the ground.
The painted forest is indistinguishable from the real one. The sun peeking through the branches creates a touch of magic.
Let's draw a mysterious winter forest on a piece of paper. This picture is painted with watercolors. The image will be in a monochromatic color scheme:
- First, let's learn how to draw a spruce. Mix the paints to get a dark green tint.
- Let's draw the top of the tree. Let's draw a short vertical line, from the top of which we will draw several short oblique lines, each of which is longer than the other. At the end they should expand and curl slightly.
- Let us depict the following levels of needles in the same way. When drawing needles, remember that the lower branches should be wider than the upper ones. At the end, the needles should completely cover the trunk.
- Draw the base of the tree in the form of a short vertical line at the bottom of the spruce.
- Now let's create a color scheme of three shades. Mix light, medium and dark shades of green.
- Let's paint several fir trees in a light shade of paint. We will place the bases just below the middle of the sheet. The tops should touch the top edge of the paper.
- On top of the light row we draw fir trees of a medium shade. The tops originate slightly lower than the previous ones, the bases are drawn at the bottom edge of the sheet.
- We draw the last, dark row of fir trees in the foreground. The bases of dark trees extend beyond the boundaries of the picture, the tops of the trees are even more understated. All trees should be placed unevenly, but at the same time maintain the approximate height of the row.
Watercolor winter landscape is completed.
Several similar paintings can be framed and displayed next to each other. They will harmonize perfectly with each other. Monotonous colors have a calming effect on the eyes of the beholder.
Knowing the drawing technique, depicting a forest on paper is as easy as shelling pears. Anyone can do this by following step-by-step instructions.
