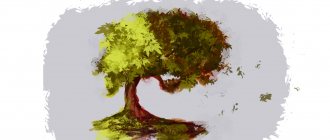
Hi all! Lately we have been interested in reading autumn poems, making wreaths and, of course, going for walks and walks. Enjoying the last warm days. And besides this, we draw, try a variety of unconventional drawing methods, in particular, we draw an autumn tree in 9 different ways:
Drawing an autumn tree. Blowing
Materials:
- sheet A4
- tassels;
- cocktail straw;
- freshly picked tree leaves;
- paints: yellow, green, red and brown.
In our case, we prepared the background in advance. When the background dried, a huge brown blot was dropped in the center of the sheet. And they began to take turns blowing out the trunk and branches of the trees with a cocktail straw. The branches turn out thin and unusual. By the way, it also turned out to be an excellent breathing exercise. And the dried tree was additionally decorated with tree leaves.
Long-term planning for non-traditional drawing for the preparatory group
The program on alternative drawing techniques contains:
- Explanatory note: place of the course in the educational program of the preschool educational institution,
- goals and objectives.
- consultations,
- exhibition of works,
Table: long-term plan for unconventional drawing (fragment)
| Month | Subject | Goals | Execution technique |
| October | "My hometown" |
| Students' choice |
| “Red, yellow, gold - all over the colored sheet” |
| Leaf prints | |
| November | "Birch" |
| Charcoal drawing |
| "Painted Forest" |
| Poking drawing | |
| Author | Naumova E. N., teacher of the Municipal Preschool Educational Institution “Kindergarten No. 164” | ||
| Quote from: https://www.maam.ru/detskijsad/perspektivnyi-plan-po-netradicionomu-risovaniyu-podgotovitelnaja-grupa.html | |||
Creativity is meant to bring joy to children. Let drawing in each non-traditional technique become a small but memorable game. Experiments with materials and tools, unexpected results and unbridled flights of imagination! Unusual drawing techniques expand possibilities and strengthen children's courage to express artistic talents.
Drawing an autumn tree. Dry leaves and hole punch
Materials:
- sheet A4;
- tassels:
- hole puncher;
- dry tree leaves;
- PVA glue;
- paint: black, brown
I painted birch trees in watercolors. While the birch trees were drying out, my daughter and I used a hole punch to stamp circles from dry tree leaves. Then came the work of the little artist. She herself applied PVA glue to the desired areas of the trees, and then generously sprinkled them with our prepared mini-foliage. The result, in my opinion, came out very nice.
Drawing an autumn tree. Sponge
Materials:
- sheet A4;
- sponge;
- paints: yellow, green, red, brown, black.
Here I again drew a tree trunk. I used a clothespin (for convenience) to hook a round piece of sponge and we began stamping the foliage. True, in this drawing we used all the paints that we had in our arsenal. The artist's desire is the law! Why shouldn't the foliage be black and purple?!
Birch in summer
Summer birch is drawn with green leaves of different shades.
In reality, they do not differ from each other in size and shape. Long yellow earrings will add truthfulness to the picture.
Judging by the leaves drawn with an inclination in one direction, it is immediately clear that a birch tree is depicted in windy weather. The artist also tilts thin branches in the same direction. One side of the trunk is shaded to make the drawing more realistic.
Green birch looks beautiful against the backdrop of a mountain landscape, next to a river, a forest, or in a clearing with different flowers.
A painting with a swing on a birch tree, with children playing and a blue sky, as a symbol of peaceful life on earth.
Drawing an autumn tree. Plasticine stamps
Materials:
- sheet A4;
- plasticine;
- bottle cap;
- paints: yellow, green, red, brown, black.
Maybe you remember my article about modeling, where I described many of our plasticine games?! There I already mentioned a simple way to make a plasticine stamp. You just need to mold the desired shape (in this case, a leaf) and press it into an unnecessary bottle cap. Now we dip the stamp in paint and decorate a pre-prepared tree branch with leaves.
Drawing an autumn tree. Marbles
Materials:
- sheet A4;
- wax candle;
- cotton swab;
- marbles;
- paints: yellow, green, red, brown, black.
I drew a tree trunk with a wax candle and a cotton swab (to be on the safe side, so that when the balls were rolling, the tree trunk would not be completely painted over). When the drawing had dried, my daughter dipped the balls in paint, threw them on our sheet of paper, and then carefully shook the plastic box with the balls and the drawing.
Image of a birch branch with leaves
After it is clear how to draw one birch leaf, it is not difficult to move on to the image of its branch.
- In the figure, one of the branches with small branches is selected.
- Several leaves and buds are added, as a decoration characteristic only of birch.
- The contours of the leaves are drawn with sharp teeth. The buds have their own texture.
- A black pen emphasizes the shapes of the leaves and the veins on them. The kidneys are not left unattended either.
- At this stage, the leaves and buds are painted in shades of green and yellow.
- To make the drawing more expressive, the teeth, veins and contours of the buds are re-drawn with a black marker.
Now you can cover the entire tree with leaves and decorate it with earrings.
Drawing an autumn tree. Window
Materials:
- window;
- tassel:
- paints: yellow, green, red.
A slightly hooligan way of unconventional drawing. Of course, not everyone will agree to dirty the windows. Although... you just have to see the happy eyes of your child, and even the strictest mother will give in and give all the windows in the house to be torn to pieces. In addition, you won’t believe that at 1.9, the child spent about an hour doing this activity. I think many mothers of babies will agree that keeping a child occupied for such a long time is very, very difficult. All you need is a brush and three types of paint. And then, together, draw the trunk and branches of the tree.
How to make notes for a lesson on drawing in non-traditional techniques
The lesson notes indicate:
- goals and objectives,
- preliminary work (if carried out),
- materials and equipment,
- progress of the lesson.
Working on organizing the lesson is the responsibility of the teacher
According to SanPiN standards, a drawing lesson in the preparatory group lasts 25–30 minutes.
- Organizational moment - 1 minute.
- Introductory stage – 4–6 minutes.
- Practical part - 16–20 minutes.
- Display and discussion of works - 2–3 minutes.
- Reflection and summing up - 1 minute.
Between the structural elements of the lesson, didactic games and dynamic pauses are included.
Outdoor games and warm-ups are a form of health protection in drawing classes
Table: summary of a lesson on drawing in an unconventional technique, scratch paper “Dinosaur Excavation” (preparatory group)
| Author | Semenyako T. |
| Tasks |
|
| Preliminary work |
|
| Materials and equipment |
|
| Contents of the lesson | Children sit in a semicircle on chairs on the carpet. V.: Guys! Today we will meet dinosaurs again! She will be unusual. Want to go in search of dinosaurs? (Children’s answers are usually positive.) Reading the poem “Dinosaurs” by E. Aerova V.: Guys, why can’t we meet dinosaurs anywhere other than the museum? D: Because dinosaurs became extinct. They don't live now. Q: How then did dinosaurs get into the museum? Maybe they live in a museum? (Children's answers) V. gives the correct answer: Of course, dinosaurs do not live in museums. There they are kept in the form of stuffed animals, skeletons or fossils. In the museum you can find out what dinosaurs looked like, their height and weight, and coloring. Let's remember which scientists helped us learn everything about dinosaurs? How did they find them and where? (Children's answers) <…> V.: Let's imagine that on your tables there is an excavation site. Here is a “piece of earth” (shows the prepared cardboard for scratching), and tools (shows a sharp stick and a napkin). Using a sharp stick, you will “find” the dinosaur you want on a black background. But this work is not only interesting, but also difficult, and you need to prepare for it. Let's stand freely in front of the chairs and warm up. Physical education Setting an educational task V.: Guys, how to “find” a dinosaur? It’s very simple - you need to scratch it on a black background with a sharp stick. This image method is called “scratching”, or in other words, scratches. Think about what kind of dinosaur you want to find and scratch the drawing. Think about whether your dinosaur is tall or short, what kind of neck, tail, paws does it have? Are there horns, spikes or claws? You can draw a dinosaur as if it were alive, or you can draw its skeleton. Look what dinosaur I recently dug up. Next, show a sample and explain the scratching technology. Practical work for children At the end of the lesson, an exhibition is organized and the work is analyzed. V.: Well, our excavations have come to an end, and now I invite young paleontologists to tell us what they managed to find, what are the names of your dinosaurs. 2-3 children speak, and the opinions and assessments of those interested are heard. You can suggest making an illustrated magazine: “Dinosaurs”. |
| Quote from: https://www.maam.ru/detskijsad/konspekt-zanjatija-po-risovaniyu-v-netradicionoi-tehnike-gratazh-raskopki-dinozavra-podgotovitelnaja-grupa.html | |
Non-traditional drawing classes are often conducted in a playful way, for example, children go on a dinosaur dig
Dinosaur Dig is an ideal pedagogical development. The lesson is combined with topics on studying the surrounding world (“Professions”, “Animal World”), satisfies children’s desire to experiment and undoubtedly develops their imagination. The list of preliminary work includes a visit to a paleontological museum - unfortunately, they are located in only a few cities of the Russian Federation. Make a presentation and let the children visit the Museum of Antiquities virtually!
This is probably every child's dream - to become a paleontologist and dig up a dinosaur.
