Idea No. 9
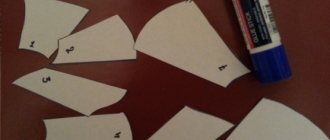
Those who love textures will surely enjoy filling different silhouettes with patterns. Draw or trace an autumn leaf according to the template, divide it into small planes, like a stained glass window. Have your child fill in each piece with a different pattern. You can do this with a gel pen or felt-tip pens.
Autumn words and pictures.
It would be quite useful to look at pictures with your child on the theme “Autumn” and study “autumn” words: leaves, rain, umbrella, puddles, falling, mushrooms, leaves, yellowed, etc.
Will help:
— Colorful autumn presentations.
— Autumn pictures that you can hang on the walls and periodically discuss them with your child.
— A selection of autumn photographs that can be viewed on a computer screen or printed as cards.
Just look at the illustrations with your child, name the objects that are depicted on them (cloud, leaf, tree, fallen leaf, wet puddle, etc.), ask to find the objects in the picture (show with your finger, where is the tree?), describe what what is drawn in the pictures in simple sentences (it is raining, there are puddles on the ground, the girl is dressed warmly, etc.).
Lotto "Couples".
Invite your child to play the autumn Lotto. By playing with lotto, kids develop attention and logic, and also expand their vocabulary (if the mother voices the objects drawn in the picture).
(If you are interested in lotto, click on the picture to enlarge the image).
Idea No. 3
Paint is applied to the sheet from the vein side. Then the sheet is applied to the paper and an imprint is made. The effect will be different depending on what paint you use.
You can come up with many compositional solutions: the imprint of a large leaf can become the crown of a tree if you complete the trunk; A few prints are already a whole forest!
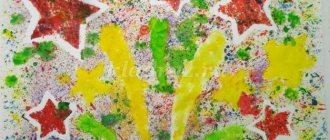
Prints made with white paint on a colored background look impressive. You can combine several techniques and complete the images with pencils or felt-tip pens.
Game "Big and small leaves."
Goal: teach the concept of “big - small”.
For the game you will need leaves - large and small.
You can use real autumn leaves or cut out leaves from paper.
The essence of the game: We put large leaves in a large box, and small ones in a small one.
This task will be quite easy to complete for children from 2 to 3 years old.
But children from 1 to 2 years old may have difficulties (“you begin to introduce the baby to a task, and he smiles and runs away from you into another room” - a familiar picture, right?).
In order for the child to cope with the task more successfully, it is important to conduct a “getting to know each other” ritual with the task.
For example:
- Look at the large piece of paper with your child. Say “here’s a big leaf.” Highlight the word “big” in the appropriate voice. “Let’s show how big this leaf is, so big” - we spread our arms wide to the side, showing the “big” sign, we encourage the child to repeat this gesture after you (if he finds it difficult, we spread his arms to the sides ourselves ).
- Take a small leaf. “And this leaf is “small” (we pronounce the word “small” in a “thin” voice.) Let’s show how “small” this leaf is (we bring our hands close to each other, showing the “small size” sign, encouraging the child to repeat this gesture after you , we help him do this if he himself finds it difficult).
This preliminary work - highlighting the words “big” and “small” in a special voice, showing the sizes “big” and “small” with pens - is very important. With its help, the child will better understand the meaning of the task and it will be easier for him to complete it.
3. After you have worked with the concept of “big - small leaf”, you can move on to completing the task. Show your child that large leaves should be put in a large box, and small ones in a small box. Ask him to arrange all the leaves into the boxes correctly.
How you can help your child:
- together determine the size of the leaf (mom says what kind of leaf it is - large or small).
— guide the child’s hand with the piece of paper to the correct size box if the child makes a mistake.
- if the baby finds it difficult to choose the right box, you can simply place the right box under the baby’s hand and ask him to “throw a big piece of paper into the big box.”
It seems that with such “help” the mother does almost everything for the child. But that's not true! In the process of completing a task together, the baby actively learns. His eyes look and remember (he examines large and small leaves), his ears hear and absorb (he constantly hears his mother comparing leaves by size), his hands “do” (kids absorb knowledge very well if it is presented through “movement” ).
After your child completes this task several times with you and with your help, he will feel more confident, better understand all the necessary concepts and begin to cope with similar tasks on his own.
Music of the rain.
Take percussion or noise children's musical instruments that you have at home (or use these “household” instruments that can easily replace musical ones).
Take the child’s hands in yours and try together to “tap” the rhythm to the verses:
Rain, rain, drip and drip!
Don't drip so loudly!
Don't knock on our window!
Better wet the grass!
Drip - drip - drip - drip!
Then turn on the music and invite the child to play a “melody” to the song themselves (play along to Ekaterina Zheleznova’s composition “Rain” ).
The baby will do this with great pleasure if the mother also plays the rhythm on some musical instrument with the child.
Modeling + color study.
Review with your child two pieces of paper printed on a piece of paper. One of them is red, and the other is yellow (Download a picture with leaves
).
Only the mice ate holes in the leaves! This needs to be corrected urgently.
To play, you will need pre-prepared lumps of soft plasticine - yellow and red.
Show your child that “we will put red lumps on a red leaf and press them down with our fingers, and yellow lumps - on a yellow leaf, so we will close all the holes!”
Most likely, at first the child may get confused and put lumps of plasticine on a leaf of the wrong color. Therefore, actively help your child complete the task - say the name of the color he is currently working with, and tell him which piece of paper to attach the plasticine to.
This game not only develops modeling skills, but also helps to remember colors - during the work, the child will hear the words “red, yellow” from the mother many times, and this will definitely affect how quickly the baby remembers the names of the primary colors.
(When I give similar tasks in the early development group to children from 1 to 2 years old, then first (over several lessons) we always do “preparatory” exercises - we attach yellow plasticine berries to yellow plates drawn on paper, and red “berries” - on red ones, or we attach yellow/red lumps (apples) to yellow and red baskets drawn on paper, etc. - i.e. first we learn to attach yellow plasticine separately from red in a more free form, and only then make it more complicated , asking to attach the plasticine to a certain place).
Idea No. 15
It is convenient to draw fruit trees using halves of small apples and pears.
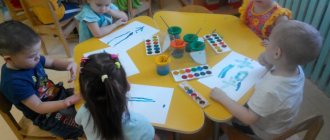
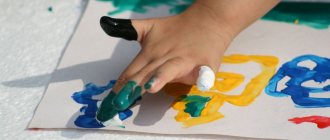
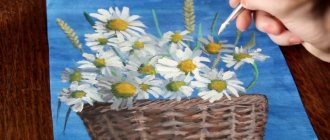
You can come up with infinitely many ways to paint autumn, because she herself is a Great Artist! Trust your children with paints and brushes and let them create!!!
We recommend reading:
- Say YES to painting with fruits and vegetables
- Say YES to drawing with a fork
Dear readers, tell us in the comments what drawing techniques you tried with your children, what they liked the most.
Learning colors.
This activity will help your child understand the concept of “red and yellow.”
Prepare leaves of two colors - red and yellow.
Examine the leaves, focus the baby’s attention on the fact that some leaves are yellow and others are red.
Then offer to put the yellow leaves in a yellow box, and the red leaves in a red box.
To help complete this task correctly, the same rules as for the previous lesson will help (we actively help the child complete the task, work together with the child, at first it is very useful to literally place the desired “box” under the child’s hand, saying the name of the color out loud (“this is red”) piece of paper, we put it in a red box").
Autumn with children from 1.5 to 2 years old - educational games and ideas for activities.
- Seal
Details Author: Nalivaykina Lyudmila Published August 23, 2017
In this article I want to share with you ideas for autumn games with the youngest children - from 1.5 to 2 years old. They can be played separately or used as the basis for a real educational activity on the theme “Autumn”.
Since children aged 1.5 to 2 years can differ significantly from each other in their development, each game from the list below will need to be “adjusted” to your child’s level (complicated or simplified).
