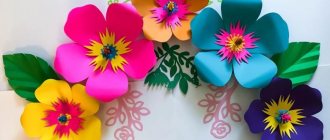
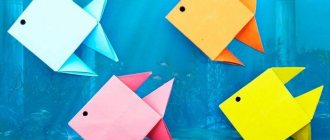
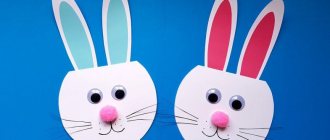
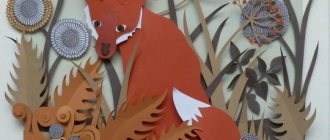
Appliqué is actually not as boring as it might seem. All crafts made from colored paper, cardboard, plasticine, real flowers and leaves can surprise you with their beauty and originality.
To do this, just use your imagination and buy more glue, as well as solvent in case someone sticks to the table.
Applications from children's hands
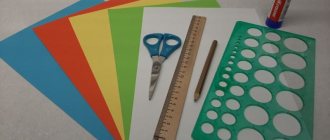
This type of children's applique made from colored paper speaks for itself. To create a picture you will need a lot of colored sheets, cardboard, palms, a simple pencil, scissors and PVA glue or a glue stick.
- Choose a background, the color of the cardboard will depend on what you want to do;
- Place your palm on the paper and trace it;
- Use your imagination.
The picture is ready. But if you are stuck on the second point, then here are examples of what you can get with this technique: a parrot, a mysterious forest, a sun, a sunflower, a swan, a dove, a peacock, a jellyfish, etc. The end result is limited only by the world of your imagination.
Summary of a lesson on applique for children of the preparatory group on the topic: “Towers on the Kremlin”
Municipal budgetary preschool educational institution kindergarten No. 21, Novocherkassk
Summary of an appliqué lesson for preparatory group children on the topic: “Towers on the Kremlin.”
Author: Dolmat Ekaterina Vladimirovna
Goals:
learn to work independently and in a team; create a bright, harmonious composition. Develop color perception and color perception. Improve the technique of making mosaics - appliqué using the tearing method, skills in working with glue and a brush.
- continue to teach children how to make compositions from colored paper;
- consolidate the ability to cut paper in various ways (along the contour, diagonally, by folding); tearing pieces of paper.
- strengthen skills in working with scissors and glue.
- develop attention and creativity;
- cultivate patriotic feelings, develop moral feelings of empathy and gratitude to all those who participated in the Great Patriotic War.
Equipment:
Demonstration material: photographs of the Kremlin towers in Moscow, fireworks on Red Square, CD player.
Handouts: colored paper blanks; colored napkins, rags, scissors, wax crayons, oilcloths, glue, simple pencils.
Progress of the lesson:
Educator: Today, we will talk about the main attraction of Moscow (the Moscow Kremlin).
Children read poetry:
In Moscow on Red Square the crowd is black and black. The Kremlin wall is humming from heavy footsteps.
The Kremlin on a winter night over Moscow - The river and the city of Moscow - With the steep head of Ivan And with the shadow of the guard walls.
The Kremlin on a winter night under the moon, You are wonderful with the lofty antiquity And glorious with it along with the cruel recent memory.
Educator: The Kremlin is considered a symbol of the protection of our people from enemies at all times. The Kremlin is a fortress. Through narrow loopholes in the Kremlin walls, the defenders of the fortress shot at the enemies attacking them. There are 20 towers in the Kremlin. The most famous: called Vodovzvodnaya, Corner Arsenalnaya and Middle Arsenalnaya, Armory, Borovitskaya, Tainitskaya tower.
Spasskaya Tower is the most beautiful tower of the Kremlin. It is easy to recognize by its chimes. And today we will try to make an application on the theme: “Moscow Kremlin”.
Children sit on chairs at tables.
Educator: Find a dial without arrows, draw arrows on them so that your watch shows 10 pm.
Gymnastics for the eyes:
Movement of the Russian flag in different directions.
Now see how the application will be done.
The background of the application will be thick blue or black paper (cardboard).
1. A large red piece of paper, we bend it on both sides, 2 times, this will be the voluminous lower part of our Spasskaya Tower.
We will glue a white openwork strip to it on top (previously bend a strip of white paper into 4 parts, draw a pattern on it, and cut it out).
Glue the prepared blank onto the bottom of the background.
2. Glue a red rectangle above it. We will glue a clock we made onto it, showing the time when the fireworks are fired.
3. Take a green rectangle, cut it diagonally - we create a triangular roof of our tower.
4. At the top of our tower, a five-pointed star is glued.
5. Fireworks are drawn with wax pencils.
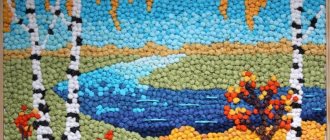
6. Fireworks sparks are made from colored napkins (tear off small pieces and roll into small balls) and stick them on the work
When the guys have completed the first stage, the
Physical education minute
:
One two three four five. Children walk in a circle.
We're going for a walk around Moscow.
They came to Red Square and spread their hands wide. Wide, beautiful.
And on that square - Turn your face in a circle. The Kremlin is tall and large. Raise 2 arms above your head. Oh, what a height! They lift it up one by one. Oh, what a beauty! Left and right hand. One two three four five. They walk in a circle. Then we go for a walk. Turn their faces in a circle. Pokrovsky Cathedral, mausoleum, Alternately, they take their left and right hands to the side of the Historical Museum. We were at the wonderful skating rink,
We didn’t forget to go to GUM
The sun began to set, hands on the belt, squats. It's time for us to return home.
Then the guys carry out the subsequent stages of work. (While children are working, songs from the war years are heard).
Result: At the end, an exhibition of works is held and the best works are evaluated.
Asking children what they did, what they learned.
Fireworks sound in honor of all winners.
The finished application can be placed in a frame. You can buy a frame in a store, or you can make it yourself from paper or from a box of chocolates.
Application using cutting technique
This technique is especially popular among beginners. Because it is very simple, but guarantees a good result. After all, crafts made using this technique look beautiful.
"Airplane"
We will need:
- Colored paper: gray, blue, yellow;
- Blue cardboard;
- Simple pencil;
- Brush;
- PVA glue;
- Black felt-tip pen.
Application stages:
- On blue cardboard with a simple pencil we draw silhouettes of the sun, clouds and airplane. To highlight a brighter outline, they can be outlined with a black felt-tip pen.
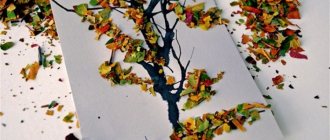
- Next, to make a paper appliqué, you need to tear the colored paper into pieces of different sizes. Using a brush, apply glue to the silhouette of the airplane and glue it with pieces of gray paper. When everything is glued, you can make the airplane several windows and a front windshield from blue paper, gluing it on top of the gray paper.
- Using exactly the same steps, we cover the sun and clouds.
"Ship"
To complete this work we will need:
- Colored paper: white, green, red, brown;
- Blue cardboard;
- Black felt-tip pen;
- PVA glue;
- Brush;
- A simple pencil.
Application procedure:
- We take cardboard and draw on it with a pencil a sketch of our future ship with a double sail and a flag, you can also draw waves and seagulls. Next, we outline the outline with a black felt-tip pen to make the picture brighter.
- To decorate, tear colored paper into small pieces; if desired, you can use scissors. When we have several bales, we begin to seal the ship. White and green are used for the sail, red for the flag and brown for the ship. Thus, an applique of torn paper is obtained.
Unusual applique
If the master has already mastered several basic techniques, then it’s time to think about making an unusual craft. For example, you can make an original snowman with your own hands.
"Snowman"
For this job we will need:
- Colored cardboard: blue, white, red, black;
- Scissors;
- Glue.
Step-by-step instruction:
- Step one. Cut out three circles from white cardboard: large, medium and small.
- Step two. Lubricate the large circle with glue and glue it in the center of the blue cardboard, then glue the middle and small circle onto it so that they come into contact with the large one at the highest point.
- Step three. We cut out a red hat and a carrot for the snowman, and twigs from black cardboard, eyes, a mouth and hands. We glue them to our snowman.
- The finished application should result in a snowman looking up with his snowy head raised; to complete the picture, you can add snowflakes around him. Then it turns out that he is admiring the falling snow.
Paper applications are a good reason to have fun and interesting time with your child.
Each such work develops not only fine motor skills, but also imagination. And the most important thing is that there is nothing complicated here, the main thing is to start, but you won’t be able to stop!
Features of paper layouts
A DIY paper Kremlin helps parents develop their child’s imagination and fine motor skills, and teaches them how to work with cardboard, scissors and other tools. If you are just doing activities with children, it is enough to choose an easy-to-make craft in the form of a flashlight, flower or animal.
A do-it-yourself model of the Kremlin is made only in the following cases:
- The family collects handmade items. It can be not only paper products. Matches, Chinese sticks, cotton wool, fabrics, plastic, etc. are used.
- The family collects building crafts made from paper. Often these are landmarks of the World, so the Kremlin will always be added to the collection.
- It is required to make a model to form a stage for a mini-theater. Perhaps it will be a shadow theater, but the shape of the building in question has to be created for the surroundings.
Regardless of where the Kremlin model will be used in the future, it must be assembled from paper according to the instructions.
