Fabric flower applications
Textiles are one of the best materials for creating appliques with your child. Crafts made from fabric are unusual and memorable.
Let's make a bouquet of flowers from fabric.
This craft can be done with children in the younger group of kindergarten.
For this simple craft you will need pieces of cotton fabric, green woolen threads, a bow, a sheet of cardboard, a pencil, scissors, glue:
- Cups of flowers are cut out of fabric.
- Lines of stems for the bouquet are drawn on the cardboard.
- Wool threads are glued along the lines.
- Fabric blanks are glued to the top.
- A bow is glued to the bottom.
This completes the “Flowers for Mom” fabric applique.
To create a flower applique from felt, you will need flower templates, thread and needle, glue, scissors and the felt itself. This type of craft can be offered to children in the middle group. There are several options for creating felt flowers:
- The patterns are applied to the fabric and traced, or pinned and the fabric is trimmed along the edges.
- Templates can be placed on top of each other to make the flower double.
- A spiral is drawn on the workpiece, then a cut is made along the line and twisted. Depending on the type of spiral, different flowers will be obtained.
- Several petals are cut and strung on a thread, then fastened.
Felt flowers can be used in interior design, as tattoos on clothes or to decorate a wedding celebration.
OOD abstract on application in the middle group “Beautiful Flower”
Finger gymnastics “Castle”
There's a lock on the door,
Who could open it?
They pulled, twisted,
They knocked and opened it!
- So the magic gates of a fairyland have opened ! Well, let's go!
(Children go through the gate closer to the screen)
- Here we are greeted by a multi-colored rainbow, and here comes the bright sun! Let's go towards the sun, it will definitely lead us to the magical palace!
(Children are just about to take their first steps towards the sun when alarming music sounds and the color picture of the magical land of beautiful speech turns black and white)
II. Main part.
(A voice is heard from the projector screen)
- What are these children?
Voice:
“Hello, our dear guys! Residents of a fairyland are writing to you ! Evil wizards bewitched our sun and scattered its rays and it became dark in this beautiful country ! Everything we have: houses, fields, forests, paths, and rivers, everything is left without light and will soon perish! Help us disenchant our country , and we will thank you for it!”
- Guys, look, without the sun with its warm rays, in the multi-colored country of Beautiful Speech it has become dull and ugly! The sun is completely sad! (The teacher points to the subject board on which there is an image of a sad sun without rays) Guys, let's help the sun! To disenchant the rays you need to complete tasks! Let's help the residents of this fabulous country ?
-Yes, we will help!
-Then quickly sit down on the chairs!
(The teacher reads out the tasks written on the rays and, having completed the tasks, attaches the rays to the sun. All rays are scattered throughout the group )
Task I: Here comes the first ray of light, listen to the task: “Call me kindly”
(The teacher, throwing the ball to the child, calls the word, and he calls it affectionately)
Example words: Monkey, hippopotamus, dog, bull, boar, badger, beetle, etc.
- Well done guys, you did a wonderful job with your first task! What is the second task?
Task II: “Video” We need to watch the video, and then answer the questions, get ready.
(The teacher plays a video about spring)
-What time of year were you talking about?
-About spring
-What signs of spring do you know?
-In spring, the snow melts, streams flow, the sun shines brighter, birds fly in, the first flowers appear.
-What spring months do you know?
-March April May
III task: “Animals in spring”
-Well done! And the third ray asks us about what animals wake up in the spring?
-In spring, the bear, badger, and hedgehog wake up.
-That's right, I know one very interesting hedgehog. Let's listen to a story about him. And for this we will need our massage balls, our faithful friends for the development of fine motor skills .
Volumetric flower applications step by step
There are several possible techniques for creating three-dimensional flower appliqué.
- Several petals of the same shape, two leaves, a core and a stem are cut out.
- Each petal is folded in half and glued to the cardboard on one side.
- The core and stem are glued between them.
- On both sides of the stem, sheets are glued to one side.
A simple volumetric applique is complete.
There are other options for creating volume on paper. Let's depict a flower growing from the ground.
- Several strips are cut from paper. These will be the petals of the flower.
- Grass, stems and leaves are cut out of green paper. The yellow one is the core.
- The strips are twisted into petals and glued together.
- A ring of glue is drawn on a cardboard base. The petals and core are glued to it.
- Grass, stem and leaves are glued to the bottom.
The volumetric paper flower is ready.
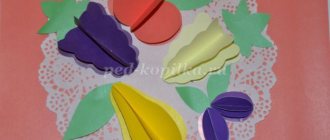
Let's make a paper vase filled with fluffy flowers:
- Using templates, identical flower bowls of different sizes are cut out.
- The petals are bent upward using a ruler. This will give the flowers volume.
- Smaller flowers are placed inside larger ones.
- A vase is cut out from the template and glued to cardboard.
- At the top of the vase there are double flowers.
The application “Flowers in a Vase” is ready.
Master class: flower garlands
You can make stunning flower garlands from ordinary paper that can decorate any occasion.
The following materials should be used:
- Corrugated paper in different colors
- Scissors
- fishing line
- Glue
Work progress:
- Rectangles are cut out of corrugated paper and folded into a stack five times.
- The size of the rectangles determines what size the flowers will be.
- Each stack needs to be collected into an accordion in the middle, secured with a paper ring, and the edges of the petals should be folded up; they must first be rounded.
- The finished flowers are strung on a fishing line, the garland is ready.
Flower applications from other materials
Let's make a bouquet of zinnias from natural materials. To do this you will need cones, poplar branches, leaves, cardboard, a sheet of paper, glue, scissors, paints:
- The tops of the cones are trimmed with scissors.
- The petals are painted red, the core turns yellow.
- A smaller piece of paper is glued onto a cardboard base to create a picture frame.
- A vase is made from poplar branches.
- Next, a bouquet of leaves is glued on as a solid background.
- Painted cones are glued to the leaves.
The pine cone appliqué is complete. You can admire the result.
Original ideas for applique flower arrangements
Let's make a composition with snowdrops from colored paper. This will require some effort and time. The result promises to be impressive.
To create an applique with realistic chrysanthemums, you need double-sided colored, plain white and decorative corrugated colored paper, yellow and green felt-tip pens, scissors, and glue.
Thanks to thick corrugated paper, flowers will better retain their shape:
- Strips are cut from decorative paper. The length of the petals depends on the width of the strip.
- The strips are folded several times.
- Using scissors, triangular cuts are made along the width of the strip. These will be the petals of the flower.
- An adhesive trace is left on the untouched length of the strip.
- The strip is rolled into a roll. A second strip is glued onto the finished roll.
- We straighten the paper petals. This creates a chrysanthemum flower.
- The core of the flower can be colored inside with a yellow felt-tip pen.
- A vase is cut out of decorative paper. From green - leaves. Using colored felt-tip pens, the veins on the petals are drawn.
- The vase is glued to the background of the applique. It can be made from paper with cut edges glued to cardboard.
- The flower bowls are turned over, the bases are cut, unfolded and coated with glue.
- Flowers are glued over the edges of the vase in three rows.
- The leaves are slightly bent and glued by their bases to different parts of the picture.
At this point, the original applique with chrysanthemums is considered ready. Artificial flowers can be used separately - for example, to decorate a room or create artificial bouquets.
Let's try to create three-dimensional carnations out of paper.
These flowers are often given to men on Victory Day.
To make an applique, you should prepare corrugated paper, a regular sheet of colored paper, a sheet of cardboard for the background, scissors, glue, felt-tip pens, a water sprayer, a stapler:
- Four square pieces are cut out of decorative corrugated paper.
- The squares are overlapped and connected with a stapler.
- A circle is cut out of a multi-layer paper square. Slightly oblique cuts are made at the edges, going towards the core. These are the petals of the future flower.
- The petals rise starting from the top circle. It turns out a voluminous clove.
- Using a felt-tip pen, thin colored veins are depicted on the petals.
- The paper is sprayed with water.
- The flower is folded along the midline twice.
- Stems are rolled from green paper, leaves and sepals are cut out.
- Paper with curly edges is glued to the cardboard. This is the background for the application.
- The stems are glued to the base, two sepals and two flowers are glued to each stem.
The result is realistic carnations that delight the eye with their beauty. The picture can be decorated with additional details - for example, butterflies or ribbons.
Making appliqués is one of the easiest ways to show your creativity. The flower craft can be used as a gift for March 8th or hung on the wall.
Master class: flowers on a stem
This beginner's tutorial will help you make cute flowers on a stem, which are prepared according to a simple pattern.
The following materials need to be prepared:
- Thick paper of any color;
- Green corrugated paper;
- Wire;
- Scissors;
- Glue;
Work progress:
- You need to cut a circle out of paper and fold it three times. The wide part of the resulting triangle is rounded off with scissors.
- The circle unfolds and the workpiece is glued together.
- The wire must be bent so that on one side it resembles a hook. It needs to be covered with green corrugated paper.
- The stem is inserted into the center of the flower, with the hook inward, it should also be wrapped in green paper.
This is an incredibly simple and accessible scheme that even a child can handle.
