Applications
Eights with flowers
A symbolic figure eight decorated with flowers will be both a postcard and a gift picture.
Cut out the figure eights in advance. Also cut out flowers and butterflies of different sizes and colors from colored paper.
Gifts for mothers on March 8, preparatory group
Paper wicker basket
To make a basket, you should prepare colored paper, scissors and glue. First of all, you need to cut out strips of different colors, about 30 cm long, 1.5 cm wide and 10 cm long, 1.5 cm wide. You also need to cut out a circle whose diameter is 9 cm.
Glue shorter strips onto a circle, along the diameter, bend and lift up. Then start weaving, thread a long strip horizontally through the vertical in a checkerboard pattern.
Fold the top ends and glue them together.
Cut and glue the handle
Decorate as desired.
Craft in decoupage style from a plate
To make this craft, prepare paper plates, napkins with a pattern, glue, and a brush.
Coat a plate with glue and place a napkin on it.
Cut the napkin in a circle, leaving 1 cm from the edge of the plate. Turn the plate over and coat the edges with glue. Wrap the napkin on the back side and glue it.
Cut out blanks from other napkins. First, you should apply glue to the plate itself, then fix the workpiece and coat it with glue again.
These are the plates you should get as a gift for your mother.
Postcard (quilling technique)
Roll colored paper into a tube and cut into 1 cm pieces
Prepare the base for the card
It is recommended to let the child choose the details and create compositions himself.
Glue the assembled drawing.
Felt brooch
Prepare templates in the form of circles or flowers. You should get several pieces of different sizes. Place the templates on felt and cut them out. To make the brooch look more beautiful, you need to use felt in different colors. Then we assemble the flower by placing the cut-out pieces on top of each other. Sew a button in the middle. We decorate at our discretion. Sew a pin on the back side. That's all, the brooch for mom is ready!
Paper hyacinth
First, prepare a container that will serve as a pot, for example, a plastic bottle. You need to cut off the bottom part and put the crumpled paper there. Cut a sheet of A4 paper in half and roll it into a tube, fix it with glue. Make cuts at the bottom and glue to a wad of paper.
Paint the bottom part with green paint.
Cut the napkin into squares and insert a skewer into the center. Lift the edges and begin gluing the stem.
Cut out leaves from colored paper and glue to the stem.
Fix the hyacinth in the pot and arrange it as you wish.
Application
You can make any application, depending on your imagination. We suggest cutting out a mug and decorating it with leaves and flowers.
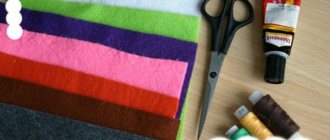
Felt crafts
Baskets with felt flowers
Felt is a soft synthetic material that can be used for appliques. Flowers made from felt or colored paper are suitable as decorations. Rhinestones made of colored plastic can now be found on sale; they already come with an adhesive backing, so attaching them to the center of the flowers and to the basket itself will not be difficult.
Working with finger paints
Finger paints are non-toxic and completely safe for children. Even if the baby decides to taste and lick his finger there will be no harm to health.
Postcard painted with finger paints
Children really like to draw simply with their own hands without using brushes. This develops their tactile senses and skills.
Happy Mother's Day - pictures for children.
Only mom has the kindest hands, the most tender smile and the most loving heart.
November 29, 2021 – greeting card for Mother’s Day.
Picture for children with gifts for mom.
A walk with my beloved mother.
“This holiday is the most important, the warmest, the kindest. After all, there is nothing more desirable in the world, nothing more important than the word “mother”!”
“Mommy, sweet, gentle, kind, smart and radiant. In the palms of my hands I will give you happiness. I tell you thank you for everything.”
Volumetric flowers made of corrugated paper
Tulips made of corrugated paper and disposable spoons
You can make a whole bouquet of such tulips and strengthen them along with the leaves in a small flower pot. Or you can make one tulip in a pot for each mother.
For this craft we need:
- Plastic spoons - at the rate of 4 spoons per flower.
- Red and green corrugated paper - 0.5-1 meter for each flower, 1 meter is enough for green.
- Transparent tape.
Wrap each spoon in red paper.
Wrap the leg of the spoon in green paper and secure with tape.
Gifts made from ordinary table napkins
In addition to their main purpose, paper napkins are an excellent material for creativity. Soft and flexible, they wrinkle well. And the variety of flowers allows you to make bouquets of roses, mimosas, and daisies.
Bouquet of mimosa from table napkins
Ordinary table napkins are very flexible; they can be used to make voluminous small flowers or small lumps.
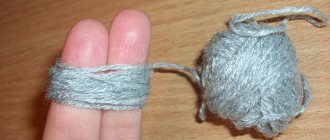
Take yellow and green napkins.
Floral arrangements made from double-sided colored paper and other materials
Magic double-layer flowers flowers made of colored paper
These seemingly complex flowers are made very simply. Moreover, when making crafts, you don’t have to glue a lot. It is enough to fasten the necessary parts with a piece of tape.
For work we need:
- Colored double-sided paper, for example white and purple - 2 leaves per flower.
- Green colored double-sided paper - 1 sheet will yield three stems.
- Scotch.
Fold the sheet in half.
Set aside 2 cm from the free edge and draw a light line.
From the fold side, cut a sheet of colored paper into strips to a drawn line no more than 2 mm wide.
First do this from purple paper, then from white.
Move the edges of the workpiece to the right by 3 cm and secure the left edge with tape.
Let's prepare the stem. To do this, divide the paper horizontally into three equal parts. You need to start twisting the stem from the diagonal.
Now let's start twisting the flower.
The lighter part should remain at the top of the flower. The darker part is below.
Secure the white and purple paper to the stem with tape. Spread the petals.
Flowers made from cotton swabs
Cotton swabs are perfect for our children's creativity. The more you show your imagination and involve kids in making gifts for mothers and grandmothers, the more interesting it will be for them.
https://www.youtube.com/watch?v=imuDCCq9jww
This is the kind of beautiful unusual flower you should end up with.
For work we need:
- Cotton swabs on plastic stems - 2-3 large packages.
- Foam balls for the base - 1 ball for each flower.
- A container in which to dilute paints.
- Paints - you can take regular gouache in different compatible colors. For example, pink and light blue. Or yellow and orange.
- Wooden skewers for canapés are the stem.
Each stick must be cut diagonally to create a sharp edge.
We insert each half of a cotton swab into a foam ball.
You should end up with a hedgehog made from cotton swabs like this.
Dilute a small amount of paint with water into a plate or other container. The solution should be bright but not thick.
Dip our hedgehog into the paint and leave the cotton end in the paint for a second.
We paint the wooden stem green with gouache.
How to draw a gift for mom on March 8, ideas with descriptions
Younger children are still not good with a pencil and a brush. The easiest way to draw a gift for mom is to draw with your palms. You can buy special paints for this, but if you don’t have such paints, making them yourself won’t be difficult. To do this, take half a tablespoon of salt, 3 tablespoons of sugar, 1/2 cup of starch, 2 cups of water, food coloring. Boil the mixture over the fire (without dye), stirring. The fire should be small. When you see the first clumps, remove from heat and continue stirring until smooth. After cooling, add dye.
On an A4 sheet of paper, place the child’s palms in such a way that the intended composition is obtained. Make several prints. After this, wash off the paint and continue painting with your finger. If these are flowers, dip your finger in green paint and draw the stems and leaves.
Another option. Draw a stem with a brush, then dip your finger in brown paint and press firmly to the base of the flower. We wait until it dries. Next, dip your finger in white paint and draw a dandelion. This way you can design a postcard.
For older children, use pencils, brushes and paints.
To draw tulips correctly, you can use the following sequence.
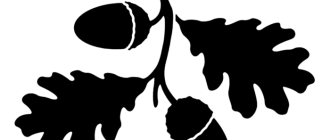
Sequence of drawing snowdrops
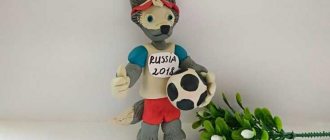
Let's draw a figure eight. Print out the drawing and let the children color it. Give them the opportunity to use their imagination and draw what they want.
Plasticine products
Plasticine can now be found in different qualities and colors. I really like plasticine, which dries in the air. It does not stick to hands and clothes, and the finished product will become very dense over time. Another advantage of this plasticine is the choice of colors.
Bouquet of plasticine on paper
On a sheet of paper we make a bouquet of thin tubes. We divide the plasticine into equal pieces and roll them into small flagella. We roll these flagella into a spiral - these will be our flowers. Place a ball of green plasticine in the center.
As an option, you can make a beautiful mimosa from plasticine balls.
DIY flowers made from colored paper ribbons
These ribbons are sold as a set. But making the blanks yourself is not difficult. You can instruct your parents at home to cut double-sided colored paper into 1 cm thick ribbons. Children lay out flowers twisted into spirals on the paper. The ribbons are attached to the paper using regular glue.
Rolled paper appliques
Baskets with flowers
Paper baskets with flowers
As baskets, you can use either colored paper itself or ready-made small flower pots for seedlings. To make the baskets look more aesthetically pleasing, they should be wrapped in corrugated soft paper or colored paper.
Instead of flowers, you can make small trees with flowers using this technology.
Simple Mother's Day cards for kindergarten - coloring pages with templates
Coloring is the most accessible technique from the age of 3-4 years. Children love coloring books because they are easy and understandable. Your hands also remain clean. In one lesson you can do everything almost without the help of adults. And our diagrams can be signed with the child’s name and the date the surprise was created. Printing them is quite a budget-friendly pleasure. All you need is a black and white printer and white paper.
Very convenient even for the older group of kindergarten. Moreover, it’s great for kids.
Easy-to-use schemes will help kids cheer up mom!
Easy DIY Mother's Day cards for kindergarten - and let the holiday be fun!
We can offer a wonderful find with a ready-made diagram for downloading to all those who are not afraid to get their little ones’ hands dirty with paint. Also suitable for early development classes, kindergarten groups where there are enough teacher assistants and, of course, for fun home creativity. Hey dads and grandmas! Join us in the congratulations! Help make mom happy on her state-recognized day! Fun finger painting will make a simple and easy card truly unique.
And a few more ready-made easy patterns for an elegant bouquet. A teacher of a kindergarten or 1st grade group only needs to print out a blank coloring sheet according to the number of children. The rest is up to the young creators. Cut out, color, trace the lines, bend the sides and write on the inside. Teachers will help preschoolers make a postcard, and first-graders can do it themselves.
The little one paints - the mothers admire it! and every VOLUME congratulation will be unique.
A paper postcard is like a voluminous folding notebook, and even a ready-made easy diagram for working with colored pencils. What mom can resist this stylish thing?!
A colorful, easy DIY card is just what you need to make your mom happy!
Original crafts from bushings
Save the rolls from disposable towels or toilet paper. From them you can make a huge number of useful things for the home and just for beauty.
Mugs, hats and bracelets made from cardboard tubes
These are the mugs for mom. You can't pour tea in them, but you can store various little things.
And what mother would refuse an exclusive bracelet made by her baby?
And in such boxes, mothers can store pens, pencils and even knitting needles with other needlework supplies.
Our children’s crafts will not be as beautiful and neat as in the pictures, but for us, mothers, it will be the most valuable gift. And when children grow up, homemade gifts will keep memories and love.
Happy Mother's Day - beautiful pictures with congratulations, inscriptions and poems.
A beautiful picture for Mother's Day with congratulations.
Postcard – Happiness is in the hands of a mother.
Picture – Little joy.
Postcard – Baby with a rose for mommy.
Happy Mother's Day 2021 – congratulation picture with verse.
A postcard with an inscription from a little blue-eyed lady - “Mommy, my beloved, happy holiday!” Thank you for having me!”
“There is only one woman in the world, she is not more beautiful in the world! This woman has children who send her greetings today!”
“On Mother’s Day, I say thank you for everything, I thank you for your tenderness and care!”
Picture – Cute modest teddy bear with a flower.
A smile that melts a mother's heart.
Mommy is the closest person who is always there, ready to help and protect.
Mother's Day is an international holiday to honor mothers. On this day, it is customary to congratulate mothers and pregnant Women, in contrast to International Women's Day, when all representatives of the fair sex accept congratulations. In different countries, this day falls on different dates; generally in the world, Mother's Day is celebrated every second Sunday in May. In Russia, the Mother's Day holiday was established in 1998. In accordance with the Decree of the President of Russia B.N. Yeltsin dated January 30, 1998 No. 120 “On Mother’s Day.” Mother's Day is celebrated on the last Sunday in November.