Preparing for sculpting
Before you start learning how to make animals from plasticine, you should take care of preparing your workplace. The surface of the table at which modeling will be done should be well lit. In addition, you should protect your workplace from plasticine. It is for such purposes that special boards are used. But if you don’t have one, you can simply cover the table with a piece of oilcloth so as not to get it dirty. For kids, you can stock up on various shaped molds, and then sculpting animals from plasticine will become an even more exciting activity. You can also purchase special gloves for handles so that the plasticine does not rub into the skin during work.
Basic techniques for working with plasticine
Modeling animals from plasticine is a step-by-step process. There are basic shapes that serve as the basis for creating various elements.
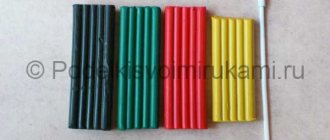
These are the ball, cube, pyramid, cake, drop and strip. A cube is formed from a ball by squeezing and pressing it on four sides, and then it can be rolled out using a rolling pin, or left in the shape of a cube, finally aligning the edges with a flat stick. Or, for example, the “drop” shape is also created from a ball. In this case, the round workpiece from one edge begins to be gradually compressed and stretched to the desired size.
Wild animals made of plasticine
The wildlife world is beautiful. It is filled with secrets and riddles. Children are drawn to the mysterious and unknown, which means they will probably be interested in how to mold animals from the wild world from plasticine.
Using modeling from plasticine, the child learns about the world and does it easily and with passion. For a more fruitful process, you can use a photo of an animal as an example or watch a video about its life in natural conditions. The process of sculpting representatives of wildlife is, in fact, no different from that when creating pets. Wild animals made from plasticine do not have to be an exact copy of their prototypes.
By showing your imagination and using different types of plasticine, for example, with glitter, you can create truly fabulous creatures. You can also add natural materials to the process. Thus, the process of studying wild animals is quite exciting. And from the resulting inhabitants of forests, deserts and mountains, you can assemble a whole zoo for the game.
Making an octopus: step-by-step instructions
The octopus is one of the most unusual inhabitants of the seas
. Naturally, the process of sculpting it has its own characteristics, but it does not cause any difficulties. Following step-by-step instructions, even a small child can cope with this task.
The octopus is one of the most unusual inhabitants of the seas
Progress:
- Make a small circle and eight long sausages - you get a head and paws.
- Place bright circles on each paw.
- Connect the head with the paws.
- Bend each limb.
- Use a toothpick to squeeze out the mouth.
- Blind the eyes and glue them to the head.
Place a small object into the tentacles.
Sculpting and age
At what age can you start sculpting with plasticine? As early as one and a half years old, you can give your baby a ball and show him how to knead it. Of course, it makes no sense to want a child to mold an elephant or a cow at this age, but he can make simple blanks that you will already assemble for him into this or that animal. At the age of three to five years, children are already able to create simple figures of animals and birds on their own. And at six years old, a child can sculpt more complex options, guided by diagrams or master classes. In addition, at this age he is already using his imagination to the fullest extent.
As you can see, figuring out how to mold animals from plasticine is not at all difficult. The main thing is not to be afraid to use different materials and your own imagination. And also follow the diagram or instructions for creating various animals. Any child will be happy to share this exciting activity with you, and you can create a huge zoo or a whole farm for games.
Lesson notes for the senior group of kindergarten. Modeling wild animals from plasticine
Wild animals. Based on the Russian folk tale "The Fox and the Wolf"
Modeling from plasticine.
Senior group. Goal:
To teach how to sculpt an animal from one piece of plasticine in a new way.
Objectives: Educational:
To develop the ability to sculpt animals, to highlight the main parts of the depicted object.
Developmental:
Develop the ability to divide plasticine into the required number of parts, determine their size and shape, and work according to the diagram.
Educational:
To cultivate interest in working with plasticine, to evoke positive emotions from the work process and its result.
Preliminary work:
Reading the Russian folk tale “The Fox and the Wolf.”
Dramatization of a fairy tale. Looking at pictures of wild animals. Mixing plasticine to obtain a gray tint. Methods and techniques:
Conversation with children, looking at pictures, working with a diagram, didactic game, practical activities for children.
Materials and equipment:
Wall magnetic board, geometric shapes and three-dimensional bodies, a fox and a wolf sculpted from plasticine as a model.
Demonstration material:
Pictures depicting a fox and a wolf, an illustration for the fairy tale “The Fox and the Wolf,” graphic diagrams for children (a diagram of dividing a piece of plasticine into parts, a diagram of sculpting individual parts from each part), a didactic game “Where is whose tail?”
Handouts:
Plasticine boards according to the number of children, stacks according to the number of children, a set of plasticine according to the number of children, hand napkins according to the number of children.
Lesson structure
1. Introductory part. 2. Main part. 3. Final part.
GCD move
1. Introductory part.
- Children, guess the riddles... He looks like a shepherd dog, every bit as sharp as a knife, he runs, grinning his mouth, ready to attack a sheep. (children's answers). That's right, wolf. The second riddle... They say she is cunning and takes chickens out of the yard. But she’s a beauty - all the guys like her. (children's answers). Yes, it's a fox. (I attach a picture of a fox and a wolf to the board). – Children, now you and I will learn to sculpt a fox and a wolf in a new way. – You have sets of plasticine on your tables. Whoever has orange in the set will sculpt a fox. Whoever has gray is a wolf. Raise your hands, who's orange? ….(list the children) You are sculpting a fox. Raise your hands, who's gray? ... (list the children) you are sculpting a wolf.
2. Main part.
Look carefully at the animals that I made... (demonstrating). Tell me, how many parts do you see on a fox? (children's answers) That's right, three. Name these parts. (children's answers - head, torso, tail). How many parts do you see on a wolf? (children's answers) Three. Name them. (children's answers - head, torso, tail). What do you see in common between a fox and a wolf? (children's answers - they both have a head, a torso and a tail). How are animals different? (children's answers - the fox's tail is long and bushy, but the wolf's tail is shorter and not so bushy). Fine. How many main parts does a wolf have? (three) The fox? (three) So how many parts will we divide the block of plasticine into? (into three parts).
The largest part is the body, then the head and tail.
Look, what do we need to mold to make the body? (children's answers). That's right, we'll roll out a thin cylinder and flatten it. How do we get the head? (children's answers). That's right, we'll roll a ball and stretch out one side. How do we make a tail? (children's answers). That's right, a small flagellum. Let's take a little rest before work.
Physical education minute.
Like our animals (Clap your hands.) Paws merrily knock: Top-top-top, top-top-top.
(Stamping feet.) And the legs are tired, They clap their palms: Clap-clap-clap, clap-clap-clap. (Clap your hands.) And then squat down (Squats.) The animals dance side by side. (Jumping in place.) And when they start running - (Running in place.) No one can catch them. Let's get to work.
(Children are working, the teacher shows with parallel commentary). We divide the plasticine according to the scheme... First in half. We divide one part in half again. (After each action, the teacher looks at the children’s progress and the quality of their work). Take most of it and knead it well. Rolled into a cylinder (sausage). They put it on the board and pressed it, flattening it. Using a stack, we make cuts on the right and left on the workpiece. The cuts should be the same. We smoothed the cut areas with our fingertips and rounded the entire part to create a rainbow shape. Take part 2. Roll into a ball. Use your fingers to stretch out one side and sharpen it. This will be the head. At the top of the head we draw out two ears, they look like triangles. Take part 3. What will it be? (children's answers - tail). Right. Let's play the game "Where is whose tail?" (The teacher places images of animals without tails on a magnetic board: a hare, a wolf, a fox, a squirrel. Children explain in words where whose tail is. For example, the first one on the left is a squirrel’s tail, etc. Children repeat which tail is the fox’s, which is the wolf.) Rolled up a flagellum. We sharpen at the ends. We attach the details. What can we do to prevent the parts from falling later? (children's answers: smooth the joints with your fingers). We make eyes, but they should not be big. And the nose. Decorate the tail and paws of the fox. Show me what you got?
3. Final part.
- Guys, what did we do today? (children's answers - they sculpted a wolf and a fox) - Have you learned something new? (children's answers - sculpt the body and legs from one part) - You tried hard today. Place your forest dwellers on plates. We are cleaning the workplace.
The plan is a summary of the GCD in the senior compensation group. Topic: “Hedgehog” (plasticine modeling)
Author: Tsutserova Natalya Alexandrovna. My work may be useful for kindergarten teachers and additional education teachers. Integration of educational areas
: cognitive, speech, communicative, artistic - aesthetic, physical.
Goal:
teach children to sculpt wild animals.
Objectives:
Cognitive development: Develop interest in wild animals.
Expand knowledge about hedgehogs: appearance, lifestyle, nutrition. Learn to understand the relationships in nature. Respect for nature. Social and communicative development: Clarify knowledge about the rules of behavior in nature. Develop independence when performing work. Develop the ability to work together with peers. Speech development: Develop the ability to perceive fiction. Develop sound and phonemic hearing. Develop connected, interactive speech. Develop the ability to answer questions with complete answers. Practice onomatopoeia. Artistic and aesthetic development: Teach children to sculpt a hedgehog, conveying the characteristic features of its appearance, and complement the image. Develop an interest in working with plasticine. Develop an aesthetic attitude towards the surrounding world. Develop fantasy and imagination. Physical development Develop fine motor skills of the hands. Prevent children from becoming tired. Methods and techniques.
Gaming: didactic, verbal games. Practical: examining a sample, doing the work independently.
Visual: showing and explaining how to do the work Verbal: situational conversation, questions, explanations from the teacher. Materials: plasticine (beige, brown, gray), napkins, seeds.
Progress of the lesson.
Guys, let's play! The game is called "Football". Children throw a ball to each other and name forest animals. Surprise moment:
- Look, guys, someone brought a basket. I wonder what's there? (teacher raises handkerchief) - Note! (Reading) Angry touchy lives in the wilderness of the forest There are a lot of needles, But not one thread. (Hedgehog)
- Right. Look what a beautiful hedgehog! “Once, a hedgehog I knew told me the following story. When he was very small, he had blind eyes, deaf ears, and no needles at all. The hedgehog's mother would not let him go far from her until good, strong needles appeared. The hedgehog has a lot of needles, which are renewed every 3 years. He has 36 teeth. When hunting, he relies only on hearing and smell, as his eyesight is very poor. — What do you think hedgehogs eat? — Hedgehogs feed on insects, small birds, bird eggs, lizards, berries, snakes, frogs. — Do hedgehogs have enemies? — Of course, there are eagle owls, large owls, hawks, and foxes. — What do hedgehogs need needles for? - Yes, guys, hedgehogs need needles for protection. The hedgehog is capable of curling up into a tight ball, with its spines exposed; it hisses and twitches strongly, jumping up if you touch it. -Let's try to become hedgehogs. Breathing improvisation “Hedgehog”
— The hedgehog wrinkles his nose, bites his lower lip, and pronounces the sound “ffff.”
— The hedgehog wrinkles his eyebrows and pronounces the sound combination “puff-puff-puff.” - The hedgehog puffs out his cheeks, then exhales with the sound “pu-u-u” - The hedgehog is tired, exhale through his throat with the sound “ha-a-a” Well done! - Guys, the hedgehog hunts in the summer and breeds offspring. What does he do in winter? - Yes. The hedgehog hibernates. Hibernation lasts 128 days. When he wakes up, the hedgehog is very hungry, so he spends several days searching for food. — How to understand the proverb: “The hedgehog is the nurse of the forest and the ship of the edges.” - Ri. The poem “He’s like a Christmas tree”
He’s like a Christmas tree, Covered in needles, Bravely catching scary snakes.
And although he is very prickly, don’t you dare offend him. He lives in the forest. But the funny hedgehog also enters the gardens. — Hedgehogs live in the forest. Even in our forests of the Samara region. -Why can’t you take a hedgehog home? - Yes you are right. It really shouldn't be taken home as it is a wild animal and should live in the forest. Hedgehogs are also nocturnal animals. If you take him home, he simply won’t let you rest at night, as he stomps so much. And at home he can die. — If you can’t take a hedgehog home, what can you do? -Made from plasticine. - First, we need to stretch our fingers. Physical education
Hedgehog, prickly hedgehog
The fingers of two hands are clasped together.
Show the needles.
Movement of the brushes to the right, left.
Here they are, here they are, here they are.
We straighten our fingers, clasp our hands.
Hedgehog, prickly hedgehog
Put them in a castle
Hide your needles. Once, and there are no needles.
Doing practical work:
1. Warm the plasticine with your palms 2. Roll out the body of the hedgehog. From one edge we make the shape of a muzzle, a sharp nose.
3. From the side of the muzzle, we begin to insert the seeds with the sharp side into the plasticine. 4. When you reach the end of the hedgehog's back. Make sure that the plasticine is not visible from behind. 5. Make eyes and nose. Reflection. - What wonderful work you have done! - Let's look at them.
Olga Maslekha
Summary of GCD for modeling in the second junior group on the theme “Hedgehog”
Topic: " Hedgehog"
»
Tasks :
1 To develop an interest in working with plasticine;
2 To strengthen children’s skill of plucking small pieces of plasticine from a piece and rolling them into balls with a diameter of 5-7 mm;
3 Strengthen children’s ability to smear plasticine on cardboard using pressing movements of the index finger;
4 Fix the navk and place the plasticine balls at an equal distance from each other;
5 Develop fine motor skills;
6 Cultivate neatness;
7 To develop aesthetic perception in children;
8. To foster in children a sense of empathy for the characters and a desire to help them;
9. Promote positive emotions in the process of mastering basic sculpting
;
10. Improve hand-eye coordination.
Materials: Demonstration material: Toy hedgehog
,
Handout: Sheets of cardboard with a hedgehog
without needles according to the number of children; gray or black plasticine in bars; plasticine rolled into balls with a diameter of about 5 - 7 mm, at the rate of 10-15 balls for each child, wet wipes for hands.
GCD move:
Educator: Guys! Do you know who came to visit us today?
The teacher pulls out a big hedgehog
. The children gather in the middle of the room.
The children answer.
Educator: Hedgehog
!
Children looking at a hedgehog
.
Educator: Guys, hedgehog
came to us from the forest. He lives in the forest.
Educator: He is friends with bears, bunnies, and squirrels. And he is afraid of the wolf and the fox. When he sees danger, the hedgehog curls up into a prickly ball and no one can touch him.
Educator: What does he like to eat? The children answer.
Educator: Hedgehog loves mushrooms
, apples, pears and milk
Educator: At home, the hedgehog drinks milk. In winter, the hedgehog sleeps in his hole. That is, in your house.
Educator: Guys, you can’t offend animals. We must love them and treat them with reverence. Look how sad the hedgehog is
.
Let's cheer him up. Children's answers The teacher reads a poem, and the children repeat after him
The hedgehog stomped along the path
And he carried mushrooms on his back (walking in place)
The hedgehog stomped slowly
Quietly the leaves rustle
(we rustle with our palms)
And a bunny gallops towards us,
Long-eared one, jump around.
Something clever in the garden
I got hold of a sideways carrot (jumping in place)
.
Educator: Guys, I invite you to the table. Children sit at tables where there are blanks with the image of a hedgehog without needles
. –
Educator: These are the pictures with the image of a hedgehog lying in front of you
.
Consider the hedgehog. Oh! He's kind of weird! The hedgehog is missing something
. Children's answers.
Educator: That's right, there are no needles! Let's quickly give the hedgehog some needles
!
Like this! The teacher shows how to make hedgehog needles. The teacher invites the children to make plasticine balls for needles: pinch off small pieces of plasticine with the thumb and forefinger of their right hand and roll them into balls. Children roll 2-4 balls each (the rest of the balls are prepared in advance)
.
Then invite the children to place a plasticine ball over the outline of the hedgehog's
, press it with their finger and pull their finger down.
Educator: It turned out to be a needle! Let's give the hedgehog a lot of needles
!
on a hedgehog
. Children and teacher make needles. The teacher helps those who are not doing well. When the work is ready, everyone admires their pictures and the pictures of their comrades.
Educator: Now I suggest you turn into hedgehogs. The teacher shows the kids how to draw a hedgehog
, clasping your fingers together.
The teacher reads a poem, and while reading, the children repeat
the teacher’s movements.
The little hedgehog is frozen
(press your fingers -
the hedgehog removes the needles )
And curled up into a ball.
The sun warmed the hedgehog
(Straighten your fingers -
the hedgehog showed the spines )
The hedgehog turned around
.
The teacher praises the children for their work and says that we will place our hedgehogs at the exhibition so that they will please us and their parents.
Educator: And now it’s time to say goodbye to our hedgehog
, he goes back to his forest.
Children say goodbye to the hedgehog
.
Educator: Guys, we helped make the hedgehog
?
Did you help the hedgehog?
How did we help him?
Publications on the topic:
Notes on sculpting in the second junior group “Who visited us in our garden?” Integration of educational areas: “Cognition”, “Reading fiction”, “Artistic creativity”, “Communication”, “Socialization”.
Abstract of GCD in the second junior group for modeling "Owl" Educational area: Artistic and aesthetic development Integration of educational areas: Artistic, aesthetic, cognitive,.
Abstract of educational activities for modeling in the second junior group “Multi-colored balls for a hedgehog” Integration of educational areas: “Cognitive development”, “Artistic and aesthetic development”. Objectives: 1. Educational: - teach.
Tasks. Develop plot-game concept and imagination. Make chicken figures from individual lumps. Using pulling and pinching techniques.
Program content: Learn to convey the shape of an object (sparrow, divide plasticine into two unequal parts, learn to fasten two parts in order to...
Notes on object modeling in the second junior group “Gift for Dad” Purpose: to make a gift for Dad (tie). Objectives: Educational: Reinforce modeling techniques: develop the ability to separate a piece of plasticine.
Plasticine is a magical material with which you can make incredibly beautiful figures. These can be fairy-tale and cartoon characters, buildings and plants. Animals made from plasticine deserve special attention. For children, modeling will be an incredibly exciting and educational activity, from which it is impossible to escape for a minute.
Plasticine is a magical material with which you can make incredibly beautiful figures.
Sea inhabitants made from plasticine turn out to be extraordinarily beautiful.
Even a child can make such crafts with his own hands. Making a crab requires just a little attention and patience.
Sea inhabitants made from plasticine turn out to be extraordinarily beautiful
Sequencing:
- Make blanks for the body, a pair of claws and eight legs.
- The largest ball from which the body will be made needs to be pressed down a little.
- To make the paws, make sticks from eight blanks.
- Attach four tabs on one side and four more on the other.
- Form claws from the two remaining blanks and attach them to the crab's front legs.
- Place small circles of a lighter material on the body.
- Make eyes.
We sculpt wild animals step by step
Wild animals are of particular interest to children, since not everyone gets to meet them in real life. We have to be content with their depiction in the pictures. That is why sculpting a lion cub from plasticine will not only be exciting, but also educational.
Wild animals are of particular interest to children, since not everyone gets to meet them in real life.
Work progress step by step:
- Make a circle from the yellow mass and attach a couple of small parts to it, forming the cheeks of the animal.
- Make a nose out of brown material and secure it between the cheeks.
- Attach eyes a little above the cheeks.
- Make a teardrop-shaped body and slightly extend the tip of this piece.
- Using a match, connect the head to the body.
- Form a lot of brown circles from brown material and fix them on the animal’s head - you get a mane.
- Now mold the paws and stick three small orange circles on each of them.
- Attach these parts to the body.
Make a yellow ponytail with an orange tassel at the tip and stick it to the craft.
Plasticine pets
In order to start sculpting animals, you must first decide what kind of animal you want to depict.
Try to clearly imagine the image that will be embodied using plasticine. Children, as a rule, choose pets to sculpt. This is due to the fact that they see them quite often, unlike wild ones. Usually, any animal begins to be sculpted from the head. To create it, you need one large ball for the base and two smaller ones for the ears. Next, the required shape is created from these balls.
Eye placement is also important. They should be positioned so that the animal is looking directly at you. Balls are also prepared for the body, paws and tail, if, of course, there is one. An important point will be the connection of all elements into one whole. You can use matches or toothpicks for this. If you use medium-soft plasticine for modeling, you can subsequently play with these animals, creating various storylines involving pets.
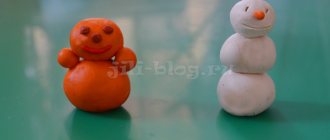
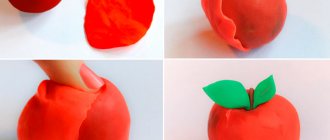
Peppa Pig made from plasticine
For many children, Peppa Pig has become a favorite cartoon character. They will certainly be interested in making it out of plasticine themselves. Moreover, this work is not at all difficult.
Manufacturing stages:
- Roll the red and pink mixture into balls.
- Press the red piece onto the work surface, then use your fingers to pull out the flat side to form the hem of the dress.
- Make a small hole on top.
- Deform the pink ball slightly, extending the wide nose.
- Stick eyes on top.
- Decorate the nickel and mouth with red stripes.
- Glue the ears to the top of the head.
- Connect the head and torso.
- Mold the arms and attach them to the body.
Glue the tail to the back.