Summary of an open lesson on drawing in a preparatory group using the scratch technique
Summary of an open lesson on drawing in a non-traditional scratch paper technique on the topic “Underwater World” for the regional methodological association.
Author: Nadezhda Viktorovna Vinogradova, teacher at GBDOU d/s No. 14, St. Petersburg. Description: I offer you a summary of an open lesson in a preparatory school group. This material will be useful to teachers and methodologists of preschool institutions. Goal: drawing on the theme “Underwater World” using the non-traditional technique “scratchboard” Objectives: To strengthen technical drawing skills in children. Continue to learn how to build a composition of a drawing, reflect your impressions and knowledge about the world around you in a drawing. Develop children's imagination and creativity. Methods and techniques: playful, verbal (conversation), visual, practical, unconventional drawing. Materials and equipment for the lesson: sheets of thick paper specially primed for making drawings using the scratch paper technique (first the entire surface of the cardboard is carefully painted with wax crayons of different colors, then the cardboard is covered with a layer of blue gouache, after complete drying the cardboard is ready for drawing), toothpicks, illustrations of sea inhabitants, puzzles (cut photographs of sea animals and fish in A4 format), audio recordings: A. Kanachyan - “In the blue sea, in white foam”, the sound of the surf.
Diving accessories: fins, masks, goggles, snorkels, “the gate of the sea Tsarstav”: a screen with blue drapery. For a relaxation corner: a bath with sand and pebbles and shells hidden in it. Course of the lesson
1. Introductory part: Conversation The song by A. Kanachyan “In the blue sea in white foam...” is played, the children enter the hall. The music stops. Educator: - Guys, today is an unusual day for us, guests have come to us, let's say hello to them (Hello!) - Now let's move on... Look, what is this lying here? What is this for? (Children look at the objects on the green “island” on the floor, offer possible answers: mask and snorkel for diving, fins, inflatable ring, etc.).
- Where is all this used, on land or in water? (in the water) - So, where will we travel today? (in the sea) - That's right, in the depths of the sea. We have already met some of the inhabitants of the underwater world. Let's remember them (the teacher takes the children to a stand with images of fish and sea animals).
Children list, pointing to pictures, those fish and animals they know, remember their habits and characteristics. The teacher draws attention to the shape and color of the sea inhabitants, as well as to the fact that there are plants in the sea - algae - and they are also all different in shape and color. The teacher asks about those who were not named: “Who do you think it is?” Who does he look like? (Children make assumptions, the teacher corrects, naming correctly) 2. Puzzles The teacher turns to the center of the hall, where there is a “lake” (blue fabric in the shape of a circle) on the floor, draws the children’s attention to it and what lies in it: - Guys , what do we have here? It looks like a pond, and there is sea mail in it, look - envelopes! Take an envelope each and let's see what's inside? - Oh, yes, there are photographs of someone, but they are not whole, but divided into parts... We need to make photographs from these pieces, then we can find out whose they are.
Children sit/lay down on the “lake”, put together puzzles, and discuss who has whose photo. Educator: - Thank you guys, now underwater inhabitants can easily find their photos.
3. Riddles Educator: - Do you know that we have an oceanarium in St. Petersburg? Have any of you been in it? If you haven’t been, I highly recommend visiting with your parents. It's so interesting there! You can meet amazing fish and sea animals, examine the seabed and various underwater plants. Guess who I met there? This fish is an evil predator It will swallow everyone headlong It yawned showing its teeth And went to the bottom... (shark) A pear with long legs Settled in the ocean As many as eight arms and legs This is a miracle -... (octopus) For himself at the bottom of the sea He builds a house with his claws A round shell , ten paws Did you guess it? This is... (crab) What kind of ball floats with spikes, Quietly waving its fins? You just can’t take this ball in your hands - ... (hedgehog fish) Both on land and in water Carries the house with it everywhere Travels without fear In this house ... (turtle) A transparent umbrella floats “I’ll burn you!” – threatens – Don’t touch! She has paws and a belly. What is her name? (jellyfish) She looks so much like a horse And she also lives in the sea That’s how the fish is! Jump and jump - The sea horse is jumping... (horse)
4. Physical education lesson Educator: Somehow, we guys stayed too long. Let's warm up a little. Waves splash in the ocean (alternately swing your right and left hands) What seems to be there in the fog? (raise your palm to your forehead, “peering”) These are the masts of ships (raise your straight arms up) Let them sail here quickly! (swing your arms left and right from the elbow) We walk along the shore, (step in place) We wait for sailors, We look for shells in the sand (bend over, reach the floor with our hands) And clench them in our fists (raise clenched fists) To collect more of them (squats) I need to squat more often
5. Main part: Educator: - Guys, would you like to meet underwater inhabitants and make a photo drawing of them? What do we need to do for this? (dive under the water) - Children, look what’s in the basket here? (masks for scuba diving). Why are they needed, remind me? (to see under water) - These are the ones that will be useful to us now. Let's put them on and dive in! Before diving, take a deep breath and hold your breath a little. Children put on masks and “dive” into the makeshift gates of the “Sea Kingdom”. The teacher invites them to sit down at the prepared workstations and take off their masks.
Educator: - Guys, we have now dived into the underwater world. Let's close our eyes and imagine the seabed and underwater inhabitants (turn on the audio recording “sound of the surf”). Look at them carefully: who you saw, what size, color, what surrounds them, remember them. Open your eyes and let's take a photo of what you just saw. We won’t tell you yet who we met, but when you draw, then we’ll try to guess. And today we will draw using the grattage technique. We are already familiar with this technique. What else can you call it, how do we apply the drawing? (scratch). The underwater world is a world of magical beauty, it is very colorful. Everything in it mysteriously shimmers with different colors, and some animals even know how to change their color themselves (octopus). Therefore, for today’s sketch for each of you, I made this small sea with a colored base, there is already water in it, you just need to populate it with inhabitants and plants. Choose the size of your future photo drawing (children choose the format of the blank). — Let's remember once again how to draw using the grattage technique (scratch a design with a toothpick on a workpiece). A toothpick is a tool, be very careful and attentive with it. Now imagine again what you want to draw and get started. If anyone needs help, call me quietly so as not to put water in your mouth and scare away the fish.
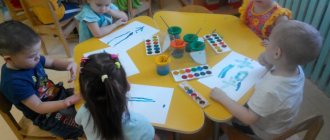
Children, under the supervision of a teacher, draw a composition on a marine theme.
The child with the finished work puts on a mask and “surfaces”, the teacher directs him to a relaxation corner (a bath filled with sand with “surprises” - the game “find a sea souvenir”). At the end of the lesson, children's works are filed in a common “photo album”.
6. Final part: Educator: - Guys, our album of “photo drawings” is ready, let’s look together, admire and try to guess who met whom under water. Children, together with the teacher, look at the album, discuss the work, and guess what is depicted. -Did you enjoy today’s trip to the Sea Kingdom? You are so great: you talked about swimming accessories, solved riddles, guessed the inhabitants from pictures and made a whole Sea Album! Let's leave it to our guests to watch, and we ourselves will go and refresh ourselves, a second breakfast awaits us. The children leave the hall to the continuation of A. Kanachyan’s song “In the blue sea, in the white foam...”.
Children's works
We recommend watching:
How to draw a winter tree Decorative art “Encaustic” + MK Non-traditional painting using the Spray technique on the theme: Winter Technique Scratchboard for preschoolers
Similar articles:
Master class for preschool teachers. Unconventional drawing techniques
"Wet" drawing technique
Parents about non-traditional drawing techniques
Application with drawing elements
Non-traditional drawing techniques in kindergarten for children 5-6-7 years old
MAGAZINE Preschooler.RF
Summary of educational activities for visual activities in the preparatory group “Fairytale House” (drawing and fantasy).Goal: to develop the ability to convey images of a fairy-tale house in a drawing, to build a plot composition.
Tasks.
Educational:
- teach children to create the image of a fairy-tale house
- improve the ability to mix paints to obtain shades of color
- learn to identify the components of a house: walls, roof, windows, pipes
Educational:
- develop the skill of conveying mood and artistic image using color
- develop independence, aesthetic feelings and emotions, a sense of composition.
- develop creative imagination and fine motor skills of the fingers.
Educational:
- to cultivate creative activity, the ability to show one’s attitude towards the characters through drawings
- develop the ability to sympathize and empathize.
Preliminary work: Reading Russian folk tales, getting acquainted with the work of illustrators Yu.A. Vasnetsova, E.M. Racheva, V.I. Deerskin.
Drawing, modeling, applique on the theme “My favorite fairy-tale hero” .
Materials and equipment: ICT - slides for fairy tales, musical accompaniment.
Handout:
- Sheets of paper
- Gouache, wax crayons
- Brushes
- Jar of water
- Napkin
- Palette
Progress of direct educational activities.
1. Preparatory part.
Organizing time.
Introductory conversation.
“Once upon a time, there lived various fairy-tale heroes in a large fairy-tale forest. One day a strong hurricane broke out in the forest. The hurricane caused a lot of trouble: it knocked down trees and destroyed all the houses of fairy-tale characters. Now there is nowhere for fairy-tale heroes to live. And it’s soon winter outside.” .
-Guys, can we help fairy-tale heroes? (Children's answers). Let's draw them new houses, better than the old ones.
-Many fairy tales that we read often talk about houses.
Let's remember what fairy-tale houses we read about? Name them.
Children's answers. ( “Teremok” , “Rukavichka” , “Zayushkina’s hut” , “Gingerbread house” , Baba Yaga’s hut).
Let's look at each of them. (Slide 2,3, 4, 5, 6)
Looking at illustrations of fairy-tale huts; clarify the shape, structure of houses, parts, their location.
-What are the main parts of the houses? (Slide 7) (Wall, roof, doors, windows, pipe.)
-What geometric shapes are the parts of the house similar to? (Rectangle, triangle.) (Slide8)
-What means does the artist use to convey the appearance of a fairy-tale house? (Pattern, color, shape of the structure.) (Slide 9)
— Guys, when drawing a house, you need to maintain proportions. Which ones do you think? (If children find it difficult to answer, ask leading questions.)
- Now think about what fairy-tale houses you would like to draw?
2. Main part.
(In the process of children’s independent activity, the teacher helps, prompts the children, directs the children’s attention to conveying the shape and decorations of the fairy-tale house).
-While our drawings are drying, you and I will take a walk through the forest where our house is located.
Physical education minute.
The children walked through the forest and watched nature. There are three shelves in the forest: (Clap our hands.) Fir trees - fir trees - fir trees. (Arms up - to the sides - down.)
The heavens lie on the fir trees. (Hands up.) There are bird voices on the Christmas trees. (Hands to the sides.) There is dew on the Christmas trees below. (Hands down, crouched down.) We had a good walk, And we were a little tired. (Sit down.)
- Now let's remember what an old, dense forest looks like. (Slide 10).
Artists use only dark shades to show how dark and dense the forest is. We take a simple brush, dip it first in dark blue paint, and then in green. Now we draw a forest thicket on the horizon line using the brushing method.
— We also need to draw several Christmas trees next to our house.
3. Final part.
Reflection.
- What beautiful fairy-tale houses they turned out to be! Do you think our fairy-tale heroes will like them? (Children's answers.)
— Which works did you like and why?
(Children analyze.)
—Whose drawing do you like best? Why?
— What was easy and what was difficult?
Cleaning the workplace.
Exhibition of children's works.
| Next > |
Preparatory group. Senior preschool age. Children 6-7 years old
Summary of the lesson on visual activity “Painting on a wet layer of paper” in the preparatory group “Painting on a wet layer of paper”
.
(preparatory group)
Objectives: • To introduce children to a new genre of painting - working with
“wet”
; • Learn to classify reproductions of paintings by genre - portrait, landscape, still life; • Strengthen children’s knowledge and skills in mixing...
Summary of a lesson in visual arts for children of the preparatory group “Winter has come”
Goal: To consolidate and systematize children’s ideas about seasonal changes in nature and natural phenomena characteristic of winter. Objectives: Educational: deepen and expand children's knowledge about winter; teach to discuss, analyze, draw conclusions. Developmental: develop...
