Autumn Crafts: Pexels It's time for colorful and variegated foliage, chestnuts, pine cones and acorns that you can use for creativity. For kindergarten and schoolchildren, creating various crafts with your own hands is a real joy. Looking for fall composition ideas? The best options and step-by-step guidance were shared by authors of books on children's creativity and bloggers.
Topiary made of pine cones
Don’t know what craft on the “Autumn” theme to create with your own hands? A popular blog on Instagram offers a creative option - a topiary (an original tree with a geometric crown) made from pine cones.
To make a decorative figure you will need the following materials:
- cones - 40–50 pcs.;
- wooden stick - 1 pc.;
- flower pot - 1 pc.;
- rowan or viburnum berries;
- dry leaves, branches, reeds, moss;
- Styrofoam;
- silver or golden paint;
- knife;
- scissors;
- glue gun
Making a decorative tree is simple:
- Prepare the base for the figure: cut out a foam ball and cylinder that will fit snugly into the tree pot.
- Insert the foam cylinder into the pot and insert the stick. Attach a foam ball to it. The base for the craft is ready.
- Paint each pine cone and tree trunk with paint and wait until dry.
- Hot glue the pine cones one by one onto the foam ball. At the same time, attach rowan branches to glue between the cones.
- Decorate the base of the pot: attach dry leaves, moss, pine cones, berries, reed branches.
To make the tree beautiful, choose the right material. The author of the book “Crafts for Boys,” Svetlana Rashchupkina, recommends collecting the main material for crafts (cones) in the rainy season or on damp soil before they dry out, so they will retain their shape longer.
Beautiful autumn compositions will become worthy exhibits of a thematic exhibition. They can be given as a gift to relatives or teachers.
Autumn crafts with children 6-7 years old
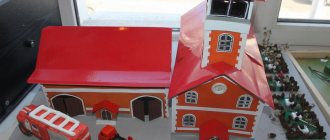
We often rack our brains about what to do for an exhibition at school or kindergarten. There can be many options for fall-themed crafts for school. But it is important to do this work together with the child and instill in him a love of creativity. Taking into account the interests and hobbies of children of this age, we can answer that they love animals, and also build houses for them.
Therefore, compositions with houses and their inhabitants may well be competitive in competitions, but also bring pleasure to children.
You can make a funny bouquet from chestnuts
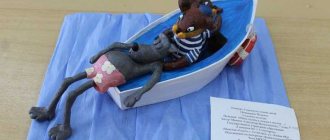
You won't find such a funny couple anywhere else.
Autumn candlestick
A beautiful souvenir craft - a pumpkin candlestick decorated with dried flowers, acorns, pine cones, and leaves.
Beautiful pumpkin candle holder: YouTube/Tsvoric
To make a beautiful craft, prepare the necessary tools and materials:
- small dense pumpkin - 1 pc.;
- dried flowers (roses, peonies, dahlias, daisies) - 5–10 pcs.;
- cones and acorns;
- dry herbs;
- glass beaker;
- sheet of cardboard;
- candle;
- scissors;
- knife;
- a simple pencil;
- glue gun
Step-by-step instructions for making a candlestick:
- Prepare the pumpkin. The author of the book “Decorative Products from Natural Materials” I. Tumko advises doing the following: cut off the top of the pumpkin, remove the lid and remove the pulp, leaving only the peel. It is very important to remove all seeds and pulp. Wash the vegetable and let it dry.
- Cut out a circle from cardboard, and another one inside (the diameter should correspond to the diameter of the glass for the candle).
- Use hot glue to randomly attach dried flowers, leaves, chestnuts, acorns and other decorative elements.
- Place the decorated circle on top of the pumpkin.
- Place a glass with a candle inside. The craft is ready.
The candlestick looks very elegant. It is appropriate to give it as a gift or decorate the interior of your home.
How to quickly make an autumn leaf from paper
Autumn crafts often require the use of leaves. We will show you a simple way to quickly cut out an autumn leaf from paper. All the steps to create it are presented in this master class.
To make such a leaf we will prepare:
- a square of orange paper with a side of 15 cm;
- a simple pencil with scissors.
First of all, we must fold the square blank in half.
Fold the resulting rectangle in half again.
Then we unfold it, we see the emerging middle line. It is to this that we must bend the side corners on the right and left sides.
We bend these corners and turn the workpiece itself over to the other side.
Now let's start forming a blank for later cutting out the leaf. First, we bend the right corner to the middle line, but do not completely align it with it, but leave a small angle.
Then we form another fold, focusing on the central fold line. We pull it to the nearest diagonal line located on the left. At the same time, again we do not combine them, but make a small angle between them.
Finally, we make the last fold, which places the diagonal line on the outside of the outer fold.
Now let's use a simple pencil. On all folds we draw the outline of half a leaf, and on the other edge we outline a stalk in the form of a thin strip.
Cut with scissors strictly along the marked line.
We unfold our workpiece. It turned out to be such an autumn leaf.
If desired, you can make several of these leaves using square blanks of different sizes and colors.
Grapes from nutshells
A picture made from a nut shell looks unusual.
Materials that will be useful in creating crafts:
- walnuts - 7 pcs.;
- cardboard sheet - 1 pc.;
- paint (watercolor or gouache) brown, purple or green;
- grape leaves (an alternative is leaves made of colored paper) - 2 pcs.;
- scissors;
- brush;
- a simple pencil;
- brown felt-tip pen;
- knife, hammer, pliers;
- glue gun;
- PVA glue.
Progress:
- Chop the nuts and remove the core. For work you will only need whole halves of the shell. Natalya Dmitrieva in her book “Crafts from Natural Materials” gives practical advice: in order not to damage the halves, split the nut with a knife, tapping it on top with a hammer. To prevent the nut from popping out, clamp it with pliers.
- Using a pencil, draw a sketch of the picture on a piece of cardboard. Draw the branches with a brown felt-tip pen.
- Paint the walnut halves with brown, purple or green paint. These are berries. Hot glue the shell in the designated places.
- Attach grape leaves to the top of the bunch with PVA glue or make leaves from colored paper: draw with a pencil, cut along the contour and glue.
You can give the painting a festive look with the help of decorative elements: decorate the craft with ribbons and colored stones.
Volumetric origami watermelon slice
In this master class we will make a bright watermelon slice from red and green paper. Origami techniques and step-by-step photographs will help with this.
To create such a slice we will prepare:
- rectangles of red and green paper 10.5x21 cm;
- black marker.
First, we put a couple of rectangles together, with the red one on top. We make folds on the sides at a slight angle, so we form the edges of the watermelon slice. After this we bend the bottom edge up.
Turn the workpiece over to the other side. Here you need to bend the bottom corners to make the edge of the watermelon slice more rounded.
Then we turn our craft over again. Now you need to slightly align the side edges from above. To do this, we bend them and at the same time form small folds.
Fold the workpiece in half, with the red layer on top.
We straighten it, and then bend the upper edges at an angle on the sides.
Now you need to bend the right side to the left, aligning the edges.
Then we repeat the same with the left side of the watermelon slice.
So we outlined the folds we needed to form a three-dimensional craft. But before its final creation, we will use a black marker, draw seeds and eyes with a mouth.
All that remains is to fold the origami watermelon slice along the intended fold lines (while tucking in the edges).
Application from dry leaves “Birds on a branch”
Dry plant material is perfect for depicting animals, birds and various funny creatures. When making an application from dried leaves, the author of the book “Crafts from Dried Flowers and Leaves,” Tatyana Plotnikova, advises building the work according to the following principle:
- determine the leaves for the base shapes (head, body) and their location on the base;
- pick up small details (ears, tails, paws);
- bring your craft to life by giving it some distinctive features.
Little crafters can create an applique called “Birds on a Branch.”
Leaf craft: YouTube/EMK-Em
Prepare the following materials:
- sheet of cardboard;
- dry leaves of different shapes and sizes;
- dry twig;
- rowan or viburnum berries;
- PVA glue;
- plasticine.
Step-by-step guide to making a painting:
- Glue a dry twig at the bottom of a sheet of cardboard. Decorate it with berries and dry leaves.
- Create the birds: glue 2 large yellow leaves - these are the bodies, attach smaller leaves (wings) in the middle. Make a tail from small narrow leaves and glue it to the bottom of the body.
- Bring the birds to life: mold beaks and eyes from plasticine and attach them in the right places.
Project for preschoolers “Colors of Autumn”
Ulybina Irina Vladimirovna
Project for preschoolers “Colors of Autumn”
Methodological development on the topic:
«Autumn colors»
Developed by:
Ulybina Irina Vladimirovna
Project title : “ Colors of Autumn ”
.
Project type : educational and creative
Project classification : short-term (3 autumn months )
.
Participants: group
Project participants : children of preparatory, senior and middle groups, parents, group teachers.
Educational standards:
• Activation of cognitive activity, development of children's speech.
• Development of environmental thinking in children
• Development of creative imagination in the process of children's artistic activity.
Relevance: the topic of this project allows children to expand their awareness of autumn natural seasonal changes, as well as develop children's cognition, communication and creativity in the educational process of preschool educational institutions. As part of this project, the joint activities of children, parents and educators contribute to the creation of a good atmosphere in the children's team, broadens the horizons of children and adults, and helps to establish cooperation between families and educational institutions.
Brief summary of the project :
This project can be used for language development, acquaintance with the outside world, and visual activities with children aged 3-7 years in a preschool educational institution. The task presented to the child focuses on the child's proactive self-expression. This project allows every child to see and expand their understanding of autumn . The project involves children of preparatory, senior and middle groups, their parents and kindergarten teachers. The teacher purposefully teaches the children; the children, under the guidance of their parents, perform various homework assignments. In addition, a musical director also participated in the project , who taught courses related to musical works, reflected the theme of the project , and also took a direct part in organizing and conducting the festival within the framework of the project .
The goal of the project : to expand children's understanding of the autumn season , to develop the ability to independently detect the first signs of autumn , to introduce them to the autumn holidays , to create conditions for the artistic education of children, to develop their cognitive abilities and creativity.
Tasks:
• Expand and enrich children’s ideas, systematize and deepen their understanding of the natural and seasonal changes of autumn (preparing trees, animals and birds for winter, about “
autumn gifts ” (vegetables, mushrooms, berries, about people’s work) in autumn ).
• Concretize ideas about the main groups of animals and plants (habitat, needs, adaptation to seasonal environmental changes).
• Reflect observations and knowledge gained in various types of activities (visual, dramatic, playful, psychological)
.
• Promote the development of cognitive activity, thinking, imagination, fantasy, creativity and communication skills.
• Summarize children's knowledge about preparing animals for winter and the flight of birds.
• Foster respect for nature, birds and animals and a desire to care for them.
• Encourage parents to engage in creative activities with their children.
Stage 1 – preparatory
Methodical work
-Selection of methodological literature on the topic; development of course notes, excursions, nature observations, selection of children's novels; selection of desktop printing and educational games.
-Anthology of novels (stories and poems about autumn nature , animals and birds; riddles and proverbs on autumn themes, etc. )
-A selection of teaching aids on autumn themes , illustrations, reproductions (landscapes and still lifes)
.
-Development of event scenes on the theme “ Colors of Autumn ”
.
-Prepare materials for artistic creativity (watercolor, gouache, colored pencils, crayons, colored paper, glue, cardboard, plasticine, etc.).
-Formulate the goals, objectives and final products of the project .
Expected Result:
-Development of cognitive activity of preschoolers in joint practical activities with teachers and parents.
-Expanding children’s horizons and their understanding of seasonal changes in nature in the fall .
-Conduct the educational process in groups on the designated topics.
-Make additions, metaphors, proverbs, proverbs and poems on the theme of autumn and enrich the active vocabulary of children.
-Develop coherent speech, the ability to write stories from pictures and narratives based on personal experience and memory.
— Sound culture dedicated to speech.
— Development of children's production activities.
-Fruitful children's artistic creations of different directions (painting, decals, modeling from paper and natural materials)
.
-Developed children's creativity.
-Reading poems about autumn .
-Parents’ participation in the educational and creative process of group work in order to increase interest in cooperation with preschool educational institutions.
Stage 2 – project
In the process of methodological recommendations, individual, additional, joint and independent activities and projects in the field of cognitive activity are implemented.
• Cognitive development.
Observation of living and inanimate natural phenomena (sun, sky, trees, grass, sunlight, autumn landscape ).
• Social and communication development.
Working in the garden, planting autumn flowers , watering plants daily,
• Speech development.
Dialogue about the season-autumn , information story “ autumn-season ”
, implementation according to the group’s work plan.
Day of proverbs, riddles and poems about autumn .
• Artistic and aesthetic development.
Expanding knowledge about autumn songs , drawings about autumn , making bouquets with autumn leaves .
Collecting natural materials and creating posters for the competition “ Autumn in our group ”
.
Exhibition of children's creativity “ Beautiful Autumn ”.
• Physical development.
Health days classified by age.
• Working with parents.
Organize a family competition-exhibition of crafts made from natural materials “ Autumn Gifts ”
.
Costume show competition " Autumn Beauty "
Display of handicrafts and clothing in the entertainment program “Golden Autumn ”
.
Conduct educational and entertaining activities “Golden Autumn ”
.
Stage 3. Final.
Project presentation .
Publication of a photo report on the official website of the preschool educational institution.
the project implementation .
Expected results.
1. As a result of cognitive activity, children should have a desire to expand their horizons on this topic and a desire to discover interesting aspects of autumn .
2. In the process of getting acquainted with autumn fairy tales , stories, poems, proverbs and riddles, children's vocabulary will be replenished. They will express themselves better and enjoy participating in group conversations, and they will have a desire to be creative on their own - write their own riddles and poems about autumn .
3. One of the important components of this project is art education: children will get acquainted with various types of art - music, painting, poetry, autumn works of art.
Volumetric applications of vegetables and fruits in the preparatory group
Every child will be interested in making a variety of fruits and vegetables out of paper, which they eat from an early age. They can be made as appliqués on paper or in volume.
How to make an apple out of paper
We will need a sheet of red double-sided paper. Fold it in half and cut it. We also fold the halves in half and draw the silhouette of half an apple with a pencil.
Glue the apple halves onto a piece of paper and create a core, stalk and leaf.
