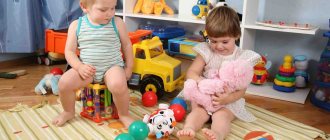
Plasticineography classes are not only an effective method for developing fine motor skills in children, regardless of how old they are, but also allow primary schoolchildren to get rid of physical and mental stress.
Modeling from plasticine can also help a child adapt to kindergarten, becoming a favorite hobby for a growing person, with the help of which he can express the emotions that accumulate during the day, relieving the central nervous system and preventing the occurrence of neuroses.
The benefits of plasticineography
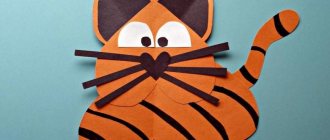
Plasticineography is a creative process during which children create three-dimensional pictures from plasticine , without using classic drawing tools - brushes, paints or pencils. For the working surface, sheets of paper, A3 size or larger, or thick cardboard are usually used.
Plasticineography for children is very useful due to its positive effect on their mental and physical development
Regardless of how old the child is, 2 or 8, the type of arts and crafts in question has a positive effect not only on his mental, but also physical development:
- filling the cognitive needs of children (especially important for children from 2 to 4-5 years old);
- acquiring the ability to navigate in the horizontal plane;
- formation of the creative component of the personality of a growing person (awakening interest in creativity, understanding the algorithm of the creative process, and so on);
- development of fantasy;
- development of fine motor skills of the hands (positively affects the child’s speech and overall development);
- broadening one's horizons;
- increasing the sensitivity of tactile perception;
- expansion of vocabulary (if the child already knows how to speak) or stimulation of speech (if the child does not yet speak due to age or developmental delay);
- instilling perseverance, accuracy, and independence in the child during the work process.
Preparation of plasticineography classes in kindergarten
In kindergarten, the topics of lessons on non-traditional modeling techniques, integrating different areas of knowledge and types of art, are very diverse. In this regard, a methodologically competent selection of ideas is to find a topic that reflects the realities of the surrounding world and/or corresponds to the time of year or socially significant events. For example, creating crafts on the theme “Winter” in December-February, “Russian Flag” on the eve of Russian Flag Day on August 22 or before National Unity Day on November 4.
Holiday crafts can be homework
Approximate topics
To prepare lessons on plasticineography, the teacher draws up a work program, which includes a list of goals, tasks for each group, a lesson schedule, a description of teaching materials, as well as calendar and thematic planning. At the same time, classes are planned in the form of thematic blocks, that is, the topics of lessons from different educational areas overlap. So, before Mother’s Day, in a lesson on speech development, children learn poems about their mother, in a lesson on getting to know the outside world, they look at the history of this holiday, and using plasticine they make crafts related to treats.
In younger groups, children are just getting acquainted with plasticineography, so the topics involve making crafts with large elements and not too curved lines:
- "Drying";
- "Snowman";
- “We decorate clothes”;
- "Easter Egg";
- "Pie for Mom."
Examples of compiling topics for plasticineography classes for children 4–5 years old could be the following:
- "Vegetables on a plate";
- “Bugs in a flower bed”;
- "Mushrooms";
- "Sun in the clouds";
- "Rowan Twig";
- "Autumn tree";
- "Fish";
- "Christmas tree";
- "Christmas decorations";
- "Bullfinch";
- "Snow Woman Fashionista";
- "Teremok";
- "Peacock";
- "Jolly Rocket"
- “Gift for dad (grandfather)”;
- “Seven-flowered flower”;
- "White birch";
- "Space";
- "Starry Sky";
- "Dandelion".
In the senior group, the topics are complemented by classes devoted to the study of folk arts and crafts:
- "Matryoshka";
- "Gzhel"
- "The human body. Man in the Rain";
- "Painted plate".
In the preparatory group, the topics also include topics that involve increasing the complexity of the plasticineography technique:
- “Cat” (children train the skill of creating a transition from light to dark shades);
- “Clothes” (children develop clothing designs using different types of techniques - straight, contour);
- “Indoor plants” (on this topic children learn to create textured images);
- “My Family” (this topic is a complication of the previously studied topic “My Body” - now young creators learn to maintain proportions between the sizes of people of different ages);
- “Lily of the valley” (the guys continue to work in textured plasticine, combining bas-relief with counter-relief).
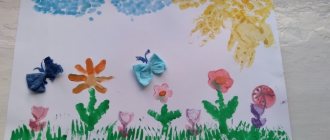
Photo gallery: samples of plasticineography works on various topics
In the preparatory group, mastering the textured type of plasticineography is conveniently carried out on the topic “Houseplants”. Painting “Gzhel” is usually done with contour plasticineography. The difficulty of making a painted plate for children lies in making clear lines. When making a nesting doll, children mix colors to obtain shades, for example, white and purple for obtaining lilac, and also learn to combine them To make “winter” crafts, snow, for example, on birches can be depicted using strokes of paint A boat using the mosaic technique can be made into a postcard for February 23 In the middle group, children begin to fantasize about the shape of the substrate, making it round , for example, Images of birds in the middle group are complicated by drawing the plumage. A complication of the task on the theme “Fish” consists of filling the background of the picture with plasticine. To make rowan berries more prominent, you can combine two shades of red. In the middle group, children master the execution of pointed elements of the picture, for example, grass in a composition with mushrooms In a craft on themes related to flowers, older preschool children practice the elements of creating counter-relief on pieces of paper. In the preparatory group, children apply decorations after the base is completely covered with plasticine. In the senior group, children master the topic “Human Body. Man in the Rain" based on the ideas about the proportions of the body structure acquired during modeling classes, making the little men not voluminous, but flat. In addition to maintaining body proportions, children 6-7 years old on the topic "My Family" learn to maintain proportions in clothes, for example, a small blouse Mom has a bigger shirt and dad has a bigger shirt. The theme in the second younger group, “Cake for Mom,” is duplicated in the middle group, and in the older group it can continue with the theme “Cake for a Friend,” in which the kids practice the smoothing technique. In the younger group, children work on the “Easter Egg” craft master contour plasticineography
Templates for making crafts using plasticine printing technique
Children acquire initial artistic skills in the non-traditional plasticine modeling technique by working with templates, which are used primarily for the direct form of creating plasticine drawings, but can also be used for more complex varieties. Thus, creating drawings with people in them is considered one of the most labor-intensive types of plasticineography.
Regular coloring books can also serve as templates for plasticine printing.
Photo gallery: templates for plasticine painting on the theme “Family”
A template depicting grandparents can be used for contour plasticineography. The pig template can also be used in the middle group, if small details are laid out in mosaics or simply colored with felt-tip pens. In a template depicting a mother with children, a chair, a dog, a book are laid out using direct plasticineography; the remaining details are painted or laid out with plasticine balls, flagella, made using a syringe without a needle. A family of runners is a complex drawing, since it contains many elements and small details that require a lot of time to complete, which means you can use the image either for a project or in a circle work
Photo gallery: templates for plasticine painting on the theme “Winter”
The template of such a Christmas tree is suitable for direct plasticine printing, and in older groups the drawing can be done with flagella. In the middle group, this template can be used like this: color the tree and make toys from plasticine balls; older preschoolers can do without coloring by combining direct and mosaic plasticine printing. Snowman template can be used for direct plasticineography in the first junior group. The Snow Maiden’s drawing is easy to perform, since it does not require the use of many colors of plasticine
Photo gallery: templates for plasticine painting on the theme “Pets”
The difficulty of making a sheep using the direct technique will be to get within the boundaries of the contour of the wool, in this sense it is more convenient to work with mosaic plasticine balls or contour flagella. Usually, a chicken is the first experience of plasticine in the younger group. In the drawing of a cockerel, you can practice the technique of mixing plasticine of different colors. To perform cows require drawing small details, so the task is suitable for older preschoolers who know different types of plasticineography
Goals and objectives
The goals and objectives of plasticineography classes vary depending on the age of the child and the characteristics of their development.
At the age of 2-3 years
Plasticineography for children 2-3 years old should be aimed at developing fine motor skills. This will help the child not only develop physically correctly, but also stimulate his speech skills.
Adults, when asking children to create pictures from plasticine, should not just give a task, but use various methods to awaken the child’s creative abilities and his interest in the work process (for example, come up with a fairy tale, including in the plot an object that the child will then sculpt.
It could be a flower, an ax or a hat - something consisting of a minimum number of parts and not requiring a lot of time to create).
Since children at an early age are not able to independently come up with a task for plasticineography, and quickly lose interest in the work process if they understand that they are left to their own devices, an adult should set a clear task for them at the beginning of the lesson.
Plasticineography for children 2-3 years old should be easy to perform
Control and assistance from an older friend should be aimed at developing the child’s accuracy, perseverance and concentration on the sequence of actions.
Using plasticineography, you can also teach a child to navigate on paper , each time describing the location of the next part of the object being created. For example, it is important for children 2-3 years old to say where the left side is and where the right is, to prompt and guide their hands to the desired edge of the working surface.
When the young creator begins to better navigate the horizontal plane, the adult should begin to give instructions verbally, giving the child the opportunity to independently determine the place where the next detail of the final image needs to be placed.
4-5-6 years
Plasticineography for children 4-5-6 years old should be aimed at improving skills in working with plasticine. At this age, the younger generation begins to develop an interest in visual arts.
By the age of 6, tasks on plasticine applications can become more complicated.
If parents support their child in a timely manner and take action to unlock his creative potential, they will not only be able to strengthen the psycho-emotional connection with their baby, becoming his support and support, but will also give him the opportunity to try himself in art.
Modeling from plasticine for children 4–6 years old is also useful because it effectively develops the eye and improves hand coordination. This not only makes the child more physically developed, but also has a beneficial effect on the formation of neural connections in his brain.
At this age, children prefer to work collectively, which means that plasticineography for them in this case will be an opportunity to improve their communication skills with other members of society - it will teach them to explain their intentions, prove they are right, or correctly express disagreement.
7-8 years
Plasticineography for children 7-8 years old, its main goal involves instilling in younger schoolchildren new sculpting skills - pressing, smearing, rolling, squeezing out of syringes.
Already possessing the basic ability to create images from plasticine, young creators will be captivated by the process, discovering new facets of their usual form of creativity.
This will help them distract from negative thoughts, get rid of stress and release emotions associated with joining a new team at school, as well as accepting the great responsibility and demands placed on them by teachers and parents.
At the age of 7-8 years, children prefer to work individually. Creating pictures from plasticine will be an effective method for them to develop their imagination, as well as a vivid way of self-expression.
It is not necessary for younger schoolchildren to be given a clear plan of action; it is enough to simply limit them to a theme, for example, “Golden Autumn,” allowing them to independently come up with an idea and the main stages for their further work.
Preparing a plasticine drawing project
To gain a deeper understanding of a particular topic and expand children’s understanding of the plasticine technique, the project method is used in teaching practice. As a rule, in the practice of preschool educational institutions, plasticineography projects are short-term, that is, they require a short period of time for preparation (2-3 days). Project development includes several stages of preparation.
- Formulation of goals and objectives. The goal of the design methodology in plasticineography is the formation of a creative approach to solving educational problems. The tasks of preparing and completing the project are as follows: practicing the implementation of elements in one type of technique or another, learning the skills to create artistic images of objects in the world around, training the ability to work in a limited space, the basics of crafts, developing aesthetic taste, perseverance and the ability to work in a team.
- Drawing up a project execution plan. This stage includes: preparing the necessary materials and equipment, motivating children to complete the task. The event to which the project is timed is also important (for example, the onset of winter, holidays).
- Project implementation.
- Presentations of the results of project activities. This is a kind of report that can be presented in the form of a story (defense) of a craft, an exhibition of finished works in a group or assembly hall.
An example of a description of the project “Gifts of Autumn”
Let's look at a sample of drawing up a project on the topic “Gifts of Autumn” in a preparatory group for school.
- The goal is to create crafts for the annual Autumn holiday at the preschool educational institution. Objectives of the work: strengthening skills in working with plasticine, practice working in a group, developing the ability to display the world around us in elements made from plasticine.
- Children work in groups of 3 and distribute responsibilities by drawing lots (for example, playing “Rock, Paper, Scissors”).
If it is not possible to distribute responsibilities in this way, the teacher himself appoints those responsible for one or another area of work. One makes mushrooms using the direct technique, the second makes wood using the straight and mosaic techniques, the third makes grass and a hedgehog using the contour technique (in our case, the craft was supplemented with grass and the sky in the form of an applique made from pieces of paper). The application can be replaced with mosaic plasticineography - The guys are working on the project.
- Presentation of results in the assembly hall: description of works, reading of poems on the topic accompanied by music (for example, “Autumn” from the “Seasons” cycles of Vivaldi and/or Tchaikovsky).
Photo gallery: ideas for a project on the theme “Autumn Gifts”
To complete a project task, you can also use additional materials, for example, cereal. The finer the details and the more varied the shades of colors, the more time it takes to complete the project. Middle-aged children can start with direct plasticine projects
General recommendations
Correctly organizing plasticineography classes for children can only be done taking into account the general recommendations:
- The total time for modeling from plasticine should be no more than 30 minutes. (otherwise the child’s attention will be distracted, and productivity will accordingly decrease);
- It is necessary to create pictures from plasticine in a well-lit place, a comfortable environment for the child, excluding the presence of distracting objects nearby, for example, a smartphone, computer, tablet, TV or toys;
- in classes with children 7-8 years old, it is recommended to use thick cardboard, since plain paper will be deformed when using the techniques of smearing, rolling and smoothing plasticine;
- It is recommended to cover the working surface with transparent tape before starting modeling (this will eliminate the possibility of greasy stains and streaks from plasticine);
- In order for the final image to retain its original appearance for as long as possible, it is recommended to cover it with colorless varnish in 2-3 layers;
- During the creative process, not only the basic working tools for plasticine printing, but also wet wipes, a knife or scissors, as well as sheets of thick paper (you can use it to correct the plasticine image) should be within reach of the child.
How to make pizza from plasticine?
Take everything you need, this is:
- sheet of cardboard;
- plasticine of the desired colors;
- syringe without needle;
- stacks for modeling.
Have your child draw a circle on a piece of cardboard. These will be the outlines of the future pizza. Now using red-brown color he will make the background. This is ketchup. You can also use dark red color for it. Make the sides for the pizza, the base is ready.
Then you need to make mushrooms from white plasticine. To do this, the child will tear off two pieces from the mass, turn them into two ovals, then give them the desired shape and flatten them. Each mushroom consists of a cap and a stem.
The next thing to decorate the pizza is sausage. To do this, you first need to fashion circles from pink plasticine, then make ropes from it and frame these blanks with them. The child will make circles of different sizes from white plasticine and glue them onto this improvised sausage.
The next thing that decorates this work using the plasticine technique is greenery. Make leaves from plasticine of the appropriate color, using a stack, add veins to them.
For the next part of the work, a piece from Lego Duplo will be useful; with it you will make a hole in the cheese. And the child will create it from yellow plasticine, which needs to be rolled out into a layer or will do it with the help of his fingers.
This tool will also help to make dark olives, which are made from black plasticine, perfectly smooth.
The photo clearly demonstrates how such plasticineography is created. Let the child make ropes from red plasticine, then roll them into snakes and glue these streams of ketchup in place. As you can see, the olives can be cut out from the inside to create holes.
But you can create not only food for dolls, but also to develop a sense of beauty. To do this, see how to make various paintings using this interesting technique. It will be enough to buy wax plasticine so that you can create such masterpieces.
To ensure the most longevity of the painting, when it is ready, coat both sides with varnish and let it dry.
Materials for work
Proper organization of a lesson in plasticineography requires the presence of a basic set of working tools:
- Thick cardboard or large sheet of paper.
Materials and tools for working with palstiline
Depending on the age and practical skills of a particular child or group of children, on the working surface you can draw the outline of an object, the inside of which will be filled by the child.
- Set of multi-colored plasticine. It is not recommended to provide a child with more than 7-8 colors of plasticine, as this may cause distraction. The need to obtain a shade that is not in the presented set will stimulate the imagination of the young creator, as well as encourage him to experiment by mixing the viscous mass.
- Hand wipes and antiseptic. Necessary for removing plasticine residues from the skin of your hands.
- Stacks. Special small plastic knives designed for working with plasticine.
- Modeling board. On a separate wooden surface, the child will create a specific detail of the object by rolling, cutting, smearing plasticine, which will subsequently be transferred to cardboard or paper used as a base.
- Original image. If a child is given a task to create a specific picture, he should be provided with a final image, demonstrating what he should get as a result of his creative activity.
Methods of drawing with plasticine and necessary materials
The plasticine for work needs to be selected soft and pliable enough so that it is easy for the child to change its shape, for example, wax. Any other safe modeling mass will do. There doesn't have to be a lot of colors - the important thing is that they are bright and mix well. It is advisable to have white and black in the palette so that the baby understands the principle of changing color saturation.
To get started, you will also need the following materials and tools:
- board for rolling out plasticine;
- stencils, templates or ready-made drawings on cardboard, plastic, glass;
- stacks, toothpicks, rolling pins, molds, stamps;
- decorations - beads, cereals, painted pasta, small buttons, rhinestones, sequins, shells;
- a syringe for squeezing out sausages (useful for advanced plasticine artists to create large-scale paintings);
- wide tape for gluing the surface of the drawing on cardboard before applying plasticine, to make it more convenient to correct flaws;
- baby hand wipes.
It is very convenient to use disposable plastic plates as a base. The plasticine adheres well to them, and at the same time the drawing is easy to adjust. The round shape looks neat, the work takes on a finished look.
The complexity of the technique used should increase in stages depending on the age and abilities of the child:
- For novice artists, a suitable option is to smear the sculpting mixture with your fingers within the designated contour.
- Children over 5 years old who can roll small balls or sausages from plasticine will be able to make three-dimensional drawings.
Planar modeling for the little ones
It is best to start getting acquainted with the basics of plasticineography by drawing with strokes. Invite your child to randomly smear several small multi-colored pieces of well-mashed plasticine on a dense surface (cardboard or plastic board). After this, you can begin to “color” simple drawings of large geometric shapes - the sun, a tree, a flower, animal figures. Typically, children use the index finger of their dominant hand to work, but it is useful to use the other hand, the thumbs. Such exercises develop synchronization of the work of both hemispheres of the brain.
When the child has mastered the smearing technique well, offer to apply 2-3 layers of plasticine of any color to the work surface, and then move it with pressure with your fingers or a stick. Depending on the pressure applied, different shades will begin to appear on the palette - the effect will amaze the baby’s imagination.
Mosaic made of plasticine balls
This technique is available to children in the middle or even junior group of kindergarten. As soon as the baby has learned to roll small balls of plasticine, you can invite him to fill the finished outline with multi-colored lumps, lightly pressing them onto the base. Such activities perfectly develop fine motor skills and imagination. Using this technique, you can depict anything, and any errors can be easily corrected by simply moving the ball to another place.
This property can be used. Try making a plasticine cartoon with your child based on a simple picture, moving the lumps so that it “moves.” Even a camera on a mobile phone is suitable for filming, and the baby will be delighted!
Plasticine sausages and spirals
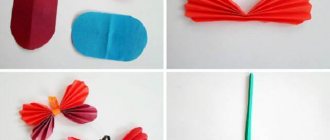
In the older group, children can already make simple compositions from plasticine rolled into a thin sausage. Here they will need even more accuracy and patience - these are the qualities that work in this technique develops. By combining stripes of different shades, children can depict space with stars and comets, and by placing a layer of plasticine snow on the green branches of fir trees - real winter. This technique successfully produces autumn trees, the underwater world, and landscapes. The complexity of the work can be increased by placing objects on top of each other, giving the picture depth.
Plasticine flagella, curled into spirals, look like flowers. From such blanks you can assemble a whole bouquet, or you can make a curly birch tree or a fluffy cat. The palette of designs will become richer, and the works themselves will become more beautiful, if you roll up plasticine of similar shades without mixing them to a uniform color. To get an elegant candy, you need to carefully twist two thin flagella (preferably made with a syringe) of bright colors together, then roll the resulting strip into a flat spiral or cut into short sticks with a hook at the end.
Place 1-2 blue, green and pink stripes among the strips of white plasticine, then apply picturesque zigzags across them with a spatula stack. The colors will mix slightly and you will get the northern lights.
Drawing with scratches and dents
Even a 3-year-old child can scratch patterns on a surface covered with plasticine using a stack or any other suitable stick. The result will be a kind of grattography. Older children use similar tools to detail the drawing, giving it additional volume and realism. Small scratches will help to depict fluffy spruce branches or a luxurious fox tail; a sharp stick is convenient for drawing scales on multi-colored fish.
Kids can squeeze out ready-made figures on smeared plasticine using special molds. Older preschoolers are interested in creating ornaments using the same technique. In this case, solid silhouettes are replaced with small curly stamps, which can be decorative buttons or interestingly shaped pasta. A tool with a tip in the form of a hemisphere will help you make indentations for the eyes of animals or fairy-tale characters: with such a device, the quality of the picture will immediately improve.
Buy your child a set of various stacks. A large selection of tips - sharp, flat, round, jagged - will spur the imagination of the young artist and inspire him to search for new images.
Plasticineography is an excellent option for conducting creative activities with both children and school-aged children. Using this technique, children get original cards for mom on March 8 or dad for February 23, New Year's and competition crafts. There are a lot of different techniques and tricks in the execution of plasticine paintings, it all depends on the imagination and experience of the young artist.
Plasticineography methods
Methods of plasticineography in the creativity of a particular child or group of children should be selected taking into account the skills of young creators, as well as their abilities and developmental characteristics.
The most commonly used of them are:
- Strokes. A small amount of plasticine is placed on the pad of the index finger or a special plastic spatula, after which it is applied to the work surface in the right place with sharp, randomly directed movements.
- Plasticine balls. Typically used when placing accents on a flat image (for example, the middle of a flower) or as basic shapes to fill the inner surface of an object schematically depicted on the working plane.
- Flattening the rolled balls. It is not recommended to use a lot of force when flattening the balls. Otherwise, the resulting figure will be deformed, thus losing its clear rounded shape.
- Smearing on the surface. This technique is used to create a background or fill the inside of a figure with colored material.
- Scratching patterns on plasticine. Patterns are created on a flattened piece of plasticine using a special plastic knife or tools with already formed threads.
- Rolling plasticine sausages. You can roll sausages both for placing them on the final image, and for the purpose of using them as a blank.
- Squeezing plasticine out of a syringe. For extrusion, it is recommended to use a special syringe, which allows you not only to easily extrude thin strips of plasticine, but also to remove the remaining working material from the main body of the tool.
Plasticineography for children on the theme “Spring”
Prepare everything you need, then it’s time to get down to business. It is better to first mark with a simple pencil where everything will be located. Then you show your child how to knead the plasticine and make it into something like melted snowdrifts. And from black he will create emerging islands of earth.
Let it be seen how the melt water flows. The baby will convey this using a strip of blue plasticine. From the same mass he will create clouds. Then you need to tear off several pieces from the white plasticine and create a semblance of buds from them. And the blossoming petals consist of three such blanks. All that remains is to make a sun and attach it to the top of the drawing. The result was a wonderful work using the plasticine technique.
Read also: What is a replica sneaker
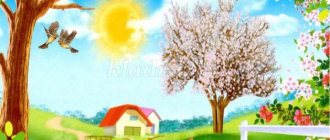
If you and the children liked plasticine painting, spring will be captured in a very interesting way. Let the child create a three-dimensional picture in which it will be seen that buds are blooming and starlings are flying in. People build birdhouses for them. The sun shines brightly. Don't forget to tell your children about these signs of spring. Kids should know about this.
To do this kind of work, you first need to take a sheet of blue cardboard or paint it white so that it becomes this tone. But you can create a background using blue plasticine. Then, using flagella, the child will make an edging for the trunk and branches of the birch. He will cover the inside of the tree itself with white modeling material. You need to put a few strokes on it so that you can see that it is birch. Using green plasticine, the child will depict blossoming leaves.
Using black wax plasticine, children will make starlings, and their beaks will be made from red. The yellow sun is round, and its rays need to be made from plasticine, which is rolled between the palms. All that remains is to attach the birdhouse, and the painting, made using the plastinography technique, called “Spring,” is ready. The following work was done in mixed media. But mostly mosaic is used here.
Flowers
The easiest way to make a flower using plasticine printing:
- In the center of a sheet of paper or thick cardboard used, draw the outlines of an open flower (middle and petals).
- Using a small amount of yellow plasticine, rubbed over the middle of the flower, paint the inside area of the bud.
- Grind the red plasticine evenly, covering the inside of the drawn petals with it, without going beyond the middle.
- Twist several sausages from blue plasticine, and then use them to mark the boundaries of the flower. As an alternative to sculpting additional elements to create borders, the simplest rubbing of blue plasticine along the contour of the image using a finger or a special spatula is allowed.
- Cover the image with 2 layers of clear varnish, then let it harden on its own.
- Draw several thin lines from the middle of the flower by rubbing a small amount of plasticine, directing them to different petals.
Space
The following option for creating an image of space using plasticine is suitable for children of any age. For children under 3-4 years old, it will become a full-fledged craft, while for older children such a picture will become a background image, implying further refinement of the drawing with details.
Step by step execution:
- Using blue and deep blue plasticine, make multiple strokes over the entire area of the sheet of paper being used so that they look like a single whole.
- Roll small balls from white plasticine. Place them randomly on a blue-blue background, then slightly flatten them with your finger (celestial bodies).
Planar modeling
You should start introducing your child to plasticineography by learning the skills of drawing with longitudinal strokes. Show your child how to rub several multi-colored slices of crushed plasticine over the surface. Then start “coloring” geometric shapes in the form of the sun, a large flower, a pyramidal poplar, and animals. Children often use only their index finger when working, but try to get them to use both limbs. Such exercises will help improve the synchronization of the brain hemispheres.
Animals
To create an image of an animal using plasticine, children will need pre-prepared templates. The inner surface of the drawn animal is filled with balls of plasticine (the color of the working material corresponds to the shade of the animal’s skin), placed closely, or painted over by evenly rubbing it or creating numerous strokes.
Classes on creating images for children from 2 to 8 years old using plasticine should be regularly conducted under the supervision of parents or teachers of preschool and school institutions.
Plasticineography helps representatives of the younger generation to reveal their creative potential, develop taste in art, improve physical development, and at the same time normalize the state of their own nervous system, thereby minimizing the occurrence of depressive mood.
Methods and techniques for working in non-traditional modeling techniques
When getting acquainted with the technique of plasticineography, the teacher uses the following methods:
- clarity (the teacher shows the kids samples of finished paintings, as well as diagrams for the step-by-step implementation of crafts),
- verbal methods of work (in a story or conversation, an adult explains the procedure for performing one or another technique of plasticineography)
- practical methods (children practice techniques of various plasticineography techniques, experiment with a combination of techniques and techniques, and also come up with game actions with ready-made crafts, for example, in the preparatory group, children make the painting “Clown” using stained glass techniques, and then tell what this character’s name is, where does it work and what numbers does it show).
In older groups, crafts using non-traditional plasticine modeling techniques can be the basis for writing descriptions or even entire stories
In a preschool educational institution (DOU), mastering plasticineography involves using the same techniques for working with plasticine that are mastered in the traditional modeling technique:
- rolling out “sausages” - a piece of plasticine is rolled out between the palms,
- rolling “balls” - a shapeless piece of plasticine is formed into a ball by circular movements of the palms,
- plucking - pieces of different sizes are plucked from the “sausage”,
- pinching - pieces are connected into one element,
- pulling - using your fingertips to give the plasticine part a pointed shape,
- flattening into “pancakes” - the plasticine part is given the shape of a flat cake.
In addition, kids get acquainted with the techniques used specifically in the plasticineography technique:
- smearing, when plasticine is spread over the finished surface with your fingertips,
- smearing or pressing - connecting parts to obtain a solid plot,
- sticking - applying plasticine elements to a template,
- smoothing - a technique when a layer of plasticine is smoothed over the surface with fingers soaked in water to prepare the base,
- by mixing multi-colored bars of plasticine to obtain new shades - in the younger group, children knead small pieces of plasticine into a bar of the same color, and in the middle and older groups they learn to carefully stick pieces of different shades on one another, forming transitions between them.
Mastering the techniques of working with plasticine for crafts using traditional and non-traditional techniques goes in parallel.
Table: comparative table of the difficulty level of doing crafts with children of different ages
| Children's age | What plasticineography techniques are mastered? | What form does the work take? | How to do the craft |
| First youngest |
| Separately with each baby | Children repeat after the teacher, who lays out the details one by one. |
| Second youngest |
|
| The kids repeat the drawing, relying on the finished sample, which was created before the eyes of the kids. |
| Average |
|
|
|
| Older |
|
|
|
| Preparatory |
|
Photo gallery: examples of work on the topic “Transport” in different age groups
In the second junior group, children work in direct plasticine, and from the second semester they master the contour form
In the middle group, children learn to combine more than two contrasting colors
In the older group, children learn to fill the entire space of the drawing with plasticine.
In the preparatory group, children are actively using additional materials to make crafts