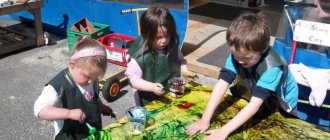
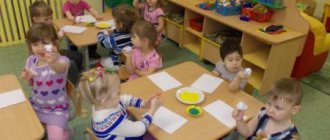
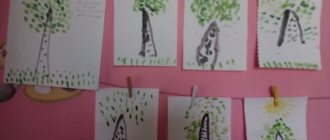
Drawing lesson in the middle group on the theme of Spring
How to draw a spring landscape
Master class on drawing using unconventional techniques, drawing with paper balls: “Spring landscape”
If you see in a painting a river, or a spruce and white frost, or a garden and clouds, or a snowy plain, or a field and a hut, the painting is sure to be called a landscape.
The master class is addressed to educators and parents and is recommended for working with children 4-5 years old.
Goal: to familiarize children with non-traditional drawing techniques, drawing with paper lumps. Objectives: to introduce children to a new visual material - gouache, to consolidate the concept of landscape composition, to develop the ability to combine drawing techniques in the execution of work, to consolidate knowledge and skills in drawing from memory and by imagining naked trees, to find a simple composition, achieving linear expressiveness in working with new material, develop creative activity, the desire to draw, create, cultivate a love for native nature, develop the articulatory apparatus and fine motor skills of the hands. We will draw a spring landscape. “All the snowstorms have died down, And the frosts don’t crackle. — Drops dripped from the roofs, — And icicles hung in a row. - More fun and warmer - Our days with you have become. - In our garden in the alleys - The thawed patches are already visible. - A tit is shading loudly - Near our window... - Soon there will be a knock on our door - Real spring! 1. Materials for work: sheet A3 or A4, paper lumps, 2 strips of cardboard, 2-3 cotton swabs, hand napkin, 2 plates for clean and used lumps, diluted gouache (blue, cyan, yellow, pink, brown. Gouache black, white, green can be supplied in jars.
Finger gymnastics will help you make paper balls with your children. We squeeze a sheet of paper And unclench our palms We try to roll it Together into a ball We won’t let him get bored We’ll draw with it. 2. Take a paper ball and dip it with blue gouache, draw the upper border of the sky, blotting the sheet.
3. Apply blue color to another lump and blot the entire sheet.
4. Dip the next lump in pink and draw a beautiful pink dawn.
So we have drawn the background of the picture, now we need to let it dry a little, we can have a physical session with the guys. If a blue river Awoke from sleep (Hands up, stretched out to the sides.) And runs through the fields, sparkling, (Jumping on the spot.) That means spring has come to us. (Clap your hands.) If the snow has melted everywhere, And the grass in the forest is visible, (Squats.) And a flock of birds sings - That means spring has come to us. (Clap your hands.) If the sun turns our cheeks red, (Tilts the head to the left and right shoulders.) It will become even more pleasant for us - That means spring has come to us. (Clap your hands.) 5. Now cardboard strips will help us in our work; apply brown color to the strip and draw a tree trunk by touching it to the leaf.
6. Using the edge of a cardboard strip, draw tree branches.
7. Apply white gouache to a cotton swab and draw flowers on the tree branches.
8. Dip the tip of another cotton swab into green gouache and draw green leaves.
9. Using a clean cardboard strip, draw thawed patches near the tree.
10. We dip the paper ball in yellow and in the corner of the picture the rising sun shines, its rays spread across the clearing.
11. My children also drew flowers on the thawed patches.
This is a simple but very interesting technique that children really like. I wish you creative success, friends!
We recommend watching:
Unconventional drawing technique pointillism
Drawing using the Blotography technique in the middle group of kindergarten. Non-traditional drawing. Middle group Drawing lesson in kindergarten on March 8
Similar articles:
Fine arts lesson for the senior group
Monotype in kindergarten
Non-traditional drawing techniques in preschool educational institutions
Non-traditional drawing technique in kindergarten. Passepartout
Wax painting in kindergarten
Long-term planning for unconventional drawing
In order to distribute in advance the order of mastering non-traditional drawing techniques according to the topics of the educational process, the teacher draws up a long-term plan for this artistic and aesthetic direction. As a rule, two lessons per month are allocated to non-traditional techniques and two to traditional ones. Regardless of the technique, after the lesson there is an exhibition of children's work.
You can see an example of drawing up a long-term plan for non-traditional drawing as part of the educational process here. In addition, non-traditional drawing can be studied as part of a circle or organized as a project assignment.
Creative activities teach kids to be proud of the results of their work
Children are tireless seekers of new experiences and knowledge. The task of adults is to find the most suitable ways to make children believe in their strength and uniqueness. Fine arts, in particular unconventional drawing, provide invaluable assistance in this regard. After all, without the usual brushes and pencils, the child feels freer and can fully express his imagination.
On the topic: methodological developments, presentations and notes
-Learn to draw a portrait, achieve expressiveness through mood, small details, hair coloring and length. -Continue to learn to examine and analyze your own: eyebrows, eyes, (color), nose, mouth.
Summary of a drawing lesson on the topic “Let's paint a picture with a rainbow” for children of the senior group using modern pedagogical health-saving technology. (using multi.
Notes on drawing in the senior group “Draw a cat that would surprise a mouse.”
Summary of drawing nodes in the senior group “Draw an autumn forest for Lesovich.”
Goal: depicting spring using non-traditional techniques Objectives: Educational: Teach children to convey impressions of spring in drawings, improve children’s skills in the Ott technique.
Source
“Draw a picture about spring.” Summary of GCD on drawing for children of the middle group
Ulyana Khamadeeva
“Draw a picture about spring.” Summary of GCD on drawing for children of the middle group
Abstract of GCD for children of the middle group in drawing
Topic: “ Draw a picture about spring ”
Goal: Learn to convey impressions of spring .
Tasks: Continue to teach children drawing methods in their works ( painting with a poke , crumpled paper)
;
develop the ability to create plot compositions. Practice drawing with paints .
Form the need for observation for the purpose of subsequent imaging. Foster a humane attitude towards nature. Materials: album sheets, brushes, watercolor paints, jars of water, napkins, cotton swabs, sheets of paper, saucer for used paper. Visual demonstration material ( pictures about spring )
.
GCD move
I brought the first honey.
Who's to say, who knows
when does this happen? ( spring )
.
- People , animals, and birds love and wait for spring. Forgive every twig in the forest, every blade of grass, forgive her caresses. After all, our winter is harsh, frosty and long. Everyone already wants warmth.
— Guys, I invite you on a journey to visit Spring , admire the blooming flowers and green trees.
To the cheerful music " Spring is Red "
Children follow the teacher in
a group and come to a carpet on which white sheets are laid out.
- So we came to the spring clearing, but something happened, where are the trees, where are the flowers? Everything white is white. Look, sad sun, let's find out what happened.
The teacher picks up the butterfly and reads the message on the back.
"Hello guys! The beautiful Spring had trouble in her magical land. An Evil Blizzard flew into a magical clearing, covered it with snow, and froze all the flowers. The snowdrifts are so deep that my rays cannot penetrate. And Spring-Red far, far away. Help me and Vesna , guys, melt the snow.”
Preview:
Summary of a drawing lesson in the middle group
“Draw a picture about spring”
Goal: To teach children to convey impressions of spring in drawings, the development of creative abilities, fantasy, and imagination.
Expand children's understanding of seasonal changes in nature.
Practice the ability to draw a tree, bushes, grass, and add leaves, using the method of “dipping” a brush to a sheet of paper.
Strengthen the skills and techniques of working with a brush (hold the brush correctly, pick up a little paint, remove excess paint on the edge of the jar).
Develop visual skills and abilities. Be able to place several images on a sheet. Depict foliage and grass with strokes of paint, and model picturesque landscape compositions from them. Strengthen the ability to draw independently using the “dip-on” method.
Develop imagination and perception of the surrounding world, cognitive abilities. Orientation in space, sense of color, rhythm. Development of eye-hand coordination and hand control
Instill accuracy when drawing. Form an emotionally positive attitude towards the drawing process itself. Induce a feeling of joy from bright, beautiful drawings.
Preliminary work: conversation about spring changes in nature, introducing children to the technique of drawing using the poke method, reading E. Shima’s story “What does spring smell like?”, looking at reproductions of paintings by I.I. Levitan “March”, “Big Water”, By the Stream”, observations on a walk.
Integration of educational areas: “Reading”, “Cognition”,
Pedagogical technology: “Development of children’s speech through constructive and visual activities.”
1. Introductory part.
What can you see in the forest? Collective story based on the mnemonic table “Spring in the Forest.”
The leaves are growing and growing.
Wild animals moult -
Winter fur coats are changed.
Babies were born in the spring:
(Children answer and sit on their chairs).
You just need to draw the sun, and the first leaves and grass on the bushes and trees. Remind and show children how to hold a brush correctly: just like a pencil, with three fingers, but above the metal part of the brush. Perform the exercise - warm-up with a brush, while the hand should be on the elbow.

