Nod move:
Introductory part. Organizing time.
Educator. Guys, we received a letter today.
"Hello guys! Little gnomes from a fairyland are writing to you. We're in trouble.
The evil witch turned our furniture and household appliances into sand. But she has bewitched the inhabitants of our country, and no one remembers what kind of furniture and household appliances . We sleep on the floor, we also eat on the floor, and our plates are also on the floor. Help us".
Educator. Well, guys, let's help the little gnomes? Children's answers
What kind of furniture do you know ? Children's answers
Educator. Guys, tell me, why do we need furniture ? (chair, table, etc.)
Children's answers
Educator. the furniture has ? (Show corresponding pictures)
The table has a tabletop and legs. A chair has legs, a seat, a back.
The sofa has a soft long back and seat, armrests, legs.
The cabinet has walls, shelves, doors, legs. The chest of drawers has walls, drawers, and doors.
Physical education lesson. Playing with a ball: “Which one? Which? Which? Which?"
Educator. I will name the furniture and ask you a question , and you will answer me.
For example. What kind of chair? Wooden, comfortable, hard, tall. Etc.
Educator. Well, guys, you know everything about furniture . How can we help the little gnomes?
Educator. Yes guys, that's right. We can draw furniture for them and send them in a hot air balloon to a magical land.
Educator. Guys, close your eyes and imagine little gnomes. Think about what kind of furniture you will paint . Now let’s get to work, because the gnomes are waiting for your help. AND
try to draw so that the furniture is painted in joyful, bright colors, so that the gnomes are no longer sad. Independent work of children.
Educator. Guys, you are great! The gnomes will be very happy.
Summary of a correctional and developmental lesson for children with visual impairments on the topic “Autumn” (senior group) Purpose: To expand children’s understanding of the seasons (autumn). Objectives: Educational: Remember the signs of autumn. Develop children's attention and memory. GCD summary for drawing with a fork “Asters” (senior group) GCD summary for non-traditional drawing using the technique of drawing with a fork “Asters” in the senior speech therapy group Prepared and conducted by: teacher. Notes on drawing in an unconventional technique “Apple tree with golden apples” (senior group) Drawing “Apple tree with golden apples”. Integration of educational areas: “Speech development”, “Social communicative development”, “Cognitive. Notes on drawing "Cosmic distances". Senior group Goal: To consolidate and expand children's knowledge about space. Objectives: To clarify children’s knowledge about space: planets of the solar system, modern aircraft.
Source
How to draw a room with a pencil step by step for beginners easily
The most important rule that must be used when working with the construction of a room is perspective. in order to study perspective in a drawing, let’s examine the concept.
Perspective is an image of space in which objects are distorted as they move away from the front plan pictures. A vivid example of perspective - this is reducing width rail at least from from distance to horizon line.
There are several types of perspectives. Linear perspective reduces the width and size of objects as moving away towards the horizon line.
Aerial perspective - changes in saturation and brightness of colors in the background. Let's look at the basic concepts , which we will use:
Line horizon -conditional line, which is at level our eyes. Vanishing point - point, which is located on the line of the horizon, and in which all lines of objects are directed.
When linear perspective appears perspective abbreviations anddistortions.Using linear andaerial perspectives make the image realistic, add spatiality anddepth.
Learn to draw a room with a pencil
Let's draw a room with an end image. For the work we will need paper in A4 format, simple pencil, eraser.
On the sheet, we draw a line of the horizon. It’s better to draw all the lines by hand, in this way You improve thequality of future works. We designate two vanishing points. The first vanishing point will be located in the center of the horizon line, the second vanishing point is conditional, and may not even appear in your image.
They appear because we draw three-dimensional space.
Let's draw a wall that we see in front of us. The larger part of the rectangle should be located below the line horizon. From the central vanishing point through corners of the rectangle draw lines to edges of the paper - these guides walls.
We erase the lines of the construction, depict a fireplace ledge in the center of the rectangle, and begin to outline the main objects. premises.
We draw the door and the windows. We draw lines from the vanishing points, they indicate the perspective shortening of the door and windows. We mark with ovals lamps.
We continue to build objects of the interior - we finish drawing the base of the sofa, the recess under the fireplace, the windows and the door. We don’t forget that all objects we are voluminous, therefore they have their recesses, which need also to be depicted.
We continue to draw lines from the vanishing point to the vertical objects that we have already designated. We finish building windows, plinths, sofa. Drawing logs in fireplace.
Using round and oval shapes we are working on a future coffee table, we use semicircular lines to designate all three-dimensional items. At this stage we’ll work with details of items, which already are on our image.
Let's move on to one more element of the picture - the chair. In order to draw the chair correctly but, we will need additional vanishing points. From them we draw lines. They will define one plane chairs.
Preview:
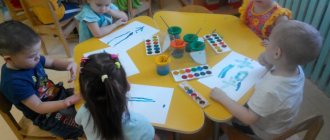
Summary of GCD in the preparatory group. Artistic and aesthetic development (drawing) “Our apartment.”
Goal: Clarification and expansion of children's ideas about furniture, its functions and properties, the quality of the materials from which it is made, its diversity (in shape, size, color and purpose).
Developmental: Develop the ability to identify and name some parts of furniture.
Teach children to choose their own materials and method of drawing furniture. Develop imagination, creativity, visual efforts and skills.
Learn to convey shape and relative size in a drawing.
Continue to learn how to navigate on a piece of paper.
Develop gross and fine motor skills.
Educational: To cultivate a caring attitude towards household items.
Educator: Children, do you hear someone knocking on our door? I'll take a look now.
One body and two backs, On one of the backs there is a Feather for Irinka. (Bed)
I'm comfortable, very soft,
It's not difficult for you to guess.
Grandmothers and grandchildren love to sit and lie down. (Sofa)
There is a back, but it never lies. Has four legs, but doesn't walk. He himself always stands, but tells others to sit. (Chair)
People sit on it, but not a chair. With armrests, but not a sofa. With pillows, but no bed. (Armchair)
He has a big back, and on it he allows you to write, and draw, and sculpt, and cut. (Table)
- Guys, how can you call all these objects in one word?
That's right, furniture. Why do we need furniture?
Children's answers. Now get your fingers ready, we’ll play and remember why we need furniture.
Finger game: "Furniture"
One, two, three, four, five (we clench our fingers into a fist)
We begin to count (we unclench)
There is a lot of furniture in the apartment (we clench and unclench our fists)
We'll hang the shirt in the closet (we clench our fingers into a fist one by one)
And we’ll put a cup in the cupboard. To rest our legs, let’s sit on a chair for a while,
And when we were fast asleep, we lay on the bed. And then the cat and I sat at the table.
They drank tea and jam together (claps). There is a lot of furniture in the apartment.
(Wood, fabric, foam rubber, iron fastenings, plastics, glass).
If the furniture is made of wood, what kind is it? (Children's answers) Made of plastic? Made of iron? From glass?
They make a lot of different furniture, from a variety of materials. You won’t immediately understand which one to choose: Each will be good in its own way! Now we will rest and warm up.
Physical school
Here is Kiryushkina’s crib, (spread your arms to the sides)
So that Kiryushka sleeps sweetly, (sit down, palms under the cheek)
So that in a dream he grows up, (rise slowly)
So that he becomes big as soon as possible (stand on your toes, stretch your arms up)
Guys, where can I buy furniture? Children's answers.
In stores, furniture is most often sold disassembled. I suggest collecting it.
Game “Cut Pictures” (children collect cut pictures and name what they got).
Educator: Guys, you have your own room. There is furniture there. What else would you like to have in terms of furniture? Now let’s think about it, draw it, and show it to your dads and moms in the evening. And they will know what to buy for your room.
Independent work of children.
Educator: You did great. You are all great fellows!
How to draw a room with furniture with a pencil step by step?
What does it cost us to build a house? Let's draw - we'll live. This couplet always makes me laugh. And many children ask their parents how to draw a room with furniture with a pencil step by step. Girls especially love to play with paper dolls and houses. You can draw a whole house for your child. Let's learn the basics of fine art.
Information on how to draw a room with furniture for children will be of interest, first of all, to parents. You will then be able to draw the interior of your apartment and bring to life the most daring ideas and design solutions. Let your desires be realized first on paper and then in reality.
Required materials and tools:
- set of pencils;
- eraser;
- White paper;
- ruler.
Step-by-step description of drawing:
- What does the room look like in the picture? First you need to draw a plane with walls.
- Using a ruler, draw a cube. You can use a stencil.
- Now carefully erase the foreground lines, leaving only the two back sides. As you can see, we have the walls of the room.
- On the right wall of the room we draw a square window. We draw two intersecting lines that will imitate the frame.
- In the far corner of the room we draw a bed.
- Please note that all auxiliary background lines must be removed with an eraser.
- Next to the bed we draw a rectangular wardrobe with drawers and handles.
- On the other side we draw a small chest of drawers and a desk.
- On the second wall, draw another window.
- We will definitely draw decorative elements - paintings.
- Let's draw the curtains on the windows.
- We erase the auxiliary lines and trace all the contours again.
- Color the drawing with watercolors or felt-tip pens.
On the topic: methodological developments, presentations and notes
Long-term plan for the “Childhood” program for the preparatory group.
To introduce children to living nature, systematize existing knowledge, develop curiosity, cultivate interest and desire to study living nature.
Summary of an open event in the senior preparatory group (artistic and aesthetic development - drawing) “I love the Russian birch...”.
Expand children's understanding of folk crafts, one of which is Dymkovo painting.
Abstract of an open GCD integrated (artistic, aesthetic, cognitive development (drawing) using non-traditional drawing techniques in the senior group “Usatiy-striped.
Lesson summary in the preparatory group Artistic and aesthetic development (drawing) Topic: “Golden Khokhloma”.
Source
