How to achieve information content when creating a stand?
It is better to make do-it-yourself stands for a kindergarten according to a strictly defined plan:
- At the top is a heading, written or printed large, in a straight line or with a curved base;
- Below the title are images. They should be placed across the entire width of the poster or a space should be made for words (depending on the volume of text);
- Below the pictures are direct congratulations and wishes, in prose or poetic form;
- Below is the signature (“kindergarten administration”, “Your teachers”, “Your parents”, etc.).
What to tell children about summer
The main “summer” topics that can be used for conversations with children are:
- vegetables fruits;
- berries, mushrooms;
- insects, birds, animals;
- people's activities in the garden, in the forest;
- types of outdoor recreation (travel to the sea, summer sports);
- safety of children in summer.
The first of these sections are suitable for toddlers, and the rest for older preschoolers. They allow you to select pictures about summer for both very young children and future first-graders. You can use both subject images (berries, flowers, sandbox toys) and subject compositions:
- “The first day of summer has arrived!”;
- “What do children play outdoors in the summer?”;
- “What are the rules of behavior on the water and why are they needed?”
Properly selected illustrations help increase the effectiveness of speech development exercises and make them more interesting. Various pictures about summer are excellent visual material that makes it possible to conduct useful activities, as well as exciting games with preschoolers of different ages.
Work in the garden
Animal world
Russia Day
Outdoor games
Walk in the woods
Children care about nature
Visibility and its implementation
For a stand to be perceived as an interior decoration, it must be in harmony with it. You should not focus only on the informative part. Pictures, images, photographs are required next to the inscriptions on the stand.
If the stand is dedicated to the New Year celebration, it must have a decorated Christmas tree. If March 8 - mimosa or a bouquet of other flowers. If it's Mother's Day - an image of a woman's face with a smile.
A bright background created by completely covering the surface with colored paper or painting it with paints will help provide clarity.
Teaching children in the summer - hardworking bees
During the summer months we often hear the buzzing of bees, so create an information display to teach children about bees. Name your stand Busy Bees, Buzzing Around, or Bee Jobs. Display a large hive with bees surrounding it on your information display, or decorate the display with different colors and place a bee next to each flower and some information about these insects next to it. Teach children where bees live, what they produce, what color they are, and even include information about how to avoid a bee sting or what to do if you get stung by a bee.
Clarity and its personification
Do not forget that the stand is made, first of all, for the audience. Both adults and small children can act as them. They understand vivid images - Father Frost, Snow Maiden, a fireman in uniform, etc., numbers that carry meaning (31, 23, 8). Symbols and branding are best left for other purposes.
The title should be as accurate and succinct as possible. There is no need to make it poetic or burden it with epithets: it is more important for children what kind of holiday they are preparing to celebrate.
Do-it-yourself stand: features and manufacturing principles
So, the first thing you need to start with is the basis of the design. Once the size of the stand is determined, you need to select a cork board and plywood of the appropriate size and glue them together using glue or liquid nails. Next, the workpiece must be painted, covered with fabric or film, and you can begin to decorate it.
You need to start designing the design with the pockets in which sheets of information will be placed. For this purpose, you can use plexiglass of a suitable size or durable stationery files. The number of pockets can be absolutely any.
Next, you need to determine the theme of the design. This could be a lesson schedule, a corner of a healthy lifestyle, congratulations on the holiday, and so on. The name of the stand is an important part of its design. The title should be bright, large and eye-catching. Remember that an information stand is a business card of an organization, so special attention should be paid to its design. Letters for the title can be cut out from bright plastic or from unnecessary magazines.
Remember about the frame of the stand. With a frame, the design will look more aesthetically pleasing and laconic.
Sheets with information and other important information can be attached to the stand using buttons or safety pins, but if we are talking about a child care facility, then it is worth finding an alternative method.
Advantages of making your own stand
- The ability to create a unique, original, inimitable design, convenient location, shape and size.
- By making the structure yourself, you can choose materials that perfectly match the interior of the room.
- You will have the opportunity to place on the stand only the information that you need, as well as choose the optimal location of pockets on the board.
- By making your own information board, you will have the opportunity to choose the color scheme that best suits the overall style of the room.
- You don't have to adapt to a design made from a template, as you can arrange the pockets and information fields as you wish.
- Handmade work is a great way to emphasize individuality and add zest to the image of the room.
Making the structure will not take much time and will not take much effort. In just 30 minutes you can make a simple, small-sized design. With stands of larger size and complexity you will have to tinker a little, but rest assured that the result will exceed all your expectations.
The stands are actively used by people, both at home and in educational, medical, transport and other institutions.
Important information, plans for the future, memorable photographs, an organizer, a list of employees, a class schedule, and this is not an exhaustive list of information that can be located on the stand.
The principle of accessibility: “let me touch it!”
If the stand is placed in a kindergarten or school classroom, children will inevitably become overly curious. Some people will want to take a closer look, and some will want to touch it. So that the result of creativity does not go to waste in the very first minutes of public viewing, you need to make it tangible.
For example:
- Attach felt leaves in yellow and orange tones to the stand for Autumn Day,
- For a stand in honor of Easter, attach a wicker surface that imitates a basket, or an eggshell, painted in different shades,
- Decorate the stand dedicated to May 9 with real St. George ribbons and carnations cut out of red corrugated paper.
A DIY children's educational stand is a prime example of accessibility. Its design depends on the age of the children for whom it is intended.
Such a busy board will help develop curiosity and promote exploration of the world around us.
For children 2-3 years old, felt flowers and trees of different shades and shapes will do.
The middle group can enjoy the following attached to the stand:
- Cubes,
- Pyramids,
- For an hour.
For members of the preparatory group - letters and road signs, tiny tools or any other gizmos from everyday life:
- Landline phone dial,
- Mixer valve,
- Door knob,
- Espagnolette,
- Chain,
- Old calculator,
- Wheel,
- Compass,
- Klaxon, etc.
Information stand for parents “Children’s Summer Holidays”
summer holiday for children
Summer is not only a time for travel, but also the most favorable time for children to relax, harden and improve their health.
Therefore, it is very important that parents make the most of this precious time. At the same time, many questions arise about how best to do this.
The sun is good, but in moderation
In summer, children should spend maximum time outdoors. However, if older preschoolers are allowed to sunbathe a little, then direct sunlight can cause harm to children. The biggest danger is overheating of the body, sunburn, sunstroke, since a small child has less perfect thermoregulation and his skin is very delicate.
Light-air baths can be carried out under a canopy or in the shade of trees. In this case, the principle of gradual exposure of the child’s body must be observed. First, the arms and legs are freed from clothing, and then the rest of the body. The time of light-air baths gradually increases to 30-40 minutes.
Such baths are especially recommended for children with weakened bodies. The best time is from 9 to 12 o'clock, in the south - from 8 to 10 o'clock. It is best to end each light-air bath with a water procedure.
After a week-long course of light-air baths, preschool children can begin sunbathing. A child can sunbathe while lying down, or even better while playing and on the move.
Sunbathing in combination with light-air baths, as well as water procedures, has an excellent strengthening effect. Children become more resistant to influenza-like illnesses than those children who sunbathed little.
Caution: heat and sunstroke!
Experts do not make much difference between these conditions. And this is understandable.
The basis of both heatstroke and sunstroke is overheating of the body. The cause of heat stroke is the difficulty of heat transfer from the surface of the body. This is often associated with prolonged exposure to a hot, humid atmosphere. When sunstroke occurs, blood circulation in the brain is impaired. This usually happens when a child walks in the sun with his head uncovered.
The younger the child is, the more sensitive he is to the effects of heat and sunlight. Therefore, overheating of the body in a small child can sometimes already occur while taking light-air baths.
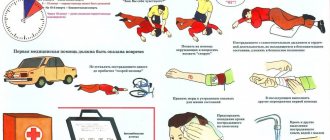
With mild sunstroke or heatstroke, the symptoms are mostly the same. These are dizziness, weakness, headache. In severe cases, convulsions, vomiting, and loss of consciousness may occur. In all such situations, you need to urgently call a doctor, and before he arrives, move the child to the shade, wet his head and chest with cold water, put a cold compress on the bridge of his nose, and raise his head. Give the child something to drink and calm him down.
Bathing is an excellent hardening agent
You can swim in open water starting from the age of two.
The swimming area should be shallow, level, and with a slow current.
Before giving your child the opportunity to independently enter the water, you need to make sure that there are no holes, deep mud, snags, or sharp stones in this place.
An adult must be in the water with the child.
When swimming, you must follow the following rules:
- It is not allowed to swim on an empty stomach or earlier than 1-1.5 hours after eating.
- Children should be in motion in the water.
- If you feel chills, get out of the water immediately.
- You should not plunge into cool water while hot.
Unusual solutions for ordinary stands
A collage is the best option if you have to prepare a stand with your child as an assignment for a group celebration or to participate in a competition.
Unlimited creative freedom:
- You can include any newspaper cutouts in your collage,
- Magazines,
- Advertising pictures,
- Suitable for the topic.
The following can be glued to the stand sheet:
- Natural materials (dried leaves, small pebbles),
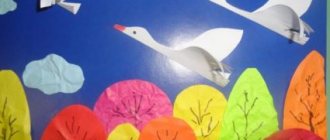
- Applications made of paper (snowflakes or flowers) or fabric (felt, knitted fabric),
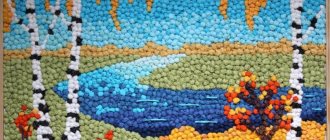
- Handicraft small items (bugle beads, beads, beads, threads of yarn, pompoms);
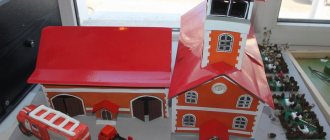
You can also make stands for children's crafts with your own hands. It can be called “Our Vernissage” or “Exhibition of Crafts”.
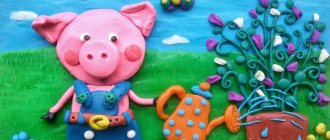
- To attach drawings to the stand, you can use pins or magnets. To demonstrate three-dimensional crafts (made of plasticine, cardboard, corrugation, etc.) - paper or knitted “pockets”;
- temporary stand, or stand-template. This will be convenient when you need to impromptu prepare for a celebration or when there is absolutely no time to decorate the group.
- For it you will need: self-adhesive letters (the entire alphabet) and numbers, button magnets, double-sided tape, a sponge (to give volume to the inscriptions), universal pictures (flowers, leaves, candles, stars, etc.);
- DIY information stands for kindergarten differ from all others by the presence of plastic frames or “pockets” for placing official information concerning parents.
- In all other respects, they should serve as decoration for a children's group: have a bright design with expressive characters - Leopold the cat, Carlson, a train, a hedgehog, a daisy, etc.
Such boards can be made in an unusual shape - in the form of a cloud or a light, a star or a sun - this way they will quickly attract the attention of parents.
Teaching children summer safety in the sun
The summer months bring heat and sun, which can be dangerous for children who are not dressed properly or not hydrated enough. Create an informational display on "Sun Safety" or "Safe Summer Fun" to give kids some safety tips that they can even share with their parents. Accompany each tip with a picture to make it clear. Teaching children about sun safety in the summer can be summed up by the following tips: “wear a bucket hat,” “use sunscreen and parasols,” “carry a water bottle or take breaks from play to drink,” and “wear sunglasses.” .
