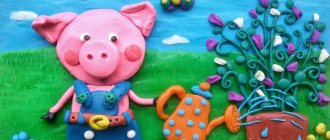
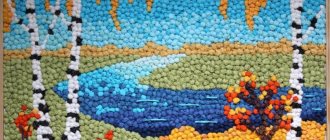
What is special about applications for children?
Children take an active part in making crafts using napkins. This technique is most common among younger children – three-year-olds.
This is due to the fact that the manufacturing technology is so simple that they happily get to work and learn to make crafts with their own hands.
During the creative process, the children develop the inclinations for creativity, develop fine motor skills, and learn to work with the material necessary to create an applique (scissors, glue, napkins, etc.).
Due to the fact that children of primary preschool age begin to engage in this craft, the designs for appliqués are chosen to be simple in both form and complexity of design.
Volumetric applique made of paper napkins with step-by-step photos for children 5 - 7 years old
Volumetric applique made from paper napkins “Tree of Mood”. Master class with step-by-step photos
Author: Galina Andreevna Garintseva, teacher, MADOU No. 21 “Iskorka”, Berdsk This master class is intended for preschool teachers and parents. This application can be used in the GCD process in such age groups as middle, senior and preparatory. In the middle group, the teacher must prepare the straws in advance, and in the older preschool age, the children prepare the straws themselves. Appointment of a master class. Application on the theme of the week, gift, group decoration, etc. Goal: Making a three-dimensional application in the process of GCD on the topic of the week. Tasks: • Orientation in space on a sheet of paper; • Develop fine motor skills of the hands; • Learn to use glue carefully; • Continue to develop color perception. • Develop aesthetic perception; • Cultivate attention, patience, perseverance, etc. Materials and tools: • Paper napkins of different colors.
• A knitting needle, or a cocktail stick, or a pen refill, • A stencil with a pattern, • Cardboard, • Thick PVA glue, • Gouache, • Brushes, • Scissors Sequence of actions.
Cut the napkin into 16 squares: 1. Cut the folded napkin in half along the fold line. You will get two squares, each square has two layers.
2. Fold each square in half lengthwise and cut along the fold line. 3. Fold each resulting rectangle (each rectangle has two layers) in half crosswise and cut along the fold line.
We got 16 squares. Then we take one of the squares and twist it onto a knitting needle.
We compress the twisted tube on both sides to class=”aligncenter” width=”627″ height=”470″[/img] Remove from the knitting needle.
Thus, we prepare the required number of tubes of different colors.
Draw a sketch of a picture (in this case a tree)
We make a tree crown by gluing tubes rolled into the desired shape onto thick PVA glue. Making a tree trunk.
The application is ready! The finished applique can be cut out and pasted on double-sided tape to create a beautiful picture. Or you can leave it like that and move the “mood tree” into a frame. But we got such a sunshine. And this is the symbol of 2015!
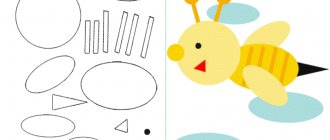
Templates for making lambs.
I wish you all good luck!
We recommend watching:
Master class “DIY Symbol of the Year” Volumetric applique made of colored paper on the theme Autumn for children 4-7 years old Volumetric applique “Autumn Sun” for children 6-7 years old Volumetric application made of paper for children 5-7 years old “Fish”. Master class with photos
Similar articles:
Paper flowers. Volumetric application of cornflowers for children
DIY paper heart
Application for children
Applique for children made of poplar fluff and feathers
Application for preschool children
Affordable and wonderful crafts from napkins
Napkins are an easily accessible and inexpensive material that everyone definitely has in their home.
Using your imagination, it is easy to create quite interesting and attractive products from them, using only scissors and glue.
Crafts made from napkins differ from others in their volume and texture. They are original and unusual, not like classic appliqués made using colored paper using templates.
Children will definitely like these crafts, because this process is a very addictive and delightful pastime.
Rowan branch
Here, for example, is a very easy craft for young children - from three to five years old. For it you will need:
- Multi-colored cardboard for the base.
- Green colored paper.
- Napkins of the same shade.
- PVA glue.
- Scissors.
- Pencils.
Operating procedure:
- First of all, the outlines of the future branch are outlined on a piece of cardboard.
- For convenience, you can use ready-made drawings or photos of rowan applications made from napkins. Or you can do it yourself.
- The kids will definitely like the next stage - berries are formed from a napkin. To do this, you need to cut them into squares with a side of about five centimeters.
- Each such instance will form one ball. The work must be done only with dry hands.
- When all the berries are rolled, you need to stick each one onto a branch using PVA. Here you should use a glue brush.
- The final part is cutting out and gluing green leaves onto the branch. After this, the application can be considered complete.
In a similar way, it is possible to create a bunch of different products, which are not at all difficult to come up with.
Applications for the little ones
Applications for the little ones are varied. Depending on the time of year, they involve creating snowmen, snowflakes, spring flowers, and rain. The lily of the valley applique made from napkins is very interesting.
Lilies of the valley
Lily of the valley application is performed using the lump technique. It is suitable for children of preschool and primary school age.
To make this craft you will need:
- white napkins;
- colored paper (green and white);
- cardboard for the base;
- glue;
- scissors.
The work is carried out in several stages.
- Preparation of the workplace and materials. For appliqué, you will need a flat table covered with oilcloth for protection. All materials are prepared in advance.
- Preparing the template. First, prepare a template. A lily of the valley will be glued to it. This can be half an A4 sheet of any color.
- Making leaves and stems. Cut out 3 oval-shaped leaves from green colored paper. Each sheet is folded so that veins are formed. The stem is a long rectangle. It is rolled into a tube.
- Making flowers. The napkin is cut into 4 parts, the layers are separated. Each piece is crushed into a ball. It is necessary to prepare a sufficient number of lumps for the lily of the valley.
- Assembly. The leaves and stem are glued onto the template first. Lumps are glued on top of the leaves near the stem.
The finished craft can be used as a greeting card.
Mimosa
For the younger group, an applique made from mimosa napkins is suitable. This topic will be most relevant in the spring or on the eve of March 8th. This work gives room for creativity. Depending on the age of the children, the vase and leaves of the plant can be drawn with pencils or glued from colored paper.
To work you will need:
- cardboard;
- yellow napkins;
- colored paper (for the vase and greenery);
- glue;
- scissors;
- colour pencils.
If you make a mimosa application from napkins with your own hands, then it is important to follow the sequence of steps.
- Preparing the base. The children are first allowed to choose a sheet of cardboard on which the applique will be placed.
- Preparing a vase template. Trace the vase template on colored paper and cut it out.
- Preparing the leaves. Oval leaves are cut out of green paper. The edges are cut into strips, imitating the green feature of mimosa.
- Preparing flowers. Napkins are cut into squares and rolled into balls.
- Assembly. On the template, use a green pencil to draw the guides of the mimosa branches. Yellow lumps are glued on top. When the flowers are formed, glue the green leaves so that they slightly cover the flowers. Finally, glue the vase.
The mimosa craft is distinguished by its variety of execution.
Dandelion
Dandelion is a craft made from napkins using three-dimensional technique.
To make it you will need:
- cardboard;
- green paper;
- yellow or white napkins;
- glue;
- stapler
The application is simple and suitable for preschool children.
- Making flowers. The napkins are cut into squares and stacked. In the center, the layers are fixed with a stapler. The napkins are shaped into a circle. The edges are cut into strips in increments of 3-5 mm. The finished flowers fluff up.
- Making leaves and stems. Cut out 2 longitudinal leaves from green paper, shaped like dandelion greens. Form a tube for the stem.
- Assembly. The stem is glued onto the cardboard. On the side of it is greenery. The applique is completed with a bright yellow flower.
Making crafts from napkins is a fun activity that will be useful not only for young children, but also for adults. Starting with simple panels, you can learn how to make voluminous and complex products that will become a worthy interior decoration.
Application "Cherry"
The next way to use napkins as a craft material is twisted flagella. Children of senior preschool age will be able to start creating a beautiful applique with the help of them, due to the fact that this method will be a little more difficult than the previous one.
For the child to start working, he will need three napkins, all of different colors - green, dark red or cherry, and any color that is not a single color.
- To begin with, take a green napkin and cut it into equal squares, each of which is then cut into three rectangles.
- After this, you need to take the resulting figure and twist it so that you get a thin rope; to do this, a piece of the product is held on one side, and on the other, at the same time, the sheet is twisted in the opposite direction. The action is repeated with each rectangular piece of napkin.
- Once all the green rectangles are twisted, you can take on other colors and the whole technology is repeated again.
- Having prepared all the parts, you need to start laying them out using prepared multi-colored strands.
- Multi-colored flagella are taken first, and the edging of the future craft is laid out - leaves, berries.
- Then the leaves are filled with green ones, and the cherries with red ones.
- All parts should be attached to a sheet of paper using scattered glue. Once all the parts are glued on, take a colored marker and trace the edge of the image.
- After this, the volumetric part of the design is carefully cut out and, using glue, pasted onto a previously prepared sheet of velvet colored paper, carefully pressed with a suitable object and removed until the product is completely dry.
After which the applique is used to decorate the room.
Application “Tree” using quilling technique
The next fascinating and unique method is quilling, which children in the middle preschool group can master. During creative work using this technology, you will need the following materials:
- Paper of different colors;
- Napkins of either one color or several, preferably consisting of three layers;
- Scissors;
- PVA glue;
- Glue brushes;
- Toothpicks.
Operating procedure:
- The procedure for making an applique for children four to five years old should begin with preparing the background, which is made using colored paper (gluing sheets together).
- A napkin of a non-uniform shade must be cut into identical strips four centimeters wide, which should then be folded, and this must be done more than once.
- When all the parts are ready, take toothpicks and screw bent pieces of napkin onto them. Then they are released, and thus a spiral is obtained - the future leaves of the autumn tree.
- As soon as the blanks for the crown are ready, you can begin making branches and the tree trunk itself. To do this, you need to take a brown napkin and cut it into strips, then glue it from the inside, creating something like a flagellum.
- Then, using the resulting bundles, a tree trunk is assembled, to which branches with autumn leaves are glued.
There are many more interesting and similar napkin applications that can be found by consulting the relevant sources.
After studying them, you can choose what you like most, take the necessary material and start creating.
Common techniques
Working with napkins is varied. During work, it is possible to create crumpled lumps that fill the template, twisting tubes or forming three-dimensional parts.
Experts identify 3 areas;
- lumps;
- tubes;
- volumetric applique.
Lumps
Lump applique is also known as Pape Art. The technique is used to develop fine motor skills in children and adults with finger mobility problems.
The work is carried out in several stages.
- Preparation. Napkins of the required colors are prepared in advance (according to the template);
- A small piece is torn off from a whole sheet and rolled into a ball. It is recommended to prepare a sufficient number of balls of each color in advance.
- The finished balls are glued to the drawing according to the template.
The main task is to glue the balls tightly enough to each other. The finished product should not contain voids.
Twisted tubes
The twisted tube technique involves creating dense tubes from napkins. For work, material of the desired color is prepared in advance.
- The prepared napkins are cut into strips. The width of the strip depends on the type of craft. Sometimes it is enough to divide the sheet into 4 parts.
- The strip is tightly twisted into a tube. It is important that the twist goes smoothly, not obliquely. It is better to do this with dry hands.
- The tubes are lubricated with paste. This will allow them to become stronger and not unwind. After this, the material is dried for 10-15 minutes.
- The finished twists are glued to the template. The completed work is varnished.
The appliqué technique of twisted tubes is suitable for creating crafts of varying complexity. It allows you to create an imitation of jewelry using forging or openwork casting. Appliqué with tubes is actively used for decorating paintings, bottles, and creating panels.
Volume applique
Volumetric application from napkins allows you to get a 3D effect. It is used to make winter compositions with a three-dimensional snowman, or greeting cards with balls and flowers. The variety of colors allows you to most accurately reproduce bunches of lilacs, carnations, and rowan.
A distinctive feature of the technique is that a volumetric element is first created.
- Several napkins are cut into even squares and folded into a stack. The thickness of the stack determines how fluffy the piece will be.
- The layers of napkins in the center are fastened with a stapler.
- The finished part is cut off at the edges, giving it a shape. If the craft is done in the younger group of a kindergarten, then the stack should not be too thick.
- The layers of the napkin are straightened, giving the product volume.
The finished parts are glued to the template along with other applique elements.

