Preparation
The first step is to prepare for the development process:
- When organizing a workplace, everything unnecessary is removed from the table.
- You can cover the surface with oilcloth to protect it from glue.
- All elements are cut out in the required quantity.
- It is recommended to use stationery scissors with blunt tips - they are comfortable for the child and he will not be able to cut himself with them.
- A background base is selected from colored paper or thick cardboard.
- For younger children, it will be more convenient to use pencil glue rather than PVA.
- To make the activity more interesting, you should choose beautiful and bright colors.
Before creating an application, you need to tell your child about geometric shapes - show the blanks, name their shapes. It is important to become familiar with the sequence.
Your child will be interested in creative activities together, and teamwork will strengthen relationships. Over time, the baby himself will learn to assemble compositions from different elements.
For the little ones
Toddlers are just beginning to learn about crafts and shapes. Initially, you should randomly distribute the shapes on the sheet so that the child learns to work with glue.
Children aged 1-2 years are characterized by energy and restlessness, so you should start the lesson in a playful way.
You can tell a story about a circus bear who lost his juggling balls. The child will get acquainted with different colors, the circle shape and learn how to handle glue.
For the applique you will need three circles of different diameters made of colored paper. You can print the bear using a template or use a sticker. The bear is glued to the background sheet, and the child’s task is to find balls of a certain color. The found circle is covered with glue.
It is important to teach your child to hold the glue at a 90 degree angle. The part is located in an arbitrary location.
When the baby learns to handle glue, you can complicate the task a little and try to make an applique along the contours. To do this, geometric shapes are sketched on a sheet or cardboard, and parts corresponding to the drawing are cut out of colored paper.
The baby must find and glue the parts along the contours of the picture.
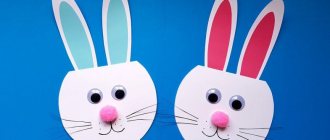
What can you make from geometry?
Paper crafts on the theme of geometric shapes are quite varied in their design. All you need is a few blanks, a little paint and imagination.
Peacock
To make a peacock, just cut out a base in the form of a circle, onto which a triangle is attached in the center. After this, you can paint gorgeous feathers for our peacock, and decorate its tail with sparkles.
Chanterelle
The fox can be made from several geometric shapes, where triangles will be taken as the basis. The tip of her tail can be made of white paper, and her paws, body and muzzle can be made of triangles of different sizes. Connect this puzzle and that’s it, the work is ready.
Butterfly
One of the most interesting fakes for preschoolers will be a butterfly.
To create it, you can draw a butterfly stencil or make wings and a body from ready-made blanks. For the wings we need 4 blanks of large circles, several small multi-colored circles, preferably in the same proportion, as well as triangles and a long elongated oval for the body of the butterfly.
Cat
You can take a circle as the basis of the cat, the ears can be triangles, the body can be made in the form of a square, and the legs can be made from rectangles. Thus, the child will be able to combine all the figures in one composition.
Mosaics
To make a mosaic, it is enough to make a stencil, prepare colored parts and cut shapes, and after that, pour glue onto the desired surface and pour the blanks there. The neat distribution of mosaics will be very popular with children, who will try to “cover” all the “clean” places in the mosaic with the right colors.
Volumetric figures
Crafts made from “3D” geometric shapes are also quite popular. With their help, you can not only indulge your imagination, but also show maximum creativity for creativity!
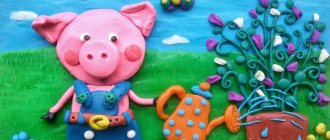
Fake Pig
To make a pig, we will need a sheet of paper rolled up into a cylinder tube; we will make cardboard stands for it in the form of legs. A regular circle will go on the pig’s head, in the center of which you can place a small patch.
We do the tail in the same way. The finished model can be glued to a thick sheet of paper.
Fake city in miniature
To make such a city you will need several matchboxes or similar structures. We cover the boxes with paper and make houses out of them.
In addition, you can make small cars, as well as a traffic light.
Matchbox box
As you already understand, for this fake we will just need to glue several matchboxes together. Additionally, you can secure them with a rubber band, which will allow the structure to stick together tightly.
The finished box can be covered with paper, stickers or painted.
There are no restrictions in geometric creativity. As you understand, you can make a variety of fakes. Everything you need for this is already at your fingertips, and all you need to decorate is a little imagination.
In any case, the child will be very interested in playing and making different geometric pictures, so give free rein to your imagination!
House
Photos of applications for the little ones clearly show how you can assemble a picture from simple shapes. To make a house you will need a template or sketch, glue, scissors, colored paper and cardboard.
From colored paper, cut out a large square and a triangle for the house, a small square for the window, and use a rectangle for the door.
All parts are sequentially treated with glue and placed on the base.
Typewriter
When working with a child, it is important to take into account his interests; for example, a boy will be much more interested in assembling a craft in the form of a car. The application will be appreciated by children aged 3-5 years, and for the work you will need colored paper, glue, a simple pencil, scissors and a model of the machine.
Stages of work:
- Shapes are cut out - rectangles for the body, circles for the wheels. You can complement the picture with smoke from ovals, and a route from a black elongated rectangle. Details are added or removed based on the child’s characteristics; if the baby is diligent and easily involved in the task, then you can freely supplement the composition. Don’t forget about the brightness of color, it is what makes the creative process even more interesting.
- Each element is smeared with glue in turn and glued to the background. The road and body come first, and then the wheels and smoke.
For greater expressiveness, you can draw trees, the sun and clouds with colored pencils. Blue color is ideal for a base. In a more complex version, the child himself cuts out the parts along the marked lines.
For 1st grade students
Children already more or less own scissors when they enter 1st grade. In this case, templates will become indispensable assistants. With their help, children will be able to cut out the necessary parts from paper, and it will be easier for them to create and learn to make appliqués. Here are templates for several simple geometric applications:
Here are some examples of work for 1st grade children and their diagrams:
Application “House in the Village”:
It seems to be nothing complicated, no complicated details. It's simple. A house, sunshine, a tree, but there is something extraordinary in this picture. In addition, the child will make this picture even more unique, because it will be the embodiment of his imagination and thinking.
Application “Cat and kitten”:
To make an applique of this cat with a kitten, a child will need to cut out a wide variety of shapes and put them together to create a complete image to their liking.
Related article: DIY things at home from unnecessary things with video
Application “Funny Caterpillar”:
The funny caterpillar will amuse your kids. It is interesting not only to look at, but also to do. After all, these circles and other details can be arranged in different ways. And each child will get their own unique cheerful caterpillar.
To make the above house, cat and caterpillar appliqués, you can simply print out the diagrams, then children can cut out the figures and glue them onto paper. But this is too simple. So you can make your own templates. And then the children will cut out parts from them from different colors and glue them.
For children from 3 years old
At the age of three, children can already assemble a picture of 6 parts in the correct sequence. You can choose animals for applique that are familiar to the child - for example, a hen with chicks.
For production you will need:
- Green cardboard.
- Yellow circles - 3 pcs.
- White circles of different diameters - 2 pcs.
- Triangles – 1 white, 2 yellow, 3 red, 6 brown.
- Colored markers.
- Glue.
The first step is to prepare a sample, and the children follow the picture and lay out their applique. It is advisable to focus on the baby’s characteristics; for some it is easier to create from a sample, while others prefer to repeat the actions step by step.
Eyes are added to the pasted chickens. The picture can also be supplemented with green grass made from stripes, a bright round sun, and daisies made from white triangles.
For the little ones there is a large selection of colorful applications for creativity, with self-adhesive figures. The kits are sold in bookstores or delivered via courier.
Ready-made sets help develop fine motor skills.
Vase with candies
The word “vase” in this task is conditional. The child can fill a jar, plate, tray or glass with colorful shapes. It is these objects (their outlines on paper, cardboard) that will act as the basis. The step-by-step process of making a craft looks like this:
- You need to prepare a base with the outline of a basic object applied to it - vases, jars, plates.
- Cut out circles of different diameters from multi-colored paper or foil that will symbolize lollipops.
- Kids must fill the outline of the base object with candies in any order, without going beyond its boundaries.
- You can complement the applique with painted flowers, candies of other sizes, and the sun.
School age children
Junior grades are able to independently separate details according to a model, and can assemble a complete picture, focusing on their imagination. Initially, you should show the children what the finished craft will look like.
To work you will need brushes, colored paper, glue, scissors, cardboard, a ruler and a simple pencil.
A base is prepared, geometric shapes in a specific theme are sketched on it. All details are copied from the base, cut out and glued according to the template.
What is needed to model geometric shapes?
Prepare your workbench and materials. As you know, kindergarten students are usually asked to make a variety of fakes, and the first grades of school also like to keep children busy with creativity.
Creativity from geometric shapes develops spatial thinking, logic, the concept of color, shape and use of an object.
Thus, a circle can turn into the basis for a sun or a lake, and for example, several triangles can make a funny squirrel that will walk in a green meadow. The essence of geometric creativity is that there are no restrictions on the use of shapes. These can be figures of either strict proportion or cutting of some details.
Another popular type of figure modeling is torn geometry. For “torn” geometry, you just need to tear figures of different sizes. The option of torn strips, which will then turn into small cubes, is perfect.
Crafts made from geometric shapes for children have gained great popularity due to the fact that children really like to play with a variety of shapes and colors.
Materials:
- Glue,
- Colored paper,
- Cardboard,
- Paints,
- Sequins,
- Rhinestones,
- Stickers,
- Natural herbarium,
- Scissors,
- Stationery knife,
- A compass (or any object that can be traced in place of an even circle.
Important: Consult your child before working with sharp objects. Show how to use a compass correctly and what to do with the finished figure.