Abstract of the GCD for the application on the topic: “Sparrows in puddles”
"Sparrows in Puddles"
Summary of GCD for application in the middle group
Educational field: Artistic and aesthetic development
Notes prepared by: teacher
Tsytsarkina N. A.
Summary of GCD for application in the middle group
Educational area:
artistic and aesthetic development
Form:
direct educational field
Subject:
"Sparrows in Puddles"
Tasks.
Teach children to cut out circles (a puddle, the body of a sparrow) by sequentially rounding the four corners of a square. Enrich the applicative technique, supplement it with graphic elements to convey small details and dynamics. Show composition options (sparrows in a puddle, above a puddle, near a puddle, etc.). Develop creative imagination.
Equipment.
Sheets of blue paper of the same size as the basis of the composition; brown paper squares for the body of the sparrows and for the head (size from 5x5cm to 7x7cm); scissors, glue sticks, colored pencils or markers; oilcloths, paper napkins, easel.
GCD move.
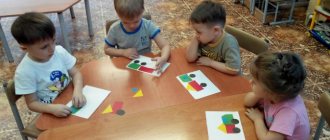
The teacher reminds the children how in winter they watched the birds at the feeder and fed them. He says that all the birds are very happy about the arrival of spring; They bask in the sun and enjoy swimming in puddles and washing their feathers. He offers to make paintings about spring “Sparrows in puddles” and shows an approximate sequence of work:
We take a square of blue or light blue paper and turn it into a puddle (we round the corners with scissors): we hold the square tightly by one corner, and round the other corner - we move the scissors in an arc from the middle of one side to the middle of the other side - the corner has fallen (the teacher shows ), then we round off another corner (shows) - and this corner fell (the teacher comments on all the actions). Look: the square has turned into a circle - it's a puddle! If necessary, the teacher can mark visual landmarks on paper blanks (draws points on the midpoints of the sides of the square and one or all arcs).
We take a small brown square and round the corners to make the body of a sparrow, cut off the corners with smooth movements of scissors or pluck the corners so that the square turns into a circle;
If the children are confident enough in using scissors, the teacher offers them to cut out a head from the smallest square in the same way (or gives them ready-made shapes);
Glue the sparrow (body and head) onto the puddle.
To show that our little sparrow is splashing water, jumping, and rejoicing, we need to arrange his wings in different ways: raise them, spread them to the sides, etc. (Shows options for the placement of wings and offers to draw as you wish.)
Then we finish drawing the eyes and beak, wings, tail, legs with felt-tip pens or colored pencils.
For those children who quickly completed the artistic task, the teacher offers to make a “friend” or several “friends” for the sparrow so that he will not be bored alone.
Children can do collective work, uniting 4-5 people in one group. In this case, the teacher draws the children’s attention to the fact that sparrows can be placed in a puddle in different ways: swimming in a puddle, diving into a puddle, flying over a puddle, or jumping along the shore of a puddle.
After class. Organization of an exhibition of children's creative works “Sparrows in Puddles”.
MAGAZINE Preschooler.RF
Zinatullina Svetlana Aleksandrovna – teacher Municipal Autonomous Preschool Educational Institution “Kindergarten No. 293 of a combined type” Lesson on cut-out appliqué in the second junior group. Topic: “Friends for a sparrow” Program content: 1. Introduce children to cut-out appliqué. 2. Learn to tear colored paper into small pieces and stick them without going beyond the edges of the outline. 3. Consolidate knowledge about the parts of a bird’s body, flowers, and the ability to carefully use a brush, glue and napkin. 4. Develop children's horizons and fine motor skills. 5. Foster a love of nature and birds. To evoke an emotional response in children to the problem of birds. Materials: toy sparrow, tape recorder, phonogram “Birds singing in the forest”, easel, sheets of A5 paper with a drawn outline of a sparrow according to the number of children, rectangles made of brown colored paper, beaks and eyes made of black colored paper, tassels, paste, rag napkins , oilcloths and glue jars. Progress of the lesson. Children sit at double tables covered with oilcloths and blanks, brushes and jars of paste laid out on small plates. Guys, look who came to our lesson (shows a toy sparrow). That's right, well done, it's a sparrow. And who is the sparrow? Well done! This is a bird. Oh, something must have happened to the sparrow, listen to how he chirps... (the soundtrack with the plaintive chirping of the sparrow starts) “Sparrow, what happened to you? "(The teacher listens) Guys, the sparrow told me that he has no friends and family: no dad, no mom, no sister, no brother. Let's help our sparrow find a family and friends? Children: “Yes!” Guys, let's stick some friends for the sparrow! Look closely, what does he have? Children's answers... Correctly, he has a head, torso, legs, beak and eyes. What is the sparrow covered with? Well done boys! It is covered with feathers. What color are the feathers? Well done guys, right! They are brown. How can we depict feathers on our sparrows? Children's answers... If the children find it difficult to answer, explain to them that you can tear a sheet of paper into several pieces and we will get a very fluffy sparrow. Give the children sheets of paper with a drawn outline of a sparrow. Guys, let's take a brown piece of paper and tear it into many small pieces, the smaller the better, the fluffier our sparrows will be. Now we will take one piece at a time, turn it over with the white side up, spread them with glue and glue them onto the body of the sparrow, without going beyond the outline. And now we will take the brushes near the piece of iron with two fingers, and the finger on top should play like this (to help children who did not take the brushes correctly). We take the required amount of glue, wipe off the excess on the edges of the jar and spread the first brown piece, glue it with a sparrow, without going beyond the outline, etc. Glue all the brown pieces. Look, little sparrow, how well done our guys are, what beautiful and fluffy sparrows they make (to help children experiencing difficulties). What are you telling me, little sparrow? Do you want to play with the guys? Guys, leave the tables, let's go play with the little sparrow. Physical exercise "Sparrows and the car." The little birds flew away, little birds. Everyone was flying, everyone was flying, flapping their wings! (children run, flapping their arms) So they flew, flapping their wings, flew onto the path, pecked grains (children sit down, “peck” grains) A car runs down the street, Puffs, hurries, blows a horn: “Tra-ta-ta, beware , beware! Tra-ta-ta, watch out, move aside!” (children run away from the car). Well done! All the sparrows ran away from the car, it didn’t run over anyone! Let's now look at our works, what is missing in them? That's right guys, well done! All that remains for our sparrows is to glue on their eyes and beaks. Take the brushes in your hands (check if they are correct). And first glue the eye, and then the beak (to help the children do this correctly). Sparrow, look what a big family we’ve created for you and the boys. Anyuta, who did you stick for the sparrow? And you Pavlusha? (ask all the children who they labeled). How fluffy your sparrows turned out. The sparrow says thank you to the children and gives a gift for their efforts, then flies away. Guys, what did we do in class today? What kind guys you are, you helped the sparrow find a family. Did you like the lesson?| Next > |
Master class on making the “Sparrow” applique in the middle group
Maria Brovkina
Master class on making the “Sparrow” applique in the middle group
Master class on making the “Sparrow” applique in the middle group
International Bird Day is celebrated annually on April 1. We do not ignore this holiday. This year we had an entertainment activity where the children of our middle group “Fidgets” strengthened and enriched their knowledge about birds, their characteristics, habits, and nutrition. We played outdoor games and put together puzzles.
And we finished the lesson by making a tear-off appliqué “Sparrow”.
—make an applique using the “Sparrow” tear-off technique
- learn how to make a product according to a sample,
-develop compositional skills,
- develop fine motor skills of the hands.
-colored and white paper,
We take sheets of colored cardboard, in different colors, and cut each sheet in half.
Cut out the silhouette of a sparrow from white cardboard.
We apply the sparrow silhouette to sheets of colored cardboard cut in half and outline the silhouette.
Cut white and brown paper into strips 1.5 cm wide.
Now for each child we distribute half of the colored cardboard, glue, strips of white and brown paper.
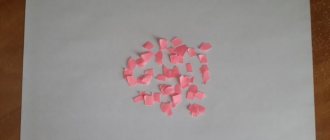
Children tear off pieces from stripes of two colors and paste them along the contour: white for the breast, brown for the body of the bird.
We then use a long strip of brown paper to make a branch for the bird and a leg.
Our application is ready!
Master class on making a collective application “Easter Basket” Good day, dear colleagues! I present to your attention a master class of collective work on the Easter Basket applique.
Children's master class on making the "Narcissus" applique Dear colleagues, I bring to your attention a children's master class on making the "Narcissus" applique. Goal: Continue to teach children.
Master class on making an applique from cotton pads “Snowdrops” Cotton pads are another material for creating various applications. From them we decided to make snowdrops - the first flowers of spring. For the manufacture of.
Master class on making an applique from rice “Autumn Tree” Master class on making an applique from rice “Autumn Tree” For work you will need: 1. Blue cardboard, 2. PVA glue, brush.
Firebird
The process of creating such a craft perfectly develops the imagination, because the character is magical and very bright.
- To make the head and body, cut out a ten-centimeter square piece from colored paper.
- Form a square into a triangle and bend along the larger side.
- Now expand the square - it is divided into four sectors.
- To get the body of the bird, glue both edges overlapping.
- The belly is the larger side, and the smaller side is the back.
- To create a chic ponytail, cut nine nine-centimeter strips - curl them or leave them straight.
- Glue three stripes to the back, six will serve as material for making wings also on the back.
- You can also make both the tail and wings using the palm technique.
- You can cut out eyes and other small details from colored paper or draw them.
- Attach the bird to the background on a branch of colored paper, decorate the background by painting it and gluing parts from colored paper.
