Folk toys are the best help in the development of children. For example, the popular matryoshka cat, made using the origami technique, will not only amuse preschoolers, but also introduce them to the basics of algebra and geometry. It will teach you to visually compare objects by size and volume, count, and most importantly, think logically. Cats or kitties hidden inside each other are one of the varieties of maneki-neko beloved by the Japanese, symbolizing good luck and prosperity.
According to national beliefs, the more such toys in the house, the greater the financial well-being of the owners. Maneki-neko dolls are called “Lucky cats” in Japan. They are always depicted with a raised paw, which they use to attract good luck.
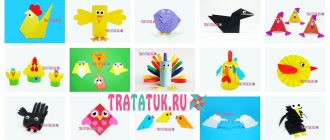
Maneki-neko in paper version
Usually matryoshka cats are made of wood. But even if they are made of paper using the origami technique, they are unlikely to lose their “magic” functions. For the Japanese talisman “for good luck” you will need 4 square sheets of different colors, sizes 15x15, 13x13, 11x11 and 9x9 cm.
Step-by-step instruction:
- We take the largest square blank.
- We place it with the top forward, fold it in half from bottom to top.
- We bend the left corner obliquely so that its top “rests” against the opposite edge.
- We do the same with the right one.
- Fold the top layer of the triangular flap forward.
- We tuck it into the lower trapezoidal “pocket”.
- We bend the second layer of the valve. We put it inside the resulting “glass”.
- Turn the workpiece 180°. We press our finger on the upper part of it to mark the ears. We draw the cat's face, as well as a tail and paws. According to Japanese tradition, one of them can be raised to attract good luck.
With a paper maneki-neko, young children will be able to act out theatrical scenes, inventing their own character for each member of the cat family. So, along with logic, an unusual nesting doll will allow you to develop your imagination.
If maneki-neko seems too exotic, the same scheme is suitable for making a classic Russian origami matryoshka doll. There is no need to press the figure with your finger at the top. The rest of the assembly algorithm is absolutely identical.
This is interesting
Folding figurines “small small less” have an ancient history. They were found both in Rus' and among other nations; just remember the Chinese carved puzzle “ball in a ball” or elephants, popular in India, which, although they were not assembled into a single toy, were also lined up from large to small. All these “funs” were nothing more than a symbolic model of the Universe. Scientists have proven that outer space is built according to the “matryoshka” principle: stars and planets consist of a core enclosed in a shell, in turn, enveloped in a gaseous environment. Cosmic bodies form galaxies, giving rise to clusters, the multitude of which are called the Universe. It is already known that it is not alone, but is also “embedded” in larger structures, still unknown to humanity.
On the other hand, unlike its analogues, the Russian nesting doll is also a symbol of motherhood and procreation. The imagery here is clear without words. The name of the toy probably comes from the Sanskrit "Matri", meaning "mother". The folding doll gained great popularity in the 19th century, when interest in folk traditions increased in Russian society and many crafts began to be revived on this wave. The international recognition of the nesting doll was promoted by the prominent merchant and philanthropist Savva Mamontov. In 1900, he presented a unique toy at the World Exhibition in Paris, causing not only general admiration, but also a real fashion boom. Orders for the mysterious nesting doll from distant Russia then poured in one after another.
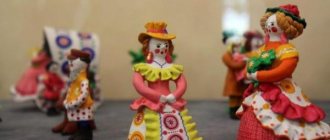
Two images of the legendary toy
The first to mass produce matryoshka dolls were the artisans of Sergiev Posad in the Moscow region. At the beginning, the samples were a mother with a large family, sometimes including only daughters, and sometimes both boys and girls. However, soon the painting of wooden dolls became much more diverse - townspeople artists depicted artisans and merchant women, young girls in bright city outfits and old men in traditional peasant clothes.
Special series were dedicated to literary works, folk tales, important historical events, and so on. The blanks were painted by local icon painters, drawing on the traditions of the Byzantine school of painting. If the first toys had a simplified appearance, then later they began to resemble the faces of saints, and the stories that adorned them became more complex.
Since the beginning of the 20th century, nesting dolls began to be produced by the leading center of folk crafts - the city of Semenov in the Nizhny Novgorod region. The artel of the master Arseny Mayorov gave preference to dolls in the Russian style, which quickly came from Sergiev Posad. To understand what the products of Semyonovsky craftsmen looked like, it is enough to remember that the city is the birthplace of the famous Khokhloma. The techniques for painting nesting dolls were borrowed from there. Particular attention was paid to the decor of the toy’s apron, which became an integral part of her outfit. The painting was dominated by plant motifs - stylized flowers, herbs and berries.
Over time, the appearance of the folk doll has changed several times. During the era of perestroika, a fashion appeared for folding models with portraits of political figures and other equally grotesque products. However, these phenomena are transitory, and the wooden folding toy, a masterpiece and phenomenon of Russian culture, not only continues to live, but is also reflected in related types of needlework. For example, in origami.
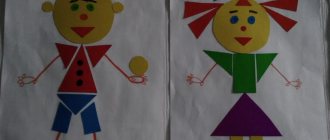
Lesson summary on application in the senior group
Lesson summary on application in the senior group
Educational field: "Creativity"
Section: Application
Topic: “ We are folk craftsmen ”
Goal : to create matryoshka doll using the cut appliqué technique .
Tasks:
-continue to introduce children to the technique of cut appliqué;
-develop fine motor skills and creativity;
- to cultivate accuracy in work and perseverance.
— To give children the opportunity to feel the joy, love, kindness that these toys bring to people;
— Continue to teach children how to work with a stencil,
Developmental: - develop a sense of shape, color (select harmonious color combinations)
:
- develop creative imagination.
Health savers:
— continue to teach children to monitor their posture;
— continue to formulate rules of safe behavior when working with scissors.
Educational:
- cultivate artistic taste;
— cultivate accuracy when working with scissors and glue;
- cultivate interest in co-creation.
Equipment:
Wooden nesting dolls, silhouette of a nesting doll on white paper , scissors, PVA glue, colored paper.
Progress:
Children enter the hall. Stand in a semicircle near the table on which the nesting dolls are displayed (they are covered so that the children do not see them)
.
Educator: Hello, guys. Today we have guests, let's say hello to them.
Educator:
— I’ll tell you a riddle, and when you guess it, you’ll find out what’s hidden on the table.
Mystery:
They love to live alone in summer and winter,
Bring them boots and they’ll go dancing. (matryoshka dolls)
Children: Matryoshka dolls
Educator: Shows the nesting dolls standing on the table.
That's right, these are nesting dolls. Yes, how beautiful.
Question: Why do you think this doll began to be called matryoshka?
Children: That’s what girls were called in Rus' - Matryona
Educator: What kind of person do you think made them, good or evil? Why did you decide so?
Children: She was made by a kind person, because she smiles and has cheerful eyes
Educator: There are many cities and villages in Rus' where craftsmen who make nesting dolls live
Question: What are they cut out of and why are the nesting dolls colored, bright and all so different?
Children: They are cut out of wood and painted with paints
Educator: Correct. Here at the Zagorskaya matryoshka (shows the matryoshka)
the nose is depicted with two dots, and the lips are made with three dots (two at the top, one at the bottom, two strands of hair are hidden under the scarf and tied in a knot, the scarf and apron are decorated with a simple color pattern.
And the Semenovskaya matryoshka (shows the matryoshka)
The craftsmen make a guide with black paint: they draw out the oval of the face, eyes, nose, lips, and outline the scarf. The Semenovskaya matryoshka doll is decorated with flower buds, lush roses, and bells.
Polkhov-Maidan nesting dolls are the brightest, most cheerful, primary colors - purple, scarlet, yellow, blue; pattern - flowers and berries.
Educator: Then let's go to the tables, sit down and make our own nesting dolls. And then we will give it to those who care about you and whom you love
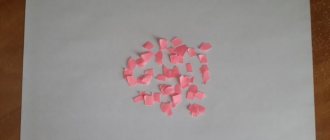
(Since our applique is broken, the children make blanks in advance, tear off multi-colored paper into small random pieces.)
Then, in a random order of colors, children glue scraps of colored paper.
Educator: Look how many bright, beautiful, different nesting dolls we have.
The matryoshka doll is a caring, kind, reliable mother who unites, brings together and protects the little and weak. Such a toy is made only in our Russia, only by Russian craftsmen. And a Russian toy pleases and warms the soul of all good people on earth. When foreign guests come to Russia, they always take home our Russian folk toy as a souvenir.
Bottom line
Questions for children:
What beautiful nesting dolls did you make, who made them so beautiful? (Children's answers)
.
How did you do that?
What was difficult for you to accomplish?
Do you like your job?
Lesson summary on application in the senior group
Educational field: "Creativity"
Section: Application
Topic: " Granny's scarf "
Goal: to develop the ability to make products using the appliqué technique.
Tasks:
1. Arouse interest in decorative applique.
2. Continue to teach the correct technique for gluing parts
3. Consolidate knowledge of geometric shapes and colors.
4. Develop mental processes (attention, memory, thinking)
.
5. Cultivate aesthetic taste, love for decorative and applied arts.
6. Cultivate responsiveness and kindness.
Progress of the lesson
Children enter the group and stop around V.
Q: Children, you see, guests came to us today. Let's say hello to them.
D. say hello.
Q: Today it will be very interesting for you and me. I suggest, in order to lift our mood even more, smile at yourself, me and the guests, and now smile at each other.
Matryoshka enters . Says hello. She wonders if the children recognized her.
Q: Oh, dear Matryoshka , what a worn, old scarf you have on your head... Here is a patch , and here the drawing is already worn out...
(Draws children's attention to this)
M. became sad: What should I do? Where can I find a new beautiful scarf now? I’m in a hurry to visit my dear mother. How can I approach her like this?
Q: Guys, maybe we can help Matryoshka ? But how?
D. answer.
V. leads the children to offer to make a scarf with their own hands.
Q: How can you make sure that the scarf is beautiful, and not just white and without patterns?
D: Decorate it.
Q: How can we decorate it?
Answer options (draw or use applique )
Q: How can we decorate a scarf??
D: Flowers, patterns.
Q: Or maybe geometric shapes? For example, what shapes do you know?
D: Circle, square, triangle.
Q: And now that we have already rested and warmed up, it’s time to get down to business. Guys, take your seats.
D. are seated at their workplaces
B. Invites to help children take jobs. A ready-made scarf template hangs on the easel. The same templates are laid out in front of the children, as well as one geometric figure each (for decorating the product)
Q: Sit back, guys. Keep your backs straight, hide your legs on the table. Well done! Keep your hands on the table, don't rush to touch anything. Look at my easel. This is the kind of scarf I propose to give to our guest, Matryoshka. It just seems to me that something is missing here... Some boring scarf . What do we do?.
D: Decorate it!
Q: How can we decorate it? Think about it. Look at the table, at the plates in front of you. What's in there?
Q: Right, guys. How smart you are. Before we start gluing, let's first lay out the parts on the handkerchiefs the way you want to glue them.
V. helps to place the details at the corners of the scarf.
Q: Smart kids! Let's do so. First, I will show you and remind you how to correctly and accurately stick on the parts, and you remember carefully.
V. shows the technique of gluing parts, how to use glue and a brush correctly and carefully.
Q: Now you can get to work. When you're done, put your handkerchief on the edge of the table and don't forget to wipe your hands with a napkin and put your brushes on a plate.
During gluing, V. approaches each child, helps them take the brush correctly, carefully apply glue to the part, and works individually.
After all the children have completed their work, he offers to raise the finished scarves above their heads and show them to Matryoshka and each other. Praises the guys.
M: Oh, guys, which scarf should I choose? They all turned out very neat and beautiful!
(Shows everyone a real scarf)
M: Thank you! My grandmother really loves it when I wear scarves like this with bright colors. Maybe I’ll take it for myself, and you guys will give your scarves to your beloved grandmothers, let it be as a keepsake.
D. agree.
V. praises the guys for how hard they tried, and for what beautiful souvenirs they turned out for their grandmothers.
Q: Now, guys, you can put your handkerchiefs in the lockers to give to your grandmothers in the evening. And the nesting doll will help you. Then don't forget to say goodbye to her.
D. and M. say goodbye to the guests and leave.
Lesson summary on application in the senior group
Educational field: "Creativity"
Section: Application
Topic: " Fire Truck "
Goal: To acquaint children with the profession of a firefighter, with the tools he needs in his work, with a fire truck.
Objectives: To consolidate knowledge about special transport - a fire engine;
To consolidate knowledge about the work of firefighters;
Give children an idea of the dangers of fire;
Develop logical thinking, spatial coordination (the ability to place parts on cardboard);
Foster a sense of caution and self-preservation.
Equipment: Picture of a fire truck, colored paper, glue, brushes, ½ colored cardboard, scissors, rags.
Progress of the lesson:
Introductory part.
— Bim - bom, bim - bom! In the courtyard there is a tall house, carved shutters, painted windows (show picture). With a crash, clicking and thunder, a fire rose above the new house, so the house collapsed and burned with all its goods. Guys, why did the house burn down? (show picture)
— Guys, what can happen if the fire is left unattended or children pick up matches and play with them? Guys, who can defeat the insidious fire?
— What number do you need to call for the firefighters to come?
—So that a firefighter can quickly get to the fire, what does he need?
—What car?
Main part.
— Guys, let's first look at what a fire truck looks like (showing a picture of a Fire Truck).
— What does a fire truck have?
— Guys, why is the car red?
— Because fire is also red, the color of danger.
— Why do you need a fire truck signal?


