Animal leaf appliques
In this type of application, the selection of material is important. It is best to store leaves in the fall - then there is an opportunity to collect material of various shades, especially warm tones. The leaves need to be straightened and placed between the pages of a large format book.
They must remain there until completely dry, otherwise the leaves will curl. It is better to collect leaves together with children, simultaneously explaining to them where each tree is and telling them about them.
Working with leaves is practically no different from working with paper, except that dry leaves are quite fragile and they do not stick well. Application of leaves develops the child's imagination.
He learns about the properties of natural materials and learns to work with them, compares the shape and color of various objects.
Applications of animals from cotton wool
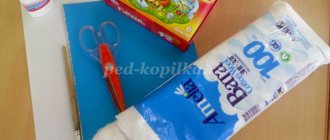
Cotton wool is a good material for applique, perfectly conveying animal hair. To work with it, children need to draw the outline of an animal.
It needs to be filled with cotton wool close to the texture of the fur of a particular animal: for a sheep - with lumps, for a dog - with narrow hanging strips, etc. If desired, this “wool” can be painted.
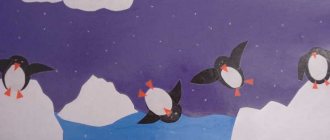
It is quite possible to simply cut out some of the elements from paper and stick them on.
Peacekeeping action “Garland of Friendship”. Master class on making a doll
Tatiana Khomusko
Peacekeeping action “Garland of Friendship”. Master class on making a doll
Good afternoon, colleagues. At the beginning of November I turned my attention. for “ Garland of Friendship campaign , and since I am a creative person, I was interested in this. I invited the children to take part, everyone unanimously agreed . From the beginning, I explained to the children why we would make dolls. what is the purpose of this action ? While we were making dolls, I told the children about the history of dolls. She gave examples of the use of these dolls. The children were very interested in the fact that they could be used as amulets. We discussed for a long time what it means to be friends . I really liked the reasoning of my guys. Somehow, suddenly, it immediately became clear that they had already grown up. Many of them said that they would ask their parents to make one more squash at home. When the parents came to pick up their children, I invited them to take part. Many agreed, but asked to show how to make a doll . This is the master class I prepared for parents.
1. To make a sledgehammer we will need: scissors, fabric of different sizes and types. A large flap for the doll , a smaller flap for the hands. We also take threads (yarn, floss, iris)
for decorating the head, torso, arms. Any decorations.
2. Take the flap for the doll , fold it inward on both sides, then fold it again towards the center. Then we put one side on the other.
3.Next step: bend it in half and take a long thread to highlight the head. We tie the thread on the reverse side. you can make several turns. Leave the ends of the thread.
4. Then we make hands using the same principle. We shape the hands and tie them with short threads.
We place our hands in the middle of the body.
5. Take the ends of the thread and make a cross on the waist. Let's tie it up.
6. The cube doll is almost ready. The threads can be cut, but you can also leave them for attaching the next dolls.
7. To decorate the doll, you can take a piece of beautiful fabric, rectangular in shape. Using a needle and thread, we assemble the fabric and give it the shape of a skirt. We put it on the doll and tie it.
8. To decorate the head, use a small triangular piece of fabric. We form a scarf and tie it around the head.
That's all, the doll is ready . This is the garland we made together with the children and parents.
I invite you too to take part in the action . Thank you for your attention.
“Garland of Friendship” campaign with the production of Kuvadok dolls Having learned about the “Garland of Friendship” campaign on the website, we decided to keep up and made 7 wonderful Kuvadok dolls. The guys really liked the story. Children's master class on making a doll “Cockerel Fire” On the pages of the blog, I have already offered my master class on making a Cockerel. I made little Cockerel with a middle school student. Master class on making a play doll “Parsley on a cone” He is smiling and cheerful. The cap on it is patterned. And the polka dot shirt makes honest people laugh. You guessed it right, friends! Today. Master class on making a doll “Kuigorozh” Kuigorozh is a fantastic creature in Moksha and Chuvash mythology that brings treasures to the house. According to legend, if a rooster lives six. Master class on making a motanka doll “Dreamcatcher” Dream creates faces, names, Colorful visions interfere with reality, Like waves under ice, under the arch of sleep Sleepless imagination lives. Samuel Marshak. Master class on making a doll-amulet “Bear Hunter” I am glad to see you, my friends, colleagues, guests! The bear has long been considered the owner of the forest. Like all inhabitants of the forest belt, the bear was surrounded by exceptional things. Master class on making a shapeshifting doll “Blacksmith” I am glad to everyone who stopped by to see me on this cozy Saturday evening! I invite you to admire my next creation! Meet the blacksmith. Master class on making a Mermaid rag doll In my recent publication, I showed you, friends, how the Little Mermaid turned into the Mistress of the Copper Mountain. Because, having transformed, she moved. Master class on making a rag protective folk doll “Bell” Good day, dear friends and guests of my blog! I haven’t turned to a folk doll for a long time. Folk rag dolls, they are also called. Master class on making a “Space Angel” doll based on the folk rag doll. The cosmos captivates us with its beauty, It has a lot of colors, it is alive. The lights shining in the night are so delightful and sweet! Our gaze is fixed on the heavens.
Source
Animal applications using quilling technique
Quilling is an application of increased complexity. The work consists of gluing narrow strips of paper, usually folded in the form of spirals, onto cardboard.
First, the outline of the animal is glued, and then it is filled from the inside with curls of the desired shade. This technique is good because it successfully imitates the texture of animal fur or bird feathers.
All children, without exception, love creativity. Therefore, appliqué is one of the most interesting hobbies. Children work with her with great pleasure both in kindergarten and at home. Not only is it a wonderful leisure activity for a child, but it also develops his imagination.
Volumetric animal applications
There are several ways to make a three-dimensional paper applique:
- Strip applique. To use this method, you need to glue the animal’s body together from narrow strips, like a flashlight. And glue a paper head, legs and tail to it. You can make a whole exhibition of works on such an application in the senior group - for example, on the topic “Animals of the North”. You can invite children to make one of the following animals: deer, wolf, polar bear or owl.
- Cone applique. Cone-based applications are perfect for developing children's imagination. For example, for children in the preparatory group, you can suggest a theme for the application “Animals of hot countries.” Children can make a tiger, lion, giraffe, elephant or crocodile. The cone can act as a head, torso, or any other part of the body. For younger children, the cutting of the cone should already be ready, and a sample should be provided for copying.
- Cylinder applique. The scheme is the same as in the previous versions, but this craft is easier to make. Plus, absolutely any animal can be made this way.
