Sand therapy for children makes a significant contribution to the development of cognitive and creative abilities, speech, fine motor skills and tactile sensitivity. Sand helps a child get rid of negative emotions, relax and relieve stress. Joint play and creativity with parents have a beneficial effect on family relationships.
Benefits of the lesson
Sand as an art material has several advantages. And most importantly – a relaxing, therapeutic effect. The child gets rid of the effects of stress, and emotional stability returns to him. Sand painting is used to treat sleep disorders, neurotic disorders, and anxiety in children. Sand art is also useful for healthy children; it allows them to calm down after failures, get rid of low self-esteem and the phobia of becoming a loser. The child sees that a bad drawing can be corrected at any time.
The second benefit of sand painting for children is a developmental activity. The technique improves finger motor skills, sensory perception and creative thinking. Drawing usually involves both hands, which has a positive effect on the development of both the right and left hemispheres of the brain. For schoolchildren, fiddling with sand improves writing skills. It is useful to use the technique with children for whom studying is a burden. In this case, sand painting becomes a good addition to homework and allows you to consolidate school knowledge through art.
The third benefit of drawing on sand is the revelation of artistic potential and the manifestation of imagination. The technique has no restrictions and strict rules. You can draw with your hands and various devices. The loose texture of the material allows you to create images of any complexity and degree of detail. Drawing with sand is available for toddlers, middle school preschoolers, and schoolchildren.
The history of sand therapy
CONTENT:
Back in the 20s of the 19th century, analyst Dora Kalf identified the healing properties of sand. Sand therapy is based on the symbolic manifestation of the unconscious and often becomes a source of development and internal growth of the individual. The author connected the content of sand paintings with a person’s state of mind. It was concluded that with the help of a sandbox, a child creates his own model of the world around him, transferring his own anxieties and concerns into it.
Sand therapy was developed in the works of Margaret Lowenfeld, who used this technology in working with children with psychological problems. She developed her own method called the “world-building technique,” which includes principles of work and exercises for working with children of different age groups. At this stage, sand therapy is distinguished as a separate type of art therapy; it can be used in child psychoanalysis, cognitive behavioral direction, Gashtalt therapy and family psychotherapy.
Sand painting materials
To learn to draw on sand, you need to purchase a list of materials and equipment. All of them are affordable, you won’t have to fork out a lot of money. Here's what the young artist will need:
- table with sides and a lighting device at the bottom;
- sand;
- antistatic agent in a can;
- additional equipment - art brushes, sticks, sieve, templates;
- a wide and flat brush for sweeping grains of sand from the corners of the table.
An antistatic agent is necessary to prevent sand grains from sticking together, which is inevitable when quartz material is used repeatedly. The spray should be sprayed before each lesson. A regular antistatic agent is suitable, preventing synthetic clothing from sticking to the body.
You can buy a table or make it yourself. Homemade design - sides connected in a rectangular shape with a bottom made of frosted glass or plastic up to 5 mm thick. It is necessary to fix the lamp from below so that diffused light is obtained. The lighting can be anything: in the warm and cold range, even colored. The legs of the table should not wobble, otherwise when drawing you will not be able to draw neat lines.
The finished table is a structure with sides and a bottom in the form of an illuminated tablet. The optimal format is 130x70 cm, but for a child 70x50 cm is enough. The height of the sides should be at least 6-7 cm, but from the side of the drawer it is only 3 cm, otherwise it will be inconvenient to draw the lower elements. It is necessary to leave indentations for sand 10-15 cm wide on the right and left sides. It is advisable that these areas be in the same plane as the space for drawing, this makes it more convenient to use many techniques. But some ready-made tables have tray recesses on both sides.
Any sand will do. You can buy an aquarium one at a pet store, and a special one for creativity at a supermarket in the children's section. You can contact a children's and adult creativity studio where sand animation is practiced, if there is such an institution in the locality. They probably won't refuse to sell a small amount of sand. The fraction of the material can also be any. It is advisable to get different ones, since fine sand is convenient for creating tones and halftones, and coarse sand is convenient for creating large image details.
If there is a river near your house, you can dig up sand on the shore. You just have to filter it through a fine-mesh sieve, then rinse. The washing procedure looks like this:
- Pour 4-5 kg of sand into a bucket. This is the standard amount for drawing.
- Fill with water to the edge of the bucket.
- Stir gently with your hand or a large spoon.
- When dust and dirt particles rise to the surface and heavier grains of sand settle to the bottom, carefully drain the water.
- Repeat the procedure until the drained water becomes crystal clear.
- Dry the cleaned material on the balcony if the weather is sunny, or on a radiator, or in the oven.
You can replace sand with semolina, finely ground salt, and to create darker and more contrasting elements of the image - ground coffee.
Bulk material should be renewed once every 3 months, and if the child draws every day, then once every 1.5 months. If this is not done, the sand will become less pliable, since with constant friction the grains of sand are destroyed and the structure of the material softens.
Characteristics of the method
In preschool childhood, playing with sand helps in the development of spatial imagination, teaches logical thinking, develops attention and fine motor skills. Sand animation has a relaxing and calming effect, so it will be especially useful for hyperactive preschoolers.
This method is a wonderful finger gymnastics, expression of fantasies, manifestation of acting abilities, which has a beneficial effect on the emotional development of the child, his sensitivity and perception of the world around him. This method will help parents learn better about the inner experiences of their children, help with the expression of feelings and emotions, an exciting game that can captivate and calm.
Even an adult may have difficulty expressing and interpreting emotional states, but for a child this can be an overwhelming task. Sand therapy promotes the manifestation of emotions and their expression in a playful form.
This method is a creative process in which there are no specific frames or boundaries. Thanks to this, the child can express his personality without fear of reproaches and mistakes. This method, which without unnecessary stress, will allow the child to transfer internal experiences to the outside world.
Sand painting technique
The technique of creating sand drawings is not difficult, but when teaching a child you will have to be patient. The main tool is the artist’s hands, but it is possible to use auxiliary devices.
Before your child starts drawing, introduce him to the art material. Offer to immerse your hands in the sand, pour it from one palm to the other, and talk about your feelings. After becoming familiar with the material, you can begin to learn drawing methods.
Fist rash
This is the first DIY sand painting method that a preschooler should master. Ask to take the material into your palm, clench it into a fist, and turn it along a vertical axis so that the grains of sand fall down. Explain to your child that the amount of sand spilled out is regulated by squeezing and relaxing the fist muscles. If more grains of sand spill out, the “mound” becomes denser and darker. This creates images with a smooth transition from light to shadow.
Lines of different sizes
Next, preschoolers master drawing lines of different thicknesses, lengths, and tortuosities. Teach your child to draw dotted lines, curls, and waves. This is the best method of getting used to the original drawing technique for a preschooler of the younger group.
To create a thin straight or curved line, you need to pour a strip of sand from your fist, then put two fingers together - your thumb and forefinger, and run them along the strip. You will get a line of the same thickness throughout. Explain to your child that you should not strain your fingers too much, otherwise the image may turn out uneven. If a thicker line is required, the fingers need to be connected diagonally.
Drawing with different parts of the hand
When drawing on sand, different parts of the hand are used. They move one or more fingers over the material, move them and spread them apart. Large elements and thick lines are depicted with a fist and the edge of the palm extending from the little finger. To create many small details, they poke the sand with their fingertips, and draw fine lines with their nails.
Drawing on dark and light
When the above-described drawing methods have been mastered, you can begin to select a compositional basis. You can draw “in the dark”: fill the background with sand to make light lines on it. Or “in light”, that is, create a dark sandy image on an empty background. Typically, professional artists combine these methods. At the initial stage, it is enough for a child to master them separately.
Drawing with aids
To make sand drawing more fun in kindergarten, let children use not only their fingers and palms, but also additional devices. What you can draw:
- Artistic brushes of different hardness. They are convenient to depict hair and wool.
- Toothpicks, hashi sushi sticks, cooking skewers. Optimal for creating thin and graceful lines, fancy patterns, and detailed drawing. It is advisable to use wooden products; they will not scratch the plastic bottom of the drawing table.
- Comb, small rake. With their help, you get neat waves.
- Colored paper. It is placed on the table and sand is poured on top. Uncovered areas of the design are multi-colored. The method is applicable for creating floral motifs and abstract patterns.
- Funnel. Pour sand through it, create slides, paths, patterns - a fascinating activity.
- Fine mesh sieve. With its help, the table is covered with a thin layer of sand, which can become the background basis for the drawing.
- Stencils. You can use ready-made ones. Or cut them out of plastic lids or cardboard for practice. Or use different flat objects for this purpose. You need to place them on a clean table surface, sprinkle them with sand, and then carefully remove them.
- Pendulum. Attach a round-shaped weight to the thread and give it to the child. Let the pendulum swing over the sandy surface, creating patterns of different depths. This is a wonderful method of strengthening the skill of correct pressure and speed of movement when creating a drawing.
- Cylinder with patterns. You can use a toilet sleeve. Apply patterns on it with a thick layer of glue. Wait until it dries, then give it to your child. Let the cylinder roll on the sand, creating patterned paths.
Who is suitable for sand therapy?
Using this method can be useful for every child, even if he does not have personality disorders, as a method of developing skills and abilities. But there are cases when the use of sand animation for preschoolers is especially recommended:
• If you have fears or severe anxiety;
• With mental retardation;
• With diagnosed neurosis, nervous tics;
• With low self-esteem;
• During outbursts of aggressive behavior;
• In case of difficulties in relationships with others (parents, teachers, peers);
• For depression, apathy, isolation, suicidal thoughts;
• For speech therapy disorders;
• In case of violence or psychological trauma.
A preschool child often has difficulty formulating his experiences. Sand animation therapy will help him overcome this barrier and cope with negative conditions in a playful way.
Exercises
Here are some popular sand painting exercises on light tables for children:
- Letters. The lesson is useful for older preschoolers and younger schoolchildren who are learning to write. Spread sand on the table in a dense layer. Let your child learn to write letters beautifully and develop finger motor skills.
- Water landscape. To create it, walk with your outstretched fingers along the sandy surface, imitating waves. At the top of the composition, make thin strokes with your nail - these will be distant ripples. Draw the horizon with the edge of your palm, remove the excess in the upper part - this is the sky above the reservoir.
- Clouds. Take sand into your fist. Pour it out in a thin stream, making circular, non-sweeping movements.
- Maple Leaf. Draw lines that form the outline and veins of the leaf. Sharpen the outline by running your finger along the outer edge of the line, moving the sand inward. Use your fingernail to follow the veins. Outline the border of the petiole.
- Sun. Take sand into your fist and lift it 20-30 cm above the table surface. Pour out evenly, trying not to move your hand. Grains of sand, falling from a height, bounce off the plastic surface, form a ring, and the middle remains empty. And its diameter is wider, the higher the hand is raised.
- Mountain landscape. Spread the sand in a horizontal direction using quick zigzag movements. Use the edge of your little finger to walk along the upper part, removing the excess to create a relief.
Sand animation for preschool children
The highest skill is shooting sand animation, in which the artist continuously creates images that smoothly flow into each other. And he does this by making the minimum possible number of movements. This is a complex art that requires the master to act quickly and have impeccable artistic skills.
Real animation is unlikely to be within the capabilities of a preschooler, but something simple, for example, a tree that is bare in winter and blooms in summer, he can easily depict after practicing for 3-4 lessons.
Introducing a sand painting master class for children:
- Spread the material evenly.
- Place the pad of your finger on the sandy surface and move upward. Thin the line by gradually raising the pad. You will get a tree trunk.
- Draw branches with your little finger. Make them curved rather than straight so they look natural. It will turn out to be a tree in winter.
- Now make it summer. Sprinkle sand in a wide layer on the ends of the branches - this is the crown. Also sprinkle horizontally under the tree - this is grass.
- Randomly poke your fingers along the crown, pressing to different depths, to make leaves. Draw blades of grass by running your fingernail vertically under the tree.
- Adjust the contour of the tree crown and remove excess sand.
- The animation can be continued by making it autumn. To do this, place a few spots under the tree with your fingers - these will be fallen leaves.
Sand therapy stages:
1. Working with sand. At the first stage of work, the child gets acquainted with the sand and the available figures and figurines. It is especially important for a psychologist to observe the actions of a child, paying attention to his behavior and actions.
2. Discussion. After the end of the game, a joint discussion of the progress of the game is held. It is important for a specialist to find out the individual explanation of each game character. The psychologist can interpret the meaning of the figures and their impact on the patient's life problems. During this stage, the psychologist should help identify the problematic situation and push towards its solution.
3. Repeated therapy. Having identified the client’s superficial problems, it is necessary to continue systematic work that allows one to study deep-seated experiences. It is necessary to work on the problem comprehensively, looking at the causes and solutions from different angles.
Playing with sand is a natural and accessible form of activity for every child. A child often cannot express his feelings and fears in words, and then playing with sand comes to his aid. By acting out the situations that agitated him with the help of toy figures, creating a picture of his own world from sand, the child is freed from tension. And most importantly, he gains invaluable experience in symbolically resolving many life situations, because in a real fairy tale everything ends well!
The properties of sand carry a certain mystery and mystery and can fascinate a person. Manipulations with sand, both wet and dry, calm impulsive, overly active children and liberate tense, constrained and anxious children. Also, playing with sand is very useful for developing fine motor skills, tactile sensations and coordination of movements. All this is directly related to the development of speech, thinking, attention, observation, imagination, and memory. Playing with sand has a positive effect on the development of children's imagination and creativity. On the sandy range you can give free rein to your wild imagination. So many things can be sculpted from wet sand: shaped Easter cakes, houses, garages, palaces, cities, sculptures. The complexity of the sand structure increases with the skill of the young architect. In this article I will tell you about some sand games for children.
Every child loves to play with sand. By offering the child a dustpan, a bucket, molds, rakes, funnels, a sieve, plastic jars and bottles, we will not only give the child an interesting activity, but will also contribute to the development of his imagination. What to take with you to the sandbox? Here is a list of items that will help you diversify your games with sand: - water (it’s convenient to take it in a plastic bottle) - scoop, spatula - bucket - sand sieve - rakes - molds of different sizes and transparency (you can use jars as molds). creams, egg cartons, yogurt cups and plastic bottles, from the top of which you can make a funnel or scoop) - watering can - funnel - mill and other toys with rotating blades - figures of people and animals (domestic, wild, sea , ancient), small dolls, surprise toys made from chocolate eggs - natural materials: stones, shells, pieces of wood, dry plants, blades of grass, sticks, twigs, leaves, cones, acorns, seeds, feathers, etc. - toy household items, furniture - toy dishes - transport (land (small cars and trucks with bodies), water, space, combat vehicles, construction equipment) - objects of the surrounding world: houses, fences, bridges, gates, road signs, signs etc. - waste material: planks, sawdust, scraps of plastic hoses and pipes of different diameters, plastic film, reels, pieces of foam plastic, foam rubber, twine, braid, oilcloth, colored wire (in a sheath), etc. - boxes with “treasures and jewelry", table tennis balls - plastic or wooden letters, numbers, various geometric shapes. Provide a separate bag for “outdoor” toys so as not to mix them with indoor ones. It’s better if there are several bags, with different game sets. So, if everything is ready for the game, let's go to the sandbox. But before that, do not forget to tell your child simple rules of behavior in the sandbox: do not throw sand overboard, do not put it in your mouth or throw it at other people, and, of course, wash your hands after playing. Now let's play...
“We bake Easter cakes”
Purpose: to introduce the child to the characteristics of dry and wet sand; form an idea of the variability of sand shape depending on the mold; learn to “sculpt” Easter cakes, carefully filling the entire container of the mold, compacting the sand; develop fine motor skills of the hands; learn to understand and use antonym words in speech: dry - wet, a lot - little sand; name the vegetables (according to the molds and real vegetables).
Progress of the game. In order to arouse the child's initial interest, tell your child a story about how you loved to play in the sand as a child.
There are different molds in the sand. Show them to the children, invite them to look at them, touch them, and talk about their color and shape. At this time, you hide the molds in the sand and ask the child to find (dig up) the hidden molds. The child is looking for molds in dry sand, and you draw his attention to the fact that the sand is spilling between his fingers, that it is dry, etc. When all the molds have been found and named, ask the child to say again which sand is dry or wet.
Together with your baby, pour sand into one half of the box, and leave the sand dry in the other half. Show how to fill molds with wet sand. Draw the child’s attention to the fact that when filling the mold, the wet sand needs to be tamped down with your fingers, show how to “bake” the Easter cake by placing it on a tray, etc. When the Easter cakes are ready, the child calls what he “baked.” Now let’s try to “bake” Easter cakes from dry sand. Ask if this can be done, if the cakes will turn out. Even if the child gives incorrect answers, you do not refute them, but offer to check them empirically. The kid pours dry sand into the molds and tries to place them on a clean tray. Naturally, the shape is not preserved, then you ask him to explain why Easter cakes turned out from wet sand, but not from dry sand?
"Hide the toys"
Goal: to develop the ability to determine the number of objects based on auditory and tactile perception, hide this amount in the sand, placing it along the entire plane of the sand box, and then remove the specified amount from the sand.
Progress of the game. The adult says to the child: “Look what toys are on the tray. Try to hide them, bury them in the sand so that they are located throughout the box. Then we will look for them together. (The baby buries the toys, and you, if necessary, help, then together he finds them and names them.) You and I hid and found toys, and now listen to how many toys I will ask you to hide. I will clap my hands, and you will take as many toys as you hear. Then you hide them in the sand. But first I’ll see how many toys you took.” (The child shows the selected number of toys and then hides them in the sand.)
Didactic exercise “GO ON THE PATH”.
Purpose: to teach how to navigate on a plane; develop the ability to listen to the end of a task; develop fine motor skills of the hands; learn to assign tasks to each other.
Material: sandbox with sand, small toys, small objects (buttons, pebbles, bones).
Game progress: 1st option. There is a net on the sand, in which there are small toys in some squares. An adult offers to find the right toy (we start from the first bottom square) - five steps up, three steps to the right, etc. This is how the child reaches the toy that the adult intended. Next, the child thinks and gives instructions to the adult.
Option 2. One child closes his eyes, the other buries something interesting (a button) in some square in the sand and also directs the actions of the other child. If the task was completed correctly, the child will find a hidden surprise in the sand.
Didactic exercise: “TRACK OF COUNTING STICKS.”
Purpose: to teach how to navigate on a plane; develop the ability to listen to the end of a task; develop fine motor skills of the hands by interacting fingers with sand, counting sticks and small toys.
Materials: sandbox with sand, counting sticks, small toys.
Progress of the game: An adult indicates the direction of movement - 2 sticks up, 3 to the right, 1 down, 1 to the right - a cat lives here; 2 up, 3 left, 3 up - a wolf lives here; 2 up, 2 right, 1 up, 3 left, 1 up - a squirrel lives here. You should always start moving from a marked place (the beginning of the path) - from a pebble.
Didactic exercise: “GUESS WHERE IT’S HIDDEN?”
Goal: we teach how to navigate on a plane, develop the ability to see the corners and middle of the sandbox, repeat the names of geometric shapes and their colors.
Material: small toys, buttons, pebbles, colored frames.
Game progress: 1st option. The child has small toys. The adult offers to place his toy in any corner, middle or on any side of the sandbox.
Masha, where is your toy? (in the middle)
Listen carefully to where your bear will go - to the lower right corner. Look with your eyes, who will he meet there? (with a lion cub), well done, show him the way - the child takes the toy and “goes.”
Invite the child to figure out where the toy will go. It is necessary to monitor the child’s speech – respond with a complete answer, correctly determine the place of the toy.
Option 2. Multi-colored buttons or other objects, the child closes his eyes, you hide the button in the sand. When the child opens his eyes, he is told: I hid the button in the square in the upper left corner, guess where it is hidden? The child is looking. Or we say: you need to put all the triangular buttons in the lower right square. (Everyone who has such buttons puts them in the indicated place). In the lower left corner - all yellow buttons, in the upper left corner - all with an eyelet, in the upper right corner - all small. Next, we count in which corner, how many buttons, where or which ones are more (less).
Didactic exercise “FUNNY EXCAVATIONS”.
Goal: to activate the child’s social and emotional experience by expanding their understanding of the world around them; development of tactile-kinesthetic sensitivity and fine motor skills of the hands.
Materials: sandbox with sand, small toys, brushes for excavation, scoops.
Progress of the game: An adult hides the necessary material in the sand in advance - a dilapidated castle made of cubes, animals, numbers, geometric shapes, etc. children dig out what is hidden in the sand. You need to dig very carefully, removing the sand in thin layers, never going deep or digging holes. If the spatula stumbles upon some object in the sand, it must be urgently replaced with a large brush and then continue to work only with brushes, carefully freeing the surfaces of the find. During the game, the child gains knowledge about the world around him, learns to fantasize and put forward his own hypotheses (if it is a castle, animals, aliens, eggs, etc.), consolidates knowledge about numbers, letters, counting objects, etc.
Didactic exercise “VERTICAL-HORIZONTAL”.
Goal: learn to navigate on a plane, find the vertical, horizontal and diagonal.
Material: sandbox with sand, small objects (pebbles, brushes) and small toys.
Progress of the game: In order to see the horizontal line, we move the sand to the lower or upper part of the sandbox. If the sand at the top is the earth and land animals live there, trees grow (we put all these toys in the sand), and at the bottom of the sandbox there is a sea where waterfowl live, pebbles, shells and a little sand may lie at the bottom. If the sand at the bottom of the sandbox is also earth, but the top part is the sky and we put toys there that can fly (birds, planes, etc.) During the game, we consolidate knowledge about the habitat of animals - forest, desert, jungle ; repeat the names of animals; We count and compare the number of toys. In order to see a vertical line, we place two palms on the sand. Two palms will have 2 identical houses and, so that they do not quarrel, we will divide the sandbox in half. The left palm chooses toys for its house, and the right palm – for its own. Another time, we’ll put the Christmas trees on the top side of the sandbox, and the doll on the bottom, and ask the child to build a path into the forest so that a vertical line is formed.
The diagonal can be built from different materials - from one corner of the sandbox to another. You can give the child the task of laying out a path of 7 red buttons, 4 blue, 5 large, 8 round, etc. So let’s fix the name of the color, shape and size of objects.
In the process of such a game, we develop speech, consolidate knowledge about the world around us, develop attention and thinking.
Didactic exercise “FIND A NUMBER”.
Goal: development of fine motor skills of the hands; development of attention and patience; Continue dividing numbers into even and odd.
Material: sandbox with sand, double-sided numbers (blue - odd, red - even), small toys.
Progress of the game. Numbers are buried in the sand. The child “puts” his hands in the sand and looks for a number.
Look, what is this number? Check if you have it in the right place?
Look, your number is blue (red). This indicates that the number is odd (even).
An adult explains on the pebbles what an even or odd number means. To remember a number well, you can draw it around with your finger in the sand, “walk” around it with your fingers, or lay out the same number next to it with bones, sticks, etc.
Next, the child looks for the next number and again explains even and odd using small objects. When the child remembers this, he simply says: “This is the number 5, it’s odd, so it’s blue.”
The task can be made more difficult by offering to place more or fewer objects on the sand than the number found. To make it interesting, you can bury other small objects in the sand, but you need to find the numbers.
"PATTERN IN A GEOMETRIC FIGURE."
Goal: orientation on a plane, develop the ability to see corners and the middle of a figure, develop imagination and fantasy, the ability to select various materials, develop fine motor skills of the hands.
Material: sandbox, geom frames. figures, pebbles, buttons, shells, etc.
Progress of the game: The child chooses a frame of a geometric figure, natural or waste material and makes a pattern in the sand. At the same time, we repeat where the corners of the figure are and how many there are, where the sides are and how many there are, where the middle is. In order for the pattern to turn out beautiful, you need to count and lay out the same number of objects, for example on the sides, objects of the same size in the corners, arrange them by color, etc.
Didactic game “HOUSE FOR FRIENDS”.
Goal: orientation on a plane, the ability to find or describe where the animal lives, using the concepts of floor and apartment in speech.
Material: sand playhouse, small toys.
Game progress: 1st option. The adult offers to place his toys in apartments in the house. Each toy has its own address - a yellow circle in a blue square, a yellow rectangle in a brown square, etc.
Option 2. The adult says: 2nd floor, 3rd apartment. The child finds this apartment and answers: my address is in the yellow square and green rectangle.
Option 3. All toys are placed in apartments. The adult says: the one who lives in the apartment blue square pink triangle goes for a walk. The child with this address puts away the toy.
Didactic exercise “FINISH THE FIGURE”.
Purpose: to consolidate the names of geometric shapes; fix the names of the colors of the shapes; develop the child’s imagination; develop fine motor skills of the hands.
Material: geometric shapes - circle, square, rectangle, triangle, oval, trapezoid, different colors and different sizes.
Progress of the game: An adult says: “Look, today I prepared a “Wonderful Bag” for you, and in it... let's see what lies there?
The child puts his hand into the bag, takes out one geometric figure at a time and answers the questions:
What kind of geometric figure is in your hand?
What colour?
Look, what objects in the group does this figure resemble?
If you combine Evina and your figure, what will happen?
The adult says: “Let's go to the sandbox. I’ll put a square on the sand and with my finger or stick I’ll add a triangle to it - I’ve got a house. Think about what you can add to our figure and draw it.
The child completes the task, takes out another figure and draws another picture.
Further, in independent play, the child takes geometric shapes of his choice.
"Our Handprints"
The child makes handprints on the wet sand, following the guidance of an adult, or independently decorates them with pebbles, flowers, etc. As a rule, this activity arouses great interest in the child. First he has a desire to touch the adult's handprint, and then he allows the adult to touch his fingerprints.
"Magic Secrets"
Prepare multi-colored pebbles, non-sharp pieces of glass, artificial leaves, flowers, etc. If the child finds it difficult or does not decide to start the game, the adult himself begins to pick up the “secrets”, bury them in the sand and look for them, commenting on his actions: “What a beautiful shiny pebble. Like? I'll put it in this small hole and bury it. Oh, where is my secret? Help me find him!
"Magic Prints"
Lay out all the molds and ask the child to turn away or close his eyes. Meanwhile, leave an imprint of some kind of mold on a flat sandy surface. The baby opens his eyes and tries to determine who just visited here, i.e. looks for the form with which the print was made. You can add other items to the plastic molds: cones, pebbles, plastic cups.
"Animal houses"
Draw several “houses” on the sand - circles, squares, triangles. Tell your child that fish (if you have them in your sand set) love to live in round houses, and, for example, a crab definitely wants to occupy a square house. Give the tasks based on the availability of toy “living creatures”. Let the child take the molds and make corresponding sand figures or simply imprints of the molds in the necessary “houses”. The task can be complicated by asking the animal to be placed in a house that is not round or square, or in a house without corners, or in a house with four corners.
“What's next?“
Using molds, lay out a flower from the sand, then a fish and then a flower again. Ask your child which figure will be next. If this is too easy a task for your baby, lay out two flowers, one elephant and again two flowers. What's next?
"Sand letters"
In the sandbox you can learn letters, numbers, geometric shapes - whatever you want. Moreover, letters can not only be written with a stick on wet sand. They can be sculpted from sand and even dug into the sand in the form of grooves.
Sand therapy session.
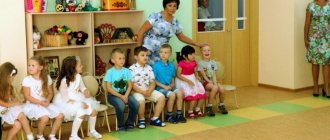
In preschool age, this method is widely used by speech therapists and psychologists, taking into account the final goal and personality characteristics of the child, the specialist determines the goals of the classes and the exercises necessary to achieve it. Classes can be conducted both for a group and separately for each preschooler.
Many experts note a positive effect after the first session. Children can open up and establish close contact with a psychologist who, by interpreting what is happening, can reveal their deepest experiences. Very often these are unconscious experiences that could not be recognized before. The main goal of psychological influence is to realize and work through your problems, find solutions and a way out of the situation.