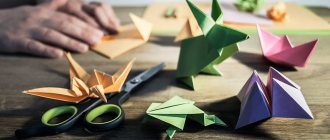
Summary of an open lesson on manual labor for older children “Surprise Toy”
Objectives: -improve the ability to work with paper: bend the sheet in different directions, smooth the folds, cut along the folds. - develop creative imagination and artistic taste. — cultivate accuracy, teach how to treat finished products with care. Goal: - consolidate acquired skills in creative transformation of objects. Materials: colored paper, scissors, glue, napkins, Pinocchio toy, audio recording with the song 'Bu-ra-ti-no!' (from the movie 'The Adventures of Pinocchio'), tray, wonderful bag with surprises. Preliminary work: reading A. Tolstoy’s fairy tale “The Golden Key or the Adventures of Pinocchio.”
Progress of the lesson.
Children, together with the teacher, enter the group. The guys greet the guests. Voss: - Guys, do you like surprises? Children: Yes. Voss: -I really like surprises. There is one fairy-tale hero who cannot live without surprises. Guess the riddle. My father has a strange boy, unusual, wooden. He is looking for a golden key on land and under water. He sticks his long nose everywhere. Who is this? Children: Pinocchio. Question: Pinocchio wanted to make a gift for his friends from the fairy tale in which he lives, but he didn’t succeed. Oh, Pinocchio, where are you? Oh, here he is, why are you hiding? (Pinocchio whispers something in his ear, the teacher nods) Voss: Guys, Pinocchio asks you to help him make surprises for his friends. Do you agree? Children: Yes. Voss: (addresses the toy Pinocchio) -Who are your friends? (Pinocchio is silent). Voss: - Guys, help. What are the names of Buratino's friends? Children: -Malvina, Pierrot, Harlequin, poodle Artemon, tortoise Tortila. Voss: Which other fairy-tale characters do you know? Children: - Karabas Barabas, talking cricket, dad Carlo, Giuseppe, cat Basilio, fox Alice, Duremar, rat Shushara. Voss: (shows a box with a surprise) - This is the surprise we will help you make Pinocchio. The teacher places the Pinocchio toy at the table with the children. Vos-l: (Explanation of work) - And it’s done like this. First you need to make a box: take a rectangular sheet, 2 stripes are drawn on it, you need to bend it along the stripes. We bent it in strips, turned it around, put the narrow side towards us and bend corner to corner in half away from us and again in half away from us. Let's expand. In the top row we got 3 squares, cut out the outer ones along the fold line, leaving 1 square - this is the lid of the box. We make 2 cuts from the lid of the box and 2 more cuts at the bottom opposite the first ones. Our box is almost ready, all that remains is to glue it together. I spread glue on the 2 outer squares near the lid and the 2 outermost squares. We do it like this: bend over, spread, bend over, spread, glue one, then the other, put on top of each other, bend the bottom squares, spread, glue everything in the middle of the box, you get a box. Voss: - Pinocchio, do you understand how to make a box? Aren't you tired? And now a surprise, we have a cheerful face from the box. The face is held on the paper by a folded spring. Take 2 strips of paper. Glue the 2 ends together and bend one or the other strip to the end. The result is a two-color spring. Glue a spring to the bottom of the box, and glue a cheerful face to the top tip. Look what happened... Voss: - And now the guys will do it. Guys, tell me, do we make a box or a spring first? Children: -A box, then a spring. (Explaining to children how they will do the work). Voss: -Pinocchio is tired, let's stretch his arms and legs.
Physical education minute:
Pinocchio stretched, 1 - bent over, 2 - straightened up, spread his arms to the sides, Apparently he didn’t find the key. To get the key for him, you have to stand on your toes. Stand tighter than Pinocchio, Here is the golden key. Voss: - Sit down guys. Well done, you need to stretch your fingers.
Finger gymnastics:
Katina's dolls are sitting in a row on a large sofa. Two bears, Pinocchio, and cheerful Cipollino, And a kitten and a baby elephant. One, 2, 3, 4, 5 Let’s help our Katya count all the toys. Voss: - Now you will make the surprise yourself. Remember to use scissors carefully. And you Pinocchio, sit and look carefully, the guys will work for a long time, but diligently. The guys make surprise boxes and place them on a tray. Voss: - Thanks, guys! They helped me out, now I will give gifts to my friends, and leave surprises for you as a gift. (wooden eggs for painting). Pinocchio leaves.
Author: Kozaeva Svetlana Aleksandrovna, teacher, MBDOU kindergarten No. 55 “Cornflower”, Murmansk, Russia
The article is published in the author's edition
Summary of GCD on manual labor in the preparatory group “Russian Flag”
GCD on manual labor in the preparatory group “Russian flag on a stand”
GCD on manual labor in the preparatory group “Russian flag on a stand”
Program content:
Give an idea of the meaning of the colored stripes on the Russian flag. Teach children to twirl a flag stick using a pencil; glue the paper flag to the stick. Strengthen the ability to fold paper in half, cut out even strips, and glue them together by overlapping; remove excess glue with a napkin. Develop fine motor skills of the fingers. To foster patriotic feelings and respect for the national flag.
Material:
A strip of white paper—landscape sheet. Blue and red colored paper, PVA glue, brushes, napkins, backing boards, sample, Russian flag on a stand. Flag stand.
GCD move:
Educator:
.Nowadays, every country has its own flag. The flags of different countries are different from each other. They may be similar, but you will never find two identical. Today we will get acquainted with the State Flag of Russia. On August 22, 1991, the national flag was raised over the White House in Moscow. And therefore August 22 is the day of the state flag of Russia.
The teacher shows the children an image of the National Flag on an easel and asks:
- Who knows what this is?
Children's answers.
Educator: The flag symbolizes our Motherland. Where have you seen the National Flag in our city?
Children's answers.
Teacher (summarizes the children’s answers): Correct. On special days and public holidays, the Russian flag is hung on public buildings and schools. The National Flag can also be seen on the President’s car, warships and aircraft of the Russian army, and spaceships. Our athletes perform under the Russian flag at all sports competitions and Olympics. They are met in the stands by fans and greeted with Russian flags.
Educator: What is depicted on the Russian Flag?
Children's answers.
Educator: The national flag of the Russian Federation consists of three horizontal stripes of equal size: the top is white, the middle is blue and the bottom is red. Each stripe has its own meaning. White is the color of peace and wisdom. He says that our country is peace-loving. Blue color – the color of the sky, water, sea – is a symbol of freedom and faith, fidelity. The people love their country, are loyal to it, and protect it. Red is the color of strength and courage. Our country is strong. We all love our country and are proud of it.
Educator:
Today we will make a Russian flag from paper. To do this, you first need to make a flagpole - a stick for the flag.
Making toys in class
In modern preschool education, it is necessary to take into account the complex thematic principle of constructing the educational process, which involves identifying the leading topic of the day, week or month. A cycle of classes subordinated to one topic allows the child to create a holistic perception of an object or phenomenon. The child “lives” the topic in different types of children’s activities (playing, drawing, designing, etc.).
The teachers of our preschool department have developed notes for thematic lessons on making toys
and crafts based on the theme of the week, implemented in direct educational activities in different sections of the program.
Summary of direct educational activities on manual labor in the preparatory school group.
Topic of the week
: “The most fun holiday.”
Topic of the lesson on artistic manual labor
: “Lanterns for the Christmas tree.”
Target
: learn to cut paper along the contour, fasten and decorate crafts.
Handout
: blanks of colored paper 15X20 cm with vertical lines applied 1.5 cm apart, not reaching the edge of the blank by 2 cm, a strip of colored paper measuring 2X10 cm, scissors, glue, brushes, stands for brushes, napkins, oilcloths.
Progress of the lesson
The teacher reminds the children about the lesson where they talked about New Year traditions and decorating houses for the New Year. The symbol of the New Year holiday is the Christmas tree. It’s very nice when the tree hangs not only toys bought in the store, but also ones made by yourself.
The teacher invites the children to make New Year's lanterns from paper. Draws attention to the fact that even using such a simple material as paper, you can get original and beautiful decorations.
Stages of work
:
1. Fold a sheet of paper in half along the long side, with the colored side facing inward. 2. From the fold line, make cuts along the drawn contour. 3. Unfold the workpiece. 4. Decorate the edges of the craft sheet with applique. 5. Roll the sheet into a tube, glue the edges along the long side. 6. Squeeze the tube a little at the bottom and top at the same time - you’ll get a flashlight. 7. Decorate the strip with applique. 8. Glue the strip inside the flashlight to create a handle. The flashlight is ready.
The teacher reports that a flashlight can serve not only as a Christmas tree decoration, but also as a decoration for a small vase or glass; several lanterns suspended on a serpentine will turn into a multi-colored garland.
At the end of the lesson, the teacher offers to decorate the group room.
Nadezhda Golitsyna, senior teacher,
Lyudmila Rudneva, teacher of secondary school No. 1716 “Eureka-Ogonyok”, Moscow