Russian beauty in kokoshnik
At school, when children study the topic of national costume, they are often given homework. How to draw a portrait of a Russian beauty? 4th grade is the time when students can already portray people almost authentically. But drawing portraits is too difficult a task. Therefore, it is better to choose a simpler theme, for example, to depict the entire figure of a girl in a national costume. In such a drawing, a portrait of a Russian beauty in a kokoshnik will also be present, but will not attract increased attention.
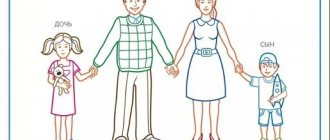
In order to depict a girl, we, again, need to arrange the figure on the sheet. So that our beauty doesn’t get bored, we can draw a young guy next to her. Let's start with the image of the girl. We divide the figure into 4 parts. The first of them is devoted to the image of the head and kokoshnik. We draw the face in a circle, and the headdress in a semicircle. Don't forget to make a small point in its center. We use a trapezoid with a rounded edge to represent a sundress. We place the second of our four parts under the arms. We draw them with corners to the trapezoid. We also outline the shoes with triangles. All that remains is to detail the figure, draw the face and the ornament on the sundress and kokoshnik. Using an analogy, we try to portray a young man.
Preview:
Drawing “Elegant dress shop” Preparatory group for school
Target. Learn to draw elegant clothes: dresses, blouses, skirts, introduce the concept of “dressing tastefully, fashionably, beautifully.” To consolidate the idea of an artist-fashion designer, designer. Material. An exhibition of festive children's clothing, a doll with a set of outfits, illustrations from children's books (Malvina, Alisa); sheets of white paper
(30x40 cm), felt-tip pens, colored crayons, markers. Progress of the lesson: An exhibition of children's and doll's elegant clothes is organized in the art studio. Educator. Look at the clothes. What is she like? (Dressy.) How is it different from casual? (fabric, color, decoration.) What is this dress decorated with? (Bows, lace.) Is it comfortable to work in the garden in such a dress? Clean the floor? (No, it’s long, white lace, satin bows.) Where can you go in such outfits? (For a matinee in kindergarten, at the theater, for a birthday, at a museum.) Let's dress up the dolls in festive clothes. But first, listen to me.
Before the tailor sews an outfit, an artist will come up with and draw it. Such artists are called “fashion designers”, “designers”. They come up with new styles of clothes, making them comfortable and elegant. The profession of a fashion designer requires imagination, invention, and a developed sense of beauty. Do you want to become a fashion designer at least temporarily? (Answers.) Then let's first come up with and then draw different outfits: suits, dresses, blouses. And then we will have an “Elegant Dress Shop”. Children draw. At the end of the work, all the drawings are placed on cardboard (store display), and the outfits are examined. Questions • What is the most fashionable outfit? What is it decorated with? • Which dress would you choose for your doll? • What dress would you wear to the theater? Tips for the teacher. It’s good to organize the “Doll’s Birthday” game, choose illustrations (fairy-tale characters in elegant dresses). You can organize an excursion to the nearest studio or clothing store.
On the topic: methodological developments, presentations and notes
Lesson notes for the senior group “Dress for Cinderella.”
Decorating a dress with Mordovian ornaments.
Introduce children to warm and cold colors. Reinforce the idea of the seven colors of the rainbow.
Summary of the organized educational activity “Elegant dress” for children of the 2nd junior group. Educational areas: cognition, artistic and aesthetic.
Lesson on comparison by size, discrimination of shapes, colors, quantitative counting of sounds.
Source
Direct educational activities on artistic and aesthetic development (Drawing) with children of the preparatory group for school
The topic of the educational activity itself: “Young fashion designers.”
Author: Svetlana Aleksandrovna Goncharova, teacher of the Municipal Preschool Educational Institution “Kindergarten No. 1 in the village of Vokhma”
Goal: developing ideas about the profession of clothing designer.
Improve your ability to use colored pencils.
enrich preschoolers’ ideas about people who create clothes.
develop the ability to independently think through the content of a drawing.
develop creative imagination and fantasy.
foster a sense of joy from beautifully executed images.
cultivate accuracy, perseverance, and the ability to work in a team.
Types of children's activities:
communicative, cognitive, gaming, motor, musical.
Methods:
playful, verbal, visual.
Techniques:
artistic expression, independent activity of pupils, physical education.
Preliminary work
: looking at fashion magazines.
Conversation on the topic: “Who is a tailor, seamstress”, “Profession of a clothing designer”. Review of the album "Textiles".
Notebook, carnival costume templates, various types of fabric. Colored pencils, pencils, crayons, landscape sheets.
Location
: group room.
Tasks. Teach children to draw patterns according to plan, filling the entire space of a sheet of paper (draw “fabric”), find beautiful combinations of colors depending on the background; use elements of decorative and applied art (plant, zoomorphic, geometric) in your creativity. Improve the technical skills of painting with a brush (paint with the tip of the brush or the entire bristle, move freely in different directions).Preliminary work. Looking at pieces of fabric and different clothes. The teacher draws
Pattern options for “fabric”: polka dots, floral, checkered, “haze”, “Khokhloma”.
Materials, tools, equipment. Sheets of paper - white and colored, pieces of white fabric (for children to choose), paints - watercolor or gouache, felt-tip pens, markers, colored pencils, brushes of different sizes, palettes, jars of water. Preparation of fabric samples (scraps with different beautiful patterns). Cardboard stencils of clothing for applying to “fabric” drawn by children.
Contents of the lesson.
The teacher invites the children to look at each other's clothes (what they are called, what fabric they are made from, what the fabric looks like - plain or patterned). Gives children pieces of fabric with beautiful colors, preferably with different decorative elements - plant, zoological (zoomorphic), geometric, abstract, etc.
- Children, look at these scraps (pieces) of fabric. Iron the fabric with your palms. What does it feel like? - Soft, tender, warm. All the patches are so different and beautiful. Who has a polka dot patch? Who's in the cage? Lift up the floral patterned scraps. Place a few scraps together and see if the colors and patterns come together nicely.
Next, the teacher asks the children what clothes can be sewn from this or that fabric (using scraps as an example). It invites you to think and tell us what fabrics are needed for festive clothes and what for everyday clothes, what is the difference between fabrics for summer clothes and winter ones? Discusses with children what else (besides sewing clothes) are fabrics needed for, where and how are they used? Children remember that fabrics are used to make curtains, upholstery, and sew toys.
The teacher tells the children that fabric patterns are drawn by artists. He invites you to imagine yourself as a fabric artist - to come up with and draw your own patterns. Shows the children the prepared art materials and informs them that patterns can be drawn both on white or colored paper, and on white fabric. Exhibits variants of patterns drawn on paper and fabric (floral, polka dot, checkered, with an abstract pattern, designed based on Dymkovo and Khokhloma painting). Then he demonstrates clothing stencils, applies them one by one to different patterned “fabrics” and consults with the children which patterns are suitable for which clothes.
The teacher reminds the children that today they are acting as fabric artists, offers to choose art materials, clothing stencils and draw their own pattern for the “fabric”. At the end of the lesson there is an exhibition of “fabrics”.
After class. The “fabrics” drawn by the children will be used to make finger play characters at the end of the week, as well as for appliqué activities (as original textured paper).
In independent artistic activities, children can be offered
put patterns on real fabric - pieces of an old sheet or pillowcase (preferably white or light blue). Before this, it is advisable to tell a story about printed fabrics: “Once upon a time, a long time ago, people painted fabrics by hand. And there were a great variety of painting methods. Patterns were applied to the fabric with a brush, wooden stamps or a special decoction (solution, composition), which made it possible to paint the fabric not all at once, but in pieces (fragments). This method of painting was invented by the Malay tribe of Bataks (or batiks), hence the name of the painting - batik.”
It will be interesting for children to try different ways of decorating fabrics, for example, putting imprints on some objects (small toys with a flat base, bottles, pieces from old chess, checkers (it should be borne in mind that there are now special sets of stamps on sale with foam rubber sponges and special liquids for their impregnation).
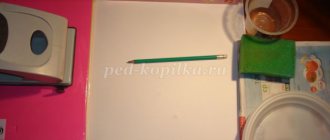
But it’s even more interesting to print a design on fabric (and on paper too) with real autumn leaves. For this work you will need gouache and watercolor paints, colored ink or ink, a simple pencil, PVA glue, a piece of foam rubber, as well as leaves of various trees and oilcloth or old newspapers to cover the table (floor) while working.
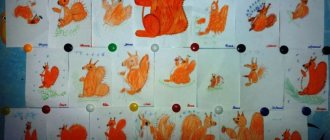
We print leaves on paper or fabric
• We collect beautiful strong leaves of different trees (maple, birch, oak).
• Apply gouache paint to the leaf from the side of the veins, trying to convey the color combination.
• Place the piece of paper on the paper or fabric (painted side down).
• Paint over the background around the leaf with a swab (cotton, rag or foam).
Portrait of a princess
If a child has artistic talent, then, in principle, he cannot depict the entire figure on paper. How to draw a portrait of a Russian beauty?
You need to outline the dimensions of the drawing. The face should occupy half or one third of the sheet. Draw an oval and mark the hairline with two semicircles. We immediately draw a kokoshnik. It will look like a pointed semicircle. Princesses wear dresses, so this part of the design needs to be given special attention. In order not to torment your child with images of decor, you can come up with a more complex style of clothing. The girl's figure should resemble an hourglass. But the sleeves can be drawn in the form of several interconnected circles or ovals. You can depict a braid in the same way. We put beads on the beauty's neck. Only the face remains. To avoid the problem that one eye is larger than the other, we draw the girl in a small spread, as if she was slightly turned away from the viewer. We depict the eyes as circles, and give them an almond shape using the eyelashes. We complete the arches of the eyebrows and draw the nose in a small semicircle. All that remains is to outline the lips, and our beauty is ready. You can color the drawing if you wish.