Different ways to draw a forest
If you want to create an original image of the forest yourself, you can use a simple pencil for sketching or colored pencils to fill the image with color.
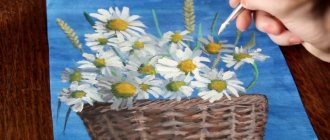
It will be easy for beginning artists to draw a forest using gouache.
When thinking about how to draw a winter forest, you can remember the contrast technique. In such a picture, the background depicting the night sky will be dark. But the snow and the outlines of the trees will remain white.
Drawings with a ballpoint pen look unusual. When carefully drawing shadows, you need to use rods of different shades.
After practicing with pencil and gouache, you can move on to more complex drawings, which are done using watercolors.
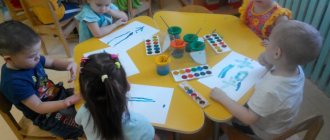
Using step-by-step master classes, learning to draw is not difficult at any age.
Forest through the eyes of animals
If you are already tired of drawing a regular forest, try changing the perspective. We offer you step-by-step instructions for depicting the forest through the eyes of small animals. To them, trees seem huge, like skyscrapers. It is this effect that will need to be displayed in the drawing.
1. Draw several thin vertical lines to represent the trunks. Some of them should start almost at the bottom of the sheet, others approximately in the center. The trunks should reach the very top of the leaf.
2. Draw an uneven horizon line on 1/3 of the sheet. Also draw short wavy lines to represent the uneven surface of the ground.
3. The forest will be coniferous, so around the thin trunks you need to draw abrupt horizontal lines, schematically representing the branches of the pine tree. The branches begin about halfway down the trunk and continue to the top edge of the leaf.
4. Draw stripes and curls on the trunks of pine trees, imitating bark.
A drawing of a pine forest drawn by children, unlike a deciduous forest, can easily turn into a winter landscape. It is enough to draw white snowdrifts instead of green grass.
Idea #8
A very unusual picture can be made using foil. Place the dried leaf (or several) on a sheet of cardboard, veins up. Cover it with thin foil and carefully, so as not to tear it, smooth it with your fingers so that the design appears. Cover the foil with dark paint (you can use gouache, acrylic, tempera, ink) and let it dry well. Rub the painting very gently with a stiff dishwashing sponge. The protruding veins of the leaf will shine, and dark paint will remain in the recesses. Now you can frame your work!
Pencil drawing of a tree
You can start learning with an image of a separate tree against the background of the night sky. It will be a winter night with snow falling from the sky.
- You should start by drawing a tree with a black pencil. You need to draw a trunk, large branches, then add small twigs.
- The second step is to shade the night sky up to the horizon line with blue.
- The ground should be left white, and the snow falling from the sky should be highlighted with a white pencil.
If you want to depict a night forest, the main emphasis can be placed on the round moon against the background of the night sky, hanging above the treetops.
Scheme of work on the forest
Draw a wavy line indicating the tree trunk on the right side of the sheet.
Use a zigzag line to indicate the root system of the tree, add a “U”-shaped branch, and a rounded line to indicate the crown.
Use waves to mark the contours of the ground from the tree to the opposite edge of the sheet.
Draw tufts of grass at the roots of the tree.
Draw the second tree in the background: branches, crown and grass at the base. It should be on the left side of the picture and be large enough.
After this, you need to start drawing the trees in the background, reducing their size as they move away. For convenience, each tree can be equipped with a “U”-shaped fork.
Behind the trees in the background, light curls can indicate bushes.
Complete the picture with tufts of short grass under the trees.
The bark relief on tree trunks should be outlined with curlicues.
A forest in an animation style must be colored with soft colored pencils or paints.
Idea No. 9
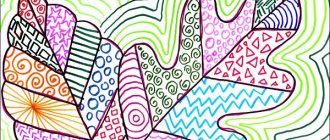
Those who love textures will surely enjoy filling different silhouettes with patterns. Draw or trace an autumn leaf according to the template, divide it into small planes, like a stained glass window. Have your child fill in each piece with a different pattern. You can do this with a gel pen or felt-tip pens.
Idea No. 3
Paint is applied to the sheet from the vein side. Then the sheet is applied to the paper and an imprint is made. The effect will be different depending on what paint you use.
You can come up with many compositional solutions: the imprint of a large leaf can become the crown of a tree if you complete the trunk; A few prints are already a whole forest!
Prints made with white paint on a colored background look impressive. You can combine several techniques and complete the images with pencils or felt-tip pens.
Scheme of work on the path
The path must be depicted in perspective: at first it is wider, and as it moves away it should narrow. To prevent the path from touching the horizon, you can draw a small hill in the distance, marking it with a wavy line.
The next step is to draw the trees. The first step is to draw their bases, trunks or stumps onto a sheet of paper. It is recommended to depict trees of different species and sizes.
In the distance, where the path goes, there is no need to draw the bases of the trees. Only the tops of heads that peek over the horizon.
It is important to remember that trees in a real forest are arranged randomly. For this reason, they should be depicted with a slight tilt at different angles, and not strictly parallel.
We recommend reading:
How to draw a star: 10 best options for drawing five-pointed and other stars with your own hands. Pictures of finished works with descriptions- How to draw a dragon with a pencil - the best step-by-step instructions for beginners. TOP pictures for quick visual learning
- How to draw a pony: TOP 10 best lessons for beginners. Detailed instructions for drawing My Little Pony step by step with a pencil
The bases of tree trunks can be immediately distinguished by dark shading. After this, you need to outline the shadows of the trees on the ground with light pencil lines.
The shadows from the trees will help make the sketch three-dimensional, so they need to be highlighted a little with shading.
Then you need to depict bushes and small hills between the plants in the forest.
Trees should be drawn in detail, adding branches and foliage. It is better to draw all elements in different sizes.
You need to finalize the pencil sketch using shading. Those details of the drawing that are located further should be darker. The space above the path does not need to be shaded.
We recommend reading:
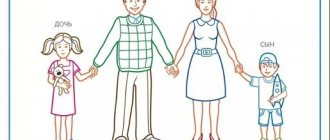
How to draw lips with a pencil - simple instructions with descriptions and pictures. Step-by-step master class for beginnersHow to draw a family: a master class on creating a drawing “My Family” for kindergarten or school. The best lessons for children on drawing with pencil and paints
How to draw a bear with a pencil? Review of simple and step-by-step instructions for children and beginners (120 pictures of a bear)
In this diagram, it is the path that will help depict the forest in perspective in the drawing, and correctly executed shading will give volume to the sketch. You need to stock up on an eraser in advance to correct pencil lines.
Instead of a path, the picture can depict a hut or another large object, for example, an animal.