Step-by-step instructions for drawing a bouquet of flowers
1. Start drawing your first flower. Draw a circle to form the center of the flower. Then enclose round shapes around the center using U-shaped lines. These are flower petals.
2. Draw a second flower. Draw a small circle for the center of the flower and use U-shaped lines to enclose the petals.
3. Draw the third flower. Draw a circle to form the center of the flower. Then enclose the petals using U-shaped lines.
4. Next you will draw another type of flower - a tulip. Behind one of the first flowers, extend a pair of straight, parallel lines to form a stem. At the end of the lines, draw a large U-shaped line. This forms the base of the flower. Next, use a series of curved lines in a "W" shape to connect the ends of the "U" surrounding the flower. Repeat this process on the opposite side of the bouquet to create another tulip.
OTHER EASY DRAWING GUIDELINES:
5. Using a U-shaped line and a W-shaped line, draw another tulip peeking out from behind the other flowers.
6. Next, draw the greenery or leaves of the bouquet. For each sheet, use two curved lines that meet at a point at the end. Allow the leaves to join together at the bottom, filling in the gaps between the flowers.
7. Continue drawing additional overlapping leaves until the bouquet shape is enclosed. Detail some of the leaves by drawing the leaf vein, a curved line down the middle of the leaf.
8. Fill your bouquet with smaller flowers. Draw two parallel lines for the stem and a circle for the center of the flower. Then extend a curved line to outline the petals. Notice the wavy pattern at the end of each petal. Repeat until your bouquet is as full of flowers as you want.
9. Draw the stems of the bouquet. Extend a couple of lines down at an angle to each other. Connect the lines, enclosing a flattened irregular shape. This will create a ribbon tied around the bouquet. Extend another set of lines from the tape and connect these lines with a series of jagged, connected, curved lines. Enclose teardrop shapes to form the ribbon bow, and pairs of lines that end in a "V" shaped line to form the cut ends of the ribbon. Detail the stems and ribbon with curved lines.
10. Color your bouquet, but don't stop there. We have many more flower drawing tutorials for you to choose from.
Questions for children in the senior group about drawing flowers for mom
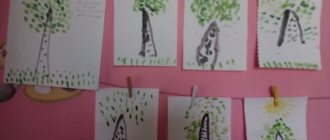
At the end of the lesson, the teacher should ask the children to look at their own and other people’s drawings and ask questions about whether the children liked the lesson, what mood they were in after drawing, whether they want to give their mothers their bouquet of tulips, what flowers they talked about today.
Note! When the lesson is finished, it is necessary to praise all the children for their efforts and love for their mother, which they expressed in their flower picture. It is important to maintain children’s interest in the drawing process so that the emotions are positive, and the child wants to draw as much and as often as possible.
Drawing flowers in the senior group can be timed to coincide with any holiday. Children really enjoy drawing them and learning new techniques for creating images. Following the advice above, each teacher will be able to think through a lesson on this topic, getting students interested in something new.
Drawing lesson “Flowers as a gift for mom”
Svetlana Strunnikova
Drawing lesson “Flowers as a gift for mom”
Lesson on painting with gouache paints “ Flowers as a gift for mom ” in the middle group.
Make you want to draw as a gift for mom on March 8th .
Continue learning to draw flowers (corolla of bright petals, stem, leaves)
.Continue to practice
drawing with gouache paints . Develop a sense of shape and color . Cultivate a caring attitude towards parents, a desire to please with homemade gifts .
GCD tasks and required materials
The purpose of this lesson is to develop the skills of reproducing flower images on paper and teach the basics of composition.
Tasks:
- Educational: teach the correct arrangement of objects on a sheet, build a composition using different elements.
- Educational: to cultivate love for mother, accuracy in work, patience and perseverance.
- Developmental: develop imaginative thinking, eye, aesthetic qualities, train fine motor skills.
Drawing of tulips for the spring holiday
Equipment and materials: landscape sheet, simple pencil, eraser, brushes, paints (watercolors are recommended, but gouache can also be used), a jar for water, napkins, cotton swabs, photographs of flowers and bouquets (tulips, roses, mimosa).
Handouts: album sheets, oval templates for those who find it difficult to draw them.
Audio recording: P. I. Tchaikovsky “Waltz of the Flowers”, “Dance of the Sugar Plum Fairy”.
Practical part of the lesson
It consists of three stages.
Bouquet sketch
The teacher hands out album sheets, suggests placing them vertically in front of you and starting to sketch flowers for mom. The tulip has an oblong bud, so you need to draw three uneven ovals with a simple pencil at the top of the leaf. If it is difficult for your child to do this, you can invite him to circle the finished template. Then draw the petals at the top of the bud, carefully erase the excess lines with an eraser so as not to damage the paper.
The role of family theater in the development of creativity in children
The teacher helps the children draw pencil lines for the stems from the buds down so that they intersect at the bottom to form a bouquet. Then you need to add long leaves to each stem, outlining elongated arcs on the side with a pencil.
Important! The teacher should check each child's drawing for accuracy, make sure that the flowers are located in the upper part, the stems intersect at one point, the leaves are elongated, and if necessary, make edits with your own hand so that the sketch looks compositionally correct.
Drawing a bouquet
The teacher talks to the children about the rules of working with paints, how to hold a brush, and remove excess water. It should remind you that tulips come in red shades. The student should be taught to put red or crimson paint on a brush and carefully paint over the plant without going beyond the outline. The middle tulip needs to be highlighted with a different tone of paint. You can take a darker burgundy color and draw flower petals.
Drawing a tulip
Then you should rinse the brush and take a dark green color, draw the middle line of the stem and paint on each elongated leaf. You need to apply the paint thickly, do not smudge it too much with water, and make sure it doesn’t spread. The teacher must monitor the correct performance of the work, help overcome difficulties that arise, and use napkins if there is a lot of water in the drawing.
Note! You need to make sure that the child touches the paper with the bristles of the brush, and not with a wooden stick, and squeezes the brush out of the water on the edge of the jar.
When the bouquet is ready, you can decorate it with ribbons, numbers and adding mimosa.
Bouquet decoration
As an option, you can beautifully tie a bouquet of tulips with a ribbon. Children can choose the color of the future bow themselves. You need to draw an uneven square at the bottom, at the intersection of the stems, and next to it on the right and left, draw two triangles, rounding the edges. This way you will get a beautiful bow. From below you need to draw two curved lines with a brush, similar to ribbons.
Drawing a bow
If children want to add a sprig of mimosa to the bouquet, they can take a cotton swab, soak it in water, dip it in yellow paint and place several round prints near each tulip at the top. These little yellow circles will resemble mimosa flowers.
Entertaining mathematics in games for preschoolers
If the drawing is being prepared for the holiday of March 8, then you can draw a beautiful figure eight and circle it with paint, or prepare a template with the corresponding number in advance to attach it to the right place on the sheet and circle it.
Finishing the mimosa
Important! All works should be collected and arranged into an exhibition of drawings.
As the task progresses, the teacher monitors the correct observance of all stages and provides assistance in the form of recommendations and practical hand movements. He monitors the accuracy of the work and the correct application of paint, and helps children if the paint has spread or gone beyond the outline of the drawing.
Step-by-step instructions for drawing flowers for Mother's Day or March 8
1. Start by drawing the stem of the flower. Draw two curved lines, narrow and connected at the bottom.
2. Next draw the sepals or green petal leaves at the base of the flower. For each sepal, draw two curved lines meeting at sharp points at the bottom. Don't connect the lines at the top. Then use a curved line to connect the outermost edges of the sepals that span that part of the flower.
3. Next, draw the flower's flower. Extend a long, curved line down each side of the sepal. Then, from each of these lines, draw a shorter, curved line toward the center of the flower. These lines form the outer petals. Finally, enclose the flower using two curved lines to form the third and final petal.
4. Draw a leaf coming from the flower stem. Use two curved lines and let them meet at a rounded point at the tip of the leaf. Draw a curved line from the base of the leaf to its center to indicate the vein. Detail the flower by drawing curved lines from the sepal to the center of the flower.
5. Write the word “Mom” above the flower in curved letters.
6. Draw a curved rectangle underneath the word "mama", overlapping the stem of the flower. This will become a banner.
7. Erase the guide lines inside the banner.
8. Write the words “I love you” inside the rectangle.
9. Draw curved lines under the word “Mom” to make your picture more beautiful.
10. Color your picture. How will you color your flower? What's your mom's favorite color? Many people give their mothers red flowers, called carnations, on Mother's Day.