Junior group. Early childhood, nursery. Children 1-4 years old
Master class on making crafts “Christmas tree on a plate” for children from 3 years old
The New Year is coming very soon. Today I would like to share a master class on making a Christmas tree on a plate craft.
.
A beautiful craft can be used as a holiday decoration at home or in a group. This master class will be useful and interesting as...
Children's master class on making “Tiger cubs” crafts using clothespins with children 4 years old
Teacher of the highest qualification category Kurnina Lyubov Vladimirovna MBDOU kindergarten No. 54, Kovrov, Vladimir region. Dear colleagues, I bring to your attention a children’s master class on making “Tiger Cubs” crafts
using a clothespin with
children 4 years old ....
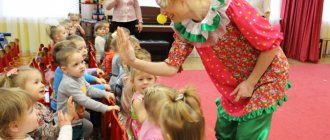
High five
Moscow Museum of Modern Art
The Moscow Museum of Modern Art has many interesting interactive programs and master classes, among which you will find “High Five!” — a series of five creative activities for parents with children from 4 to 6 years old. “High Five” is a simple and logical way for children to learn art, and an opportunity to take a fresh look at adult art. The course is designed as an exploration of the five key principles of art: line and point, texture, form, color, space. The classes are designed taking into account the psychology of children 4-6 years old and are based on three key behavior scenarios: learning new things with their parents; learning through play and creativity; learning through movement and emotional engagement.
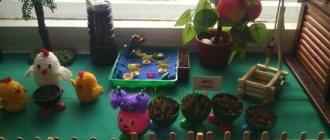
Crafts. Making crafts with children - Consultation “Working with dough” for children 3–4 years old
Publication “Consultation “Working with the test” for children 3–4...” Ale-up! Dough! Dough is an inexpensive, sensory and environmentally friendly material. Safe enough (if there is no gluten intolerance) for a child and can be used for play from an early age. The dough is a soft and flexible material and is easier to work with than plasticine...
Report on collective work with children of the second group of early age “We are drawing a bouquet for mom”
Report Collective work with children of the second group of early age “We are drawing a bouquet for mom” Goal: 1) Development of fine motor skills of the hands, 2) development of creative imagination, 3) development of visual memory, 4) teach children to work together, performing a common task. Objectives: • learn to answer...
Children's master class on making a Christmas tree toy using the origami “Gnome” technique for children from 4 years old
In kindergarten, the children and I decorate the group Christmas tree with handmade toys, for example, paper gnomes. Gnomes are little mythical people, fairy-tale characters always interest children. The master class will be interesting and useful for children from 4 years old, educators,…
Children's master class on paper applique “Christmas tree made from palms” for children from 4 years old
The most long-awaited holiday of all children and adults will soon come; the New Year will soon be here. Well, what would a New Year be without a Christmas tree! So the guys and I decided to make a “green beauty”. Material: white paper; 160g paper of any color, A3 format; pencil…
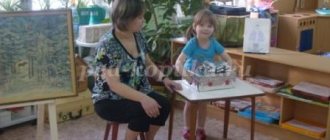
Young architect
Educational
Starting February 13, children aged 4 to 6 years old will also be able to take an Architectural course at Garage. The course is based on the perception and study of architecture by children through the prism of the fundamental concepts of “scale” and “proportion”. The architecture course is a unique project consisting of paired classes. On one, participants come up with an object for the hero (10 times smaller than himself) and draw a sketch of it, and on the other, they create a three-dimensional model. The result of each pair of lessons will become part of the following practices: pieces of furniture will be included in the model of the house, streets will be formed from houses, which will then connect to form a city, and so on. The course explains basic architectural terms in simple, understandable language and introduces children to the work of famous architects.
Corrugated paper aster
- Secrets of builders: working with couplings
DIY New Year's crafts - 9 best options
Crafts for Mother's Day in kindergarten
You will need: corrugated paper of purple, yellow, green and light green, scissors, wire, glue gun, pencil, ruler, watercolor paints, brush.
Master Class
- Prepare a strip of purple corrugated paper 4 cm wide.
- Tint one edge of the strip with purple paint and set aside to dry.
- Fold the strip several times.
- Make cuts along the unpainted edge. The first blank is ready.
- Make the second blank in the same way, only take a purple strip 6 cm wide.
- Prepare a strip of yellow paper 3 cm wide.
- Fold the yellow strip several times and make cuts.
- Wrap the wire with a light green piece of corrugated paper and secure with glue. This will be the stem.
- Wrap a yellow blank around the end of the stem - these will be the stamens.
- Twist the ends inside the purple piece, which is 4 cm wide, using a pencil.
- Step back from the base of the stamens and glue the petals.
- Take a 6cm wide purple blank and wrap it around the bud as shown in the photo.
- Twist the ends of the petals and straighten the middle.
- Cut out 6 sepals from green paper, then glue them on.
- Cut 6 long leaves of different sizes from light green paper and glue them to the stem.
The corrugated paper aster is ready! You will find even more flowers HERE.
I recommend watching this video!
Note! DIY pumpkin house: craft with step-by-step photos
Chocolate Factory
Innopark
Among the variety of exciting InnoClasses, there is one for fidgets from 3 to 6 years old, and of course, it is not only incredibly educational, but also surprisingly tasty! A confectionery product based on cocoa butter, which is a product of processing cocoa beans, is one of the most popular sweets on the planet. Did you guess it? Of course, chocolate!
At the InnoClass “Chocolate Factory”, young researchers will learn where and when chocolate appeared, get acquainted with the process of its preparation and taste its various types. The most “delicious” part of the lesson will be the creation of a chocolate surprise - an edible figurine from different types of chocolate. Just imagine how much joy and new impressions such a master class will give to a child?
Children's Academy
Restaurant Funny Cabany
The Children's Academy at the Funny Cabany restaurant is open every Sunday and offers children of any age interesting and useful master classes - culinary and creative. The topics of the classes are new every time, from preparing desserts to drawing lessons with pencils and pastels. The authors take everything prepared, drawn and put together home or, if they want, donate it to the restaurant as a souvenir.
Children's Culinary Academy
Family cafe "Anderson" on Ostrovityanova 9/5
Children's club "Anderson" is a fairy-tale country where kids will feel at home, because all the conditions have been created for this. Your own children's room, playroom, sea of toys and books. But the most important thing why it’s worth going there is the Children’s Culinary Academy, which operates both on weekdays and weekends. At the Academy, all children are transformed into young chefs and learn simple, but very tasty dishes under the guidance of experienced chefs. Everything will be for real, each child will receive a beautiful apron and a special hat, so, dear parents, get your cameras ready.
Mouse from a sleeve
Required tools and materials:
- sleeve;
- cardboard;
- colored paper;
- paints;
- glue;
- scissors.
Progress:
- Paint the bushing gray and let dry. This will be the body of the little mouse.
- Cut out ears and paws from gray cardboard.
- Make cuts in the sleeve to fix the cardboard elements in them.
- Cut an oval out of pink paper and glue it to the base. This will be the tummy.
- All that remains is to draw the eyes with eyelashes, a nose and two teeth.
Educational crafts for kids can be good helpers in studying many topics. For example, when studying shapes, you can make a chest of drawers from matchboxes and label each one with a certain meaning: circle, triangle, square. Then cut out these shapes from colored cardboard. This way the child will learn not only to cut out the simplest shapes, but also to sort them correctly.
Cinema club "Cinema for the little ones"
Cinema "Molodezhny"
Here, every Sunday in February (7, 14, 21 and 28) the Cinema for the Little Ones film club will work. This is not a practical master class, but rather a conversational, educational, but no less useful and interesting. The cinema welcomes children of any age, even the smallest. Children will enjoy retrospective screenings of domestic cartoons, as well as conversations between professionals and children in an accessible manner about the creation of the film, the main characters and artists, filming methods and other incredibly interesting things! By the way, you can also watch all modern cartoons there.
Source: HedgehogHedgehog
Mini Professors
Family centers CitYkids
Mini Professors is a program of classes for children from 2 to 4 years old, where children will get acquainted with physics, astronomy, biology, chemistry, and anatomy. Classes are held in an incredibly creative atmosphere, where kids, together with masters, will create a model of an active volcano, learn how the human body works, feed snails and even be able to see the world through a special children's microscope. Each lesson of the “Mini-Professors” is devoted to different topics, but they have one thing in common - practical experiments, with the help of which it is more interesting to study the wonderful world of science!
For children from 6 years old
For older children who skillfully handle scissors and other tools, we can offer educational crafts made from felt. This type of work is especially interesting.
At the same time, something special is created, not similar to other copies. This could be a Christmas tree toy, a puppet theater or a stand on the kitchen table. Such a creation can serve the creator for a long time or become a practical gift for a friend.In the process, skills in working with scissors are consolidated, interaction with a needle, thread and additional materials develops. It also trains fine motor skills at a higher level, improves artistic taste and improves patience and perseverance.
Cave
You will need:
- thick cardboard from a box;
- large sheet of paper;
- glue gun
Step-by-step instruction:
- Cut out three elements from cardboard: a free-form base and two curved arcs of different sizes.
- Place the arcs perpendicular to the base and secure with hot glue.
- Crumple the paper and cover the resulting structure with it, leaving an entrance on one side.
- The voluminous, spectacular craft is ready. You can place animal figures inside, placing them on a pile of straw or on pebbles.
Tips for successful work
Before you begin your chosen work, you should listen to the following tips:
- Prepare all required materials in advance.
- Scissors for children should first of all be safe, so they are suitable only with rounded ends.
- Consider protecting your work surface. It is better to cover it with oilcloth, and put special plastic boards for modeling.
- When painting with paints, you should make sure that the water is not very cloudy. After completing the drawing, it is good to cover the paints to prevent them from drying out, and wash your hands well.
- When sculpting, if there is no goal to dry the material, you need to wrap it in a suitable material: clay - in a piece of damp cloth, plasticine - in plain paper.
- Markers should be stored with their caps tightly closed.
- It is good to sharpen pencils with a sharpener.
Shark made of clothespins and paper
Necessary materials:
- pin;
- colored paper;
- glue gun;
- toothpick;
- felt-tip pen.
Progress:
- Cut out two parts from blue paper: the upper part of the shark and the lower part. Draw an eye on the top.
- Cut out a small fish from orange paper. One that fits in a shark's mouth.
- Cut a small stick from a toothpick and glue an orange fish to its top. And glue the free part of the stick to the edge of the inside of the lower part of the shark.
- Take a clothespin and glue blue parts to its ends to make a shark. It turns out that when the clothespin is opened, the shark will begin to open its mouth, and the fish will try to escape. But when closed, it will again be eaten by predatory fish.