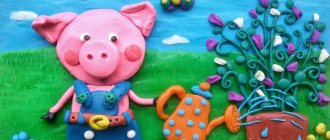
We sculpt a fly agaric from plasticine step by step
1) What does a fly agaric look like? Be sure to ask your children about this, especially if you go to the forest together to pick mushrooms in the fall. Children should know that a bright red mushroom with white spots on a beautiful thin white stalk is a poisonous toadstool. The fly agaric's cap is not flat, but elongated upward. It is also worth covering it from below with white plasticine and showing small plates. The thin leg has a collar or skirt, which is also characteristic of this representative. Prepare red and white plasticine for sculpting a mushroom, green plasticine for grass, knead all these pieces separately.
2) Crush the green plasticine with your fingers into a round cake.
3) Lift the ends of the cake up, creating a kind of vase. The hole in the vase will become a bed for the mushroom stem. Using a tool, make notches on the outside to reveal blades of grass.
4) Make a tube for the leg from white plasticine, expanding it towards the bottom, and also additionally prepare a thin sausage for the collar.
5) Glue a thin sausage across the leg, press it around the circumference with your fingers, highlighting the collar, and also treat it with a stack.
6) Make a hat out of a red ball by pulling the plasticine out to the sides with your fingers. Try to distribute the plasticine evenly around the circumference. Additionally, make a white cake, the circumference of which corresponds to the circumference of the cap.
7) Glue the white cake to the bottom of the cap and begin to cut through thin plates in a stack. Work your way out from the center of the mushroom and pull the cuts outward.
 Cover the bottom of the red cap with cuts all the way around.
9) Turn the hat over with the red side facing you and use white pieces of plasticine to show the characteristic spots that decorate the fly agaric.
10) Connect the cap and the stem. The poisonous mushroom itself is already ready. Insert the bottom of the leg into the green blank to get a more realistic craft.
The result is a beautiful and poisonous fly agaric mushroom made from plasticine - an excellent children's craft.
How to make a fly agaric from plasticine step by step
Perhaps the fly agaric is the most beautiful mushroom in the forest. It always grows in the most visible place, like other toadstools. The mushroom likes to show off its bright hat, slender leg, and it reaches enormous sizes. Indeed, who would pick the fly agaric, because it is the most dangerous mushroom in the forest. You can only see and admire such a handsome man, but you shouldn’t pick him up. A completely different matter is the fly agaric craft; you can mold this mushroom from plasticine. This tutorial shows how to do this. A fly agaric made from plasticine is an easy option for preschool children. You can make it with plasticine in two colors - red and white.
Plasticine mushroom
You can sculpt mushrooms from plasticine with both two-year-old children and teenagers. But the older the child, the more interesting and realistic the craft will be. Mushrooms are a very convenient subject for teaching children how to sculpt. They rarely grow alone. Therefore, you need to sculpt two or three mushrooms at once. At the same time, on one you can show what and how to do, and the second child will sculpt it himself, repeating after you. To prevent crafts from looking rustic, they can be decorated with grass made from green plasticine and supplemented with various details: a beetle, a butterfly, a leaf.
Plasticine grass
1.Roll out the green plasticine into stripes. To prevent the plasticine from sticking to the rolling pin, dip it in cold water for a few seconds from time to time.
2. Using a utility knife, cut the strip in a zigzag pattern. A plastic stack will not work here; you need a fairly sharp knife. The wider the zigzag, the longer the grass will be. There is no need to make too frequent cuts, otherwise the blades of grass will not hold their shape well.
3. Separate the top and bottom.
4. Separate pieces of the required length and stick around the details of the craft.
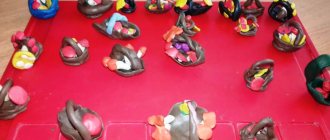
Boletus mushrooms made of plasticine
The easiest way is to sculpt boletus mushrooms from plasticine. They have a thick leg, so they are easily attached to the stand.
1. Cover a circle of cardboard with green plasticine to form a small bump.
2. Make two legs of different sizes from white plasticine, and two hats from brown plasticine.
3. Prepare the plasticine grass.
4. Cover the legs of the boletus mushrooms with grass.
5. Place one layer of grass on the stand.
6. Place the mushrooms on a stand. Lift the blades of grass slightly.
7. You can decorate the craft with a small ladybug. To do this, make half a small ball of red plasticine and mark the wings in a stack. Roll out a long black flagellum from black plasticine and divide it into three parts. Fold them into a snowflake shape. Reconcile the red body. Make a ladybug head from a small black ball.
Plasticine chanterelles
To attach the chanterelles to the stand you will need toothpicks.
1. Prepare a stand, just like for boletus mushrooms.
2. Using pieces of toothpicks, mold three cones of different sizes from orange plasticine.
3. Using a felt-tip pen cap, make indentations on the cones by rolling the cap over their surface.
4. Stretch the mushroom stems along the toothpicks.
5. Attach the chanterelles to the stand.
6. Cut grass from green plasticine. Divide it into small fragments and collect them into “bundles”.
7. Use a toothpick to secure tufts of grass between and around the chanterelles.
8. You can decorate the craft with a piece of yellow plasticine.
Draw your child's attention to the fact that the chanterelles are bowl-shaped. Therefore, after rain, you can find chanterelles filled with water in the forest. You can also place a drop of water in a plasticine craft.
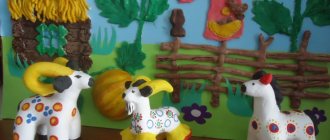
Fly agarics made of plasticine
1. Prepare a stand.
2. Make two long legs from white plasticine, and two hats from red plasticine.
3. A tall fly agaric on a thin leg will bend pretty soon. To prevent this from happening, reinforce its leg with a toothpick.
4. For the collar and underside of the cap, roll a long white sausage and roll the cap over it (1).
5. Divide the resulting corrugated strip into two parts. Roll them into rings, lightly squeezing the plasticine from one edge (2).
6. Place one ring on the leg of a large fly agaric, and fasten the second on the underside of the cap (3).
7. Place caps on fly agaric mushrooms.
8. Prepare the grass and stick it around the legs of the fly agarics and the stand. Fly agarics rise high above the grass, so it is better to make two rows of grass on a stand. Otherwise it will look too empty.
9. Make spots on the caps of fly agarics.
Tell your child that fly agarics are inedible. But they benefit nature, as wild animals use them as medicine.
Summary of an integrated lesson in the senior group of a preschool educational institution on the autumn theme. Modeling and fine art
Summary of an integrated modeling lesson in a preschool educational institution for older preschoolers, using non-traditional drawing “Mushrooms in an autumn meadow”
Author: Markhel Irina Alekseevna teacher MBDOU "Kindergarten of a combined type No. 5" p. Mga Leningrad region Goal: To teach children to combine two educational activities in one lesson activities: modeling and drawing. To develop the ability to depict an autumn meadow using an unconventional method of drawing mushrooms from plasticine. Objectives: • To consolidate the ability to sculpt familiar objects, use familiar techniques: rolling plasticine with straight and circular movements, flattening with palms. Continue to strengthen the ability to make prints of tree leaves. • Learn finger sculpting to refine the shape. Learn to draw in an unconventional way. • Lead to a figurative assessment of work. Materials: pictures and dummies of mushrooms, plasticine, modeling board, hedgehog toy, ball, dry and wet napkins, yellow and red gouache.
container for paint. 1/4 sheet of Whatman paper, tree leaves. Progress of the lesson
Educator: Guys, a hedgehog came to visit us from the forest ( showing a hedgehog toy
).
The hedgehog asks you for help, autumn will soon go away and winter will come, but he is afraid that he will not have time to collect mushrooms for the winter, because a lot of leaves in the forest fall from the trees and he has to rake them to find them. Could you help him make some mushrooms? Educator: Guys, do you want to help the hedgehog? Shall we make him some mushrooms? What can mushrooms be made from? ( children's answers)
.
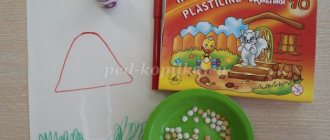
I suggest making mushrooms from plasticine, don’t you agree? Let's look at pictures with mushrooms (examination of illustrations). Educator: Guys, guess the riddle:
In a red hat under an aspen tree A yellow leaf stuck to the hat... Hurry up and get into the basket You are an edible, tasty mushroom.
Children: boletus.
At the edge of the forest, near an old tree stump, a mushroom army has gathered. I suggest you guess!
Maybe one of you guys can tell me what it is?.. Children: honey mushrooms.
I was able to find a bright, red fungus today.
Like friendly sisters Hiding in the grass Children: foxes.
Look how good it is!
Red polka dot hat, lace collar - He's no stranger to the forest! Children: fly agaric. Educator: Guys, where do you think mushrooms grow? Children: in the forest. Guys, do you remember yesterday we went for a walk in our area and saw mushrooms near a birch tree. ( children's answer
).
What are they called? ( boletus mushrooms
).
And you and I had a hard time looking at them. And why? ( answers
).
That's right, there were a lot of leaves on the ground. Today we will not only sculpt mushrooms for our hedgehog, but we will even draw a clearing with prints of autumn birch leaves, on which we will plant our mushrooms so that the hedgehog will find them. Educator: Are all mushrooms edible? Children: no. Educator: That's right, mushrooms are edible and not edible. Let's play with you the game “Edible, not edible” ( game with a ball in a circle
).
Educator: Well done, you remembered everything. And now I suggest you take a leaf and leave an imprint of a birch leaf of some kind of paint on our clearing. You will probably now remember how we did it when we painted autumn trees from our palms and leaves. Educator: Well done! Guys, how beautifully you did it, and while our autumn meadow is drying up, take one mushroom at a time, look at them carefully and tell me how they are similar? Children: Mushrooms have a stem and a cap. Educator: That's right, children! How are they different? Children: Mushrooms come in different sizes and different colors. Educator: That's right, children! Today I suggest you make mushrooms from plasticine. First, I will tell you how to sculpt mushrooms. First, I will sculpt the stem of a mushroom, take a piece of plasticine, roll it between my palms with forward and backward movements. This is how the mushroom stem turned out. To make a mushroom cap, I take another piece of plasticine, put it on my palm, roll it out in a circular motion to make a ball, then put this ball between my palms and flatten it. Like this. Now I will connect the cap and the stem, I have such a beautiful mushroom. What is the name of this mushroom? ( Boletus
) Guys, do you understand everything?
You can start sculpting. But first, I suggest you stretch our fingers. Watch and repeat after me. Finger game “Mushrooms” One, two, three, four, five! We're going to look for mushrooms. This finger went into the forest, This finger found a mushroom, This finger began to clean, This finger began to fry, This finger ate everything, and that’s why it got fat. Educator: Well, now let’s guys start sculpting mushrooms. And the hedgehog will sit and watch how you work with plasticine ( independent activity of children, provide assistance if necessary
).
Educator: Look, guys, how many mushrooms we got! The hedgehog is very happy! Now he has a supply for the winter. What kind of mushrooms did you make ( children list
).
What parts does a mushroom consist of ( leg and cap
).
What movements did we use to sculpt the mushroom ( children's answers
).
Now let's put our mushrooms in our autumn meadow ( children put mushrooms in a meadow drawn in an unconventional way
).
The hedgehog thanks the children and leaves. Well done boys! You worked really hard today! For your help, the hedgehog left you chocolate mushrooms.
We recommend watching:
Notes for a lesson on speech development in the senior group on the topic: Autumn Notes for a lesson in the senior group on the museum program on the topic: Autumn Notes for GCD in kindergarten in the preparatory drawing group “Autumn Tree” Notes for the lesson in the middle group. Drawing vegetables and fruits
Similar articles:
Lesson summary - traveling in kindergarten for the International Day for Older Persons
Entertainment “Visiting Autumn”. Senior group