Types and methods of modeling in kindergarten
“Types, methods and techniques of modeling in kindergarten”
(Methods and techniques for sculpting animals)
Modeling in kindergarten is a type of visual activity during which children depict objects of the reality around them, create a plastic image from soft materials (clay, plasticine, etc.)
Modeling:
- Develops children's powers of observation and sense of touch
- Develops more complete figurative representations
- Strengthens visual memory and small arm muscles
- Develops imagination and creativity
- Meets the age characteristics of children, satisfying their need for activity
The modeling technique is a list of those manual actions that children gradually master
Junior preschool age
- Rolling out
- Rolling up
- Finger pressing
- Topping
- Flattening
- Pulling back
- Accession
Middle preschool age
added:
- Smearing
- Pinching
- Pull
- Smoothing
Senior preschool age
- Improving sculpting techniques
- Familiar sculpting techniques are used
The subjects of modeling are very diverse. Children sculpt almost all the objects around them. Often, when modeling for children, there is one goal - to create an object with which they can play.
Children love to sculpt animals, but they will do it better if adults help them.
Animal sculpting can begin after children have mastered the image of basic shapes (ball, cylinder) and the technique of creating them.
2nd junior group
Children learn to divide a piece of clay into 2-3 unequal parts and assemble an object from individual parts in a constructive way. Gradually, finger work is included in the sculpting process.
Middle group
Children depict animals whose body shape is an ovoid (an egg-shaped figure; the term ovoid is not given to children), cones, cylinders, balls. They get acquainted with the solution of some technical problems: vertical installation of the figure, fastening parts, weighting the lower part of the figure, approximate measurement of proportions and parts, of which there are more (up to 5-6). You can introduce children to the image of a running animal. Pay attention to the image of characteristic features.
Senior group
More attention is paid to the image of the form and its clarification. Children are taught to convey texture (animal fur, bird feathers) using voluminous (high) or deep relief. They use the method of sculpting from a whole piece, which makes it possible to give the figure greater dynamism.
Preparatory group for school
Children use various means of expression, visual and technical techniques to create an image. They convey an image of a characteristic shape, proportions, details, an image of movement, and plasticity of form.
The main material for sculpting animals is clay. Clay is a natural material that is easy to prepare, has neutral and easy-to-work colors, and gives the child the opportunity to understand the integrity of the shape of objects.
When sculpting animals from clay, frames (sticks of different lengths and thicknesses) are used to ensure stability and dynamism of the figure.
When sculpting animals, you can use plasticine and salt dough.
Dough is a material accessible to everyone, cheap and easy to master.
Plasticine is an elastic material that requires special preparation before work.
The technique of sculpting animals is rich and varied, but at the same time accessible even to small children.
There are no strict rules in sculpting. The classification of methods is quite arbitrary; transitions from one method to another and the addition of one or more others to the main method when making one craft are possible. Imagination is important, and the method is just a means to realize the plan.
The initial shape of the figure is one, but the animals turn out to be very different. The main thing is to be able to sculpt characteristic details.
Constructive method An object is created from separate parts. Work begins with the main, largest part. When sculpting an animal (horse figurine), first sculpt the body, then the legs (compare them by size and correspondence to the size of the body), head, tail, etc. To sculpt paired parts, you need to prepare identical pieces of clay. Connect all the blanks to the base of the figure sequentially (coat them), then work on the small details.
Plastic method Modeling from a whole piece, when all parts are pulled out from one piece of clay.
Methods for sculpting from a whole piece:
1. Modeling “from a reel”
Animals are sculpted in this way: a dog, a bear, a cow, a horse.
Sequence of operations:
- prepare a piece of clay of such a size that it fits in an almost closed palm;
- roll into an egg-shaped ball;
- visually divide the egg into three parts and, grasping the upper part of the egg with two fingers of the right hand (thumb and index), stretch out the head (the head is not sculpted, but is formed by lightly kneading, i.e., with circular movements of the fingers);
- The lower part of the egg is also kneaded;
- if the paws (legs) are spread apart, then the edge of the palm marks a dividing line on the body;
- Then, by pinching and pulling, we continue to sculpt first the head, then the upper and lower paws (legs).
2. Modeling “from the egg”
In this way they sculpt a cockerel, a chicken, a ram.
Sequence of operations:
- prepare a piece of clay of such a size that it fits in an almost closed palm;
- roll into an egg-shaped ball;
- visually divide the egg into three parts and, grasping the upper part of the egg with two fingers of the right hand (thumb and index), shape the head by kneading, i.e. circular movements of the fingers. When making a ram, the first part to be separated (including the horns) must be larger;
- lift the comb by smoothing the clay (sliding movements of your fingers in an upward direction). At the same time, a sufficient amount of clay is “collected” for a comb or horns and ears;
- on the front part of the head, mark the eyes symmetrically by pressing the inner and outer sides of the first phalanx of the index finger;
- shape the breast so that it is convex and wide;
- “pick up” the paws so that the toy’s fulcrum is its tummy and tail (we make it in the form of a short cylinder);
- Then, by pinching and pulling, we continue to sculpt small parts.
3. Proportional division of the egg
This method is used to sculpt a horse, dog, cat, deer, elk, and bear.
Sequence of operations:
- prepare a piece of clay of such a size that it fits in an almost closed palm;
- roll into an egg-shaped ball;
- visually divide the egg into three parts and, grasping the upper part of the egg with two fingers of the right hand (thumb and index), shape the head by kneading, i.e. circular movements of the fingers. When sculpting an elk, a horse or a man's head, it is necessary to take into account that the upper part is separated in size larger than one third of the egg.
- divide the remaining part (two-thirds of the egg) with the edge of the palm or the index finger of the right hand crosswise into 4 parts;
- Then, by pinching and pulling, we continue to sculpt all parts of the toy.
Combined method This method combines modeling from a whole piece and individual parts. The combined method of modeling is used in creating compositional works.
Relief modeling
- by drawing
- by applying the form to the base
- by selecting clay
Molding
Modular molding
Reminiscent of making a three-dimensional mosaic or constructing from a large number of identical parts
Salty dough
This type of creativity was held in high esteem by our distant ancestors, who decorated pies and loaves with figures, braided ears of corn and berries. Even the smallest children can use the dough; the main advantage of this material is that it is completely safe and environmentally friendly.
You can prepare materials for crafts like this:
- take a glass of flour and salt, add ½ glass of very cold water, knead thoroughly until a homogeneous mass is formed;
- to the three previously described components add 2 tablespoons of sunflower oil or fatty glycerin cream.
You can knead the dough either by hand or with a mixer. The first option is suitable for creating small elements and details, while the second is ideal for larger-scale sculpting.
If a child has been modeling for a long time and has succeeded in this matter, you can prepare an improved version of the dough for him, which allows him to create more durable crafts and paint them. For this you will need:
- flour - 1.5 cups;
- salt (fine extra) – 1 glass;
- water – ½ cup;
- PVA or wallpaper glue - 2-3 tablespoons (can be done without glue).
This option allows you to create both large parts and small elements.
Wax plasticine
Another great option for children's creativity. It is one of the varieties of ordinary plasticine, but is suitable for modeling by the youngest children - from one year old. Wax is used as the basis for its production, as the name suggests.
The benefits of wax plasticine include:
- Ease of use. Even a child’s weak hand will be able to roll a ball or sausage without any extra effort.
- Minimum additives, environmentally friendly and non-toxic. These factors are especially important when choosing material for children's creativity.
- Very good for training finger dexterity. At the same time, it is much softer than its classic “brother”, so the baby will like it much more, and working with it will not require preliminary warm-up.
- It will be much easier for your baby to create even a complex craft due to the increased stickiness of the mass. The elements “grab” without any extra effort.
- Bright colorful tones can improve your mood.
Parents should know that there are several types of wax plasticine, differing in the degree of softness. The choice is made according to a simple principle: the younger the child, the softer the plasticine.
Soda mass
Check out another version of homemade plasticine. You will need the simplest available tools:
- soda – 1 glass;
- corn starch – ½ cup;
- warm water – ¾ cup.
Procedure:
- Combine starch and soda. Please note that it is also possible to use potato starch, but in this case the mass will be colored grayish and will not be snow-white.
- Add the bulk ingredients to the water and stir well.
- Place the container on moderate heat
- Cook until thickened, stirring constantly.
- When the mass looks like a single lump, turn off the gas and cool slightly.
- After this, knead.
The resulting “homemade plasticine” is ideally suited for children’s creativity.
Craft options
Please note that the work will require not only material, but also some tools. These include:
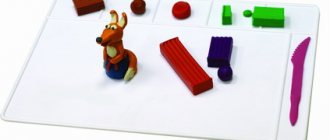
- Board or mat for rolling out. It is not necessary to purchase expensive models; the main requirement is a flat surface.
- Stacks (sticks). They help cut a piece of plasticine into pieces, as well as make recesses in it. One or two plastic stacks are enough for a child.
- To add texture, you can purchase special texture sheets.
What can kids do? There are a lot of ideas, because, in addition to the above materials for modeling, you can use buttons, pebbles, shells, twigs, acorns and cones, autumn leaves, pine needles and much more.
The little ones can start by making a simple apple:
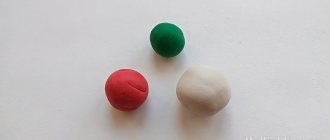
- Roll the plasticine in your palms until it forms a spherical shape.
- Use a stick to make a notch.
- Make a sheet from green plasticine.
Also easy to implement are fungus, tomato, and ladybug. An interesting craft is a hedgehog whose needles are made of toothpicks.
There are a large number of materials for modeling; it is very important not to limit the imagination and desire of children, but to give them the opportunity to do what they really like.
Clay
Experts recommend using this material without fail, even in parallel with plasticine, since the clay is not colored and does not distract attention directly from the form. This pliable and soft material allows you to create a variety of figures, including dishes, people, and animals. Then they can be painted in bright colors to create an unusual composition. The key advantage of the material, which distinguishes it favorably from plasticine, is the ability to store the craft for a long time.
Next, we will consider several clay options for children's creativity.
Polymer
Sold in almost every art supply store, it is affordable, pliable, but becomes hard after baking. Available in a variety of colors, including bright ones, to suit your baby’s taste. No preliminary preparation is required - the material is already ready for use, all that remains is to sit down and start sculpting.
Please note that children should not be given the opportunity to work with clay unattended, since very few children will be able to avoid the temptation to put the bright substance in their mouth.
Natural
The first advantage is the absence of impurities and dyes. This is an environmentally friendly product, packaged in bags. And this is also its main drawback - the clay will need to be kneaded before work. Most often, ordinary gray clay is used, a soft and plastic material.
Not every child will be delighted with this natural material - polymer colorful options, as a rule, are liked much more by young sculptors. But this is everyone’s personal choice; someone may like the opportunity to first sculpt a figurine and then decorate it.
