Boat with sail for children
The scheme differs significantly from the classic version, but there is nothing complicated about it.
Detailed instructions:
- A square sheet of paper is suitable for origami.
- It needs to be folded diagonally. Be sure to bend all 4 corners to form a cross on the sheet.
- All 4 corners meet at the central point.
- The structure needs to be expanded.
- Next, the square with folds is turned over to the other side and folded in half.
- Each half that appeared during the instructions is folded again.
- Next, the sheet is unfolded again with the front side.
- Folds in half again.
- Diagonal guides should appear along which you need to fold the sides.
- Once the workpiece is ready, you need to fold the figure in half.
- The free angle is unbent, creating a full-fledged sail.
It is unlikely that this design will withstand water, but it can become a wonderful part of the decor. Additionally, you can color the composition using gouache.
The main thing is not to place the product on a radiator or near a heat source, as after drying it will lose its appearance.
How to make an origami exhibition boat from modules
A ship with raised sails reminds of a possible journey. This instruction is much more complicated than the previous ones, but if you are going to participate in an exhibition or competition, then it is definitely worth trying. Modular origami was invented in 1734, according to Ranma Zushiki.
The technique allowed one to gain patience and attention to detail, so for some time it was even taught at school. Now we have to figure out how to make an origami paper boat using an unusual technology.
How to make a module
The structure will consist of 1027 modules, which can be held together with ordinary glue. The main difficulty is that you need to make even and neat parts; the appearance of the structure will depend on this.
Instructions:
- You need to take a rectangular sheet, then divide it into 38 equal parts.
- For convenience, you can print the cells on a printer in advance, then cut them out using scissors.
- Each part needs to be folded in half, then unfolded.
- Connect the corners of the rectangle in the middle.
- Turn over and lift the edges up.
- The corners are bent, resulting in the top of the ship described earlier.
Then the edges along the marked lines need to be expanded. You should get a figure with two pockets, they are involved in the connection. Thus, the master creates a modular construction set from which you can assemble any craft.
How to assemble a modular ship
There are two options: assembly takes place using the imagination of the master or ready-made diagrams are used. To simplify the first collection, it is better to use ready-made instructions:
- The ship is assembled in rows. A total of 16 lines will be used for the deck and 12 for the sail itself.
- The first row is composed of 47 modules.
- A base is made of 4 rows, where 1 module is added to each ring.
- Starting from rows 5 to 7, you need to add volume to the figure using 55 pcs.
- From the 8th line everything goes down by 1 piece. up to row 17.
To prevent the sail from falling off the ship, you can glue a skewer. Then you should start collecting. Everything is simple here, you need to count the remaining modules and assemble the structure according to an identical scheme. The master can experiment with any color and create patterns when assembling. The process will be reminiscent of playing with Lego.
How to make a paper boat applique with your own hands
To create such a craft, we prepared:
- square sheet of single-sided colored paper;
- black felt-tip pen.
First, our workpiece needs to be bent along diagonal lines.
Now we bend one of the corners (for convenience, we took the top one) towards the very center of the workpiece.
The same bent corner must be bent upward.
Finally, we make another fold of the same corner, but this time we bend it down.
We fold the blank of the future boat in half lengthwise.
All we have to do is form the side of our ship. To do this, you need to bend the bottom part upward at a slight angle. The width of this fold will determine the height of the side.
Now the fold needs to be straightened so that the colored paper is on the outside.
If necessary, the inner sides of the applique can be slightly secured with glue.
The final stage of our craft will be drawing portholes. We apply them using a black felt-tip pen.
Didactic game in mathematics for children of the senior group of preschool educational institutions
Description:
the material will be interesting and useful for preschool educational institutions educators, additional education workers, heads of “Entertaining Mathematics” clubs, parents
Purpose
: the material can be used as a didactic game, as part of a lesson on FEMP, applications, design , in individual work, in children’s independent activities
Integration: cognitive, speech, social and communicative, artistic and aesthetic development
Goal: developing the ability to design from geometric shapes
Objectives: educational:
teach children to arrange geometric shapes according to tables and diagrams;
developmental:
develop the eye, visual memory, spatial orientation;
educational:
to cultivate interest in designing from geometric shapes.
Methods and techniques: playful, visual, independent activity of children, individual tasks, use of artistic words
Preliminary work: classes on FEMP in the sections “Geometric Figures”, “Orientation in Space”, classes on application on the topic “Panels of Geometric Figures”, construction from a flat and volumetric construction set in the corner “Young Builder”
Plan:
1. Conversation about types of transport. 2. Design using tables and diagrams. 3. Didactic task “Invent it yourself” 4. Application work. 5. Summary. Analysis.
The content of the work:
1.
Educator:
People have always believed in miracles and composed fairy tales about
the Airplane Carpet, Emelina’s Stove, and Running Boots
, because there was always a need to move somewhere.
But this is all a fairy-tale, unreal transport that “works” only in a fairy tale. But in our life, transport is different - this is what actually moves: it drives, swims, flies, carries goods and passengers. If we need to go somewhere, sail, fly, we use transport. What types of transport do you know? Children's answers:
- ground: car, bus, bicycle, motorcycle... - underground: metro - air: plane, helicopter, rocket, balloon... - water: motor ship, boat, cutter, yacht...
2. Educator:
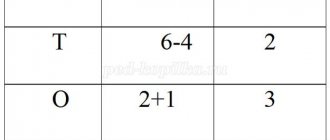
I will make riddles about transport. Whoever guesses gets a table-diagram and adds up what he guessed.
1) What kind of bird: doesn’t sing songs, doesn’t build nests, carries people and cargo?
Look - the plane, He sings a song to us: O-O-O Soon I will fly into the sky!
2) Give me the answer as soon as possible: A few years will pass, And from the Earth, faster than light, it will fly to the stars... (rocket)
Here, under the rainbow, a rocket soared to the skies, And I built the same rocket myself!
3) The palace floats on the waves - It carries people on it.
The boat floats, floats To distant lands. Who is the captain of the boat? Of course it's me!
4) What kind of miracle is this long house? There are a lot of passengers in it, They wear rubber shoes, And they eat gasoline?
The stop is empty: Everyone is on the bus, inside. And now half the battle is taking everyone home.
5) And we have fun in our family: We celebrate housewarming. We moved in an instant, and he helped us... (truck)
Why is our truck not used to being lazy? On his back he carries a body for large and small loads.
6) I drink gasoline and eat butter, although I’m not hungry at all. And without them I’m so sick that I won’t be able to go!
I am so brilliant and, of course, light. I'm rushing along the road like an arrow - You can't keep up with me!
3.
Educator:
And now I suggest you come up with your own model of transport from the same sets.
4. Educator:
What type of transport would you like to stick and decorate our exhibition?
Children's answers and choices.
5.
Educator: Let’s summarize:
What did we do? (constructed modes of transport using tables and diagrams) What did you learn? (construct modes of transport from geometric shapes) What did you like? (solve riddles, stick on geometric shapes...)
Design lesson
Goals:
Consolidating the ability to design from geometric shapes, consolidating knowledge of geometric shapes, repeating transport.
Objectives:
Development of attention, development of memory
Classic flat boat design
You can make a simple origami paper boat for children using one sheet of paper.
To then float it along a river or small stream, it is enough to lubricate the edges with laundry soap or wax. Instructions:
- A rectangular sheet of paper must be folded in half lengthwise. After that, across, then return to its original state.
- The top edge of the sheet must be turned towards the middle part, repeat with the wrong side.
- It is necessary to carefully bend the corner parts inside the structure.
- In fact, you should get a kind of envelope, which at the final stage is turned inside out.
All movements must be smooth and careful, as there is a chance of damaging the corners of the structure. At the end, you need to slowly stretch the structure so that you get a sealed diamond in the middle.
A simple boat can set off on a free voyage. Adults may also remember the pattern of folding a hat from a newspaper that everyone did in childhood.
