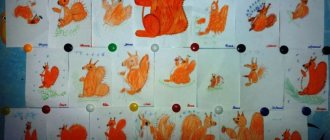
Story drawing lesson
Educator: Children, let us also become artists. Let's close our eyes and say the magic words - "Cribly-crably-boom."Educator: Well, now you and I have turned into real artists, but what are we going to paint, what landscape?
Guys, I suggest you draw such a wonderful landscape (I show a sample). But first, let's remember what a real artist should be able to do?
The artist must hold the brush correctly (by the upper part of the metal skirt), be able to use paints (rinse the brush after using one paint, and only then put another on the brush).
(Demonstration of a picture depicting winter, accompanied by a literary word:
It's winter on our street
Everything was covered with white snow, Houses, trees and bushes
Look how good they are.) I draw children's attention to trees in winter. - Guys, look at how beautiful the trees are in winter... The trunk of the trees is brown, and the branches are white, all covered in snow. — What kind of paint do we need to paint the tree? — What paint should we take to paint snow? - Well done!
- Now let's see how and what we will draw. — First we need to draw a tree trunk, and then a snow cap. Demonstration of the image method: In order to start drawing, take a brush in your hand with three fingers: thumb, index and middle (pinch), by the upper part of the skirt - like this. Dip the brush into a jar of water, and wipe off excess water from the brush on the edge of the jar. Then we dip our brush into a jar of brown paint. We bring our brush to the bottom of the sheet of paper and draw a straight line from bottom to top, but not to the end of the sheet. Then from top to bottom we draw a continuation of our trunk, like this, and paint over the gap between our lines - this will be the trunk. From the trunk we will draw branches. Using the tip of the brush, we draw a line from the top of our trunk to the right and upward, then branch it. Like this! We draw in the same way on the left side.
To paint snow, we need to wash our brush, otherwise the snow will be dirty. To do this, we bathe our brush in a jar of clean water. After we have washed the brush, we wipe off excess water from it on the edge of the jar. Dip a clean brush into a jar of white paint. To make beautiful white fluffy snow, we use a brush to make an imprint on the top of our trunk. We apply the soft bristles of the brush to the sheet and immediately remove it - look how beautiful it turned out, if you do it right, you will succeed too! You need to put a lot of imprints to make the tree beautiful. We will also cover the ground with snow (I make prints) - like this! In the center of the tree we can draw a hollow in black. Our hollow is like an elongated leaf, like this. In the upper right corner we can draw a sun with you. We draw it by rotating the brush around its own axis, here. Guys, what else can we draw on our landscape?
Certainly! Bullfinch! We start drawing our bullfinch from the head, place it on this branch, put black paint on a brush, draw a circle with the tip of the brush and draw a beak near our circle, like this. Next, we begin to draw the back of the bullfinch - to do this, we draw a curved line from the bottom of the head; at the end of this line we draw two thin stripes, this will be our tail. All we have to do is draw the chest of the bullfinch. Our breast is drawn like a droplet, like this.
We will complement our landscape with snowfall, and we will paint the snowfall with white gouache, with the tip of a brush, leaving dots like these on the sheet, look.
— Guys, after you paint your landscapes, don’t forget to wash your brushes, otherwise they will be offended. To do this, we need to bathe the brush in a jar of water, and then dry it by dipping it on a napkin. - Before we start drawing, let's stretch our fingers! Finger gymnastics “Snowball”
One, two, three, four, (Bend your fingers one at a time)
You and I made a snowball,
(“We sculpt” with both hands) Round, strong, (We draw a circle with our hands)
And completely, completely unsweetened. (We shake our fingers) - Well done! Now we sit down at the tables and start drawing.
(While the children are working, the teacher helps children who are having difficulty, draws attention to the fact that the missing colors can be mixed on the palette themselves, we recall drawing techniques. While drawing, the teacher pays attention to the children’s posture)
On the topic: methodological developments, presentations and notes
Plan of drawing notes (preparatory group) on the topic: “Winter Landscape” using the non-traditional “Imprint” technique (drawing with vegetables).
Topic: “The Adventures of the Hedgehog” (dry brush, combing paint) Visual tasks: - continue to learn how to use a combination of colors to create an image of autumn - continue to learn by mixing.
summary of a drawing lesson in the junior group “Beasts in the Forest.”
Notes on drawing in the senior group. Non-traditional drawing technique “Printing with leaves.” Theme "Autumn Forest".
Program content. Expand children's knowledge about the variety of mushrooms. Learn to draw mushrooms of different shapes, structures and colors. Practice drawing a forest clearing. Strengthen the ability to draw with paints and...
Notes on drawing in the junior group “Snowy meadow for a bunny” Drawing using an unconventional technique of drawing with a finger and a cotton swab. Purpose: To consolidate drawing skills.
The purpose of the project: to conduct entertaining classes in painting with paints. Identification and development of creative abilities in children of the older group by conducting entertaining classes in painting with paints. To introduce.
Source
On the topic: methodological developments, presentations and notes
Summary of a lesson in story drawing for children of the senior group “The Little Humpbacked Horse.” Type of activity: story drawing. Age group: senior group. Topic: “The Little Humpbacked Horse.” Program.
Summary of a lesson in decorative drawing for children of the senior group “Elegant young lady” (based on the Dymkovo toy) Program objectives: continue to teach children how to decorate with decorative elements.
laquo;Elegant young lady” (based on the Dymkovo toy).
OD summary on decorative drawing for the senior group “Elegant young lady” (based on the Dymkovo toy).
Summary of a lesson on speech development for children of the senior group "Compiling a story based on a series of plot paintings "Girl Masha and doll Natasha."
Summary of a lesson on learning to draw for children of the senior group “Spruce Branch”. Visual tasks: - Learn to convey the image of a spruce branch, consisting of one main branch and several.
Source
GCD summary. Story drawing “Our group”
Tyutyunova Daria
GCD summary. Story drawing “Our group”
Abstract of GCD . Story drawing " OUR GROUP "
Create conditions for reflecting in the drawing impressions of the life of children in kindergarten, in your group . Learn to draw simple plots , conveying the movements, interactions and relationships of children to each other. Involve children in collective discussion of a common plan. Develop a sense of color and composition. Cultivate friendliness, maintain interest in cooperation and co-creation with peers and adults; accuracy. Arouse interest in the work and the desire to create a homemade album!
Summary of fine arts activities in the senior group of kindergarten
Summary of fine art activities in the senior group on the topic: “Bird - whistle.”
Decorative drawing Author: Polukarova Svetlana Sergeevna, teacher of fine arts activities of MKDOU "Anninsky kindergarten" ORV "ROSTOK" urban settlement.
Anna, Voronezh region. Description of the material: I offer you a summary of fine arts activities for children of the older group (5-6 years old) on the topic “Bird - Whistle.” This material will be useful for teachers in kindergarten drawing.
Summary of fine art activities in the senior group on the topic “Bird - Whistle”.
Decorative drawing. Goal : to teach children to build an elegant pattern on the silhouette of a bird using alternating color spots, to practice conveying dots, strokes, and wavy lines with elements of a decorative pattern. Learn to hold the brush correctly, adjust the pressure, carry out the sequence of operations. Objectives: To introduce children to the history of the whistle. To expand children's knowledge about the use of whistles in our time. Provide a figurative assessment of finished work. Demonstration material : two birds - whistles (clay, wooden - painted), a finished drawn sample with a bird - whistle. Handouts : album sheets (with the silhouette of a bird - a whistle), gouache, brushes, a cotton swab, a sippy cup. Methodological techniques : conversation - dialogue, looking at illustrations and talking about them, summing up. Progress of the lesson. Teacher. Guys, listen to the riddle and try to guess it. I take the bird in my hands and quietly blow “Too-oo-oo” into it.
This is not a simple bird - but made of clay, painted. (
whistle ). — Have you heard about such an instrument? (children's answers). I show two whistles, a painted wooden one and a clay one (just brown). The whistle is the oldest Russian folk wind musical instrument. - Listen to how the whistles sound. Why do you think the whistle is called a wind instrument? (Because you have to blow into it). — Who wants to try playing our little interesting instrument? (children take turns blowing the whistle) It appeared a long, long time ago. Our distant ancestors used the whistle as a magical instrument to cause long-awaited rain and gusts of refreshing wind during the summer drought and heat. Nowadays, whistles have turned from serious magical instruments into children's fun toys. True, whistles can also be heard in modern folk music groups. - Guys, what are whistles made of? (made of clay, wood). A shaped whistle is usually made in the shape of a small, bright bird from baked and painted clay. - Guys, listen to the story of the toy - the whistle. During the long cold months, the women of the village gathered in large huts, placed a basket of clay in front of them, and then, slowly, while talking and singing, they sculpted toys. Roosters and hares, dogs and bears appeared in the hands of craftswomen. Since then, it has been like this - older women taught their daughters to sculpt a toy. Craftswomen made a toy from a whole piece of clay, softening it for a long time before doing so. Then they sculpted the animal’s body, legs, neck, and head. Then, with a simple wooden stick sharpened at the end, two inconspicuous holes were made and the toys were burned in the oven. The most enjoyable activity for craftswomen is painting toys. Currently, whistles are used as a folk toy and as a wind musical instrument. Independent work . - Guys, you each have a piece of paper with the silhouette of a bird - a whistle. Look at our birds, which are white and boring, let's turn them into real musical painted bright toys! To do this, we will first paint the beak with red paint, separate the head from the body and the legs from the body with a stripe, make four red petals on the chest (by applying a brush), and leave two imprints from the brush on the legs. The eye will also be an imprint from the brush. All that's left is to steal the tail. We make a wavy line along the entire length. Next, with yellow color, to make the flower even more beautiful, we will make yellow ones between the red petals, and on the legs we will leave two more strokes, only with yellow color. Now we’ll make dots with cotton swabs. This will be the tuft, the middle of the flower, between the petals and on the tail. Summarizing . At the end of the work, we examine the drawings and invite the children to choose the most beautiful, bright, and funny drawings. We look at and enjoy the resulting work. Photos from the lesson
We recommend watching:
Summary of educational activities in the senior group “Northern Adventures” Summary of a conversation with children of senior preschool age Summary of educational activities in speech therapy for the senior group Methodological development of a summary of an excursion for children of senior preschool age
Similar articles:
Summary of a mathematics lesson in the senior group of kindergarten. Geometric figures
Preview:
Municipal budgetary preschool educational institution "Kindergarten No. 140 of a combined type" of the Volga region of Kazan
Summary of an open lesson on plot drawing
Goal: to evoke in children an emotional response to the artistic image of a winter landscape, associations with their own experience of winter nature.
Objectives: To teach children to independently come up with the composition of a drawing, highlighting the far and near plan of the landscape; enrich children's speech with emotionally charged vocabulary and aesthetic terms. To develop children's interest in unconventional techniques for depicting snow, to help them feel the beauty of winter nature through music, painting, and poetry;
