MAGAZINE Preschooler.RF
Plan - summary of the actual educational lesson in the middle group. Application. Topic: “City Streets”Educational field Artistic creativity Educator: Ryabtseva S. A. Kindergarten No. 145 “Ogonyok” Bryansk, 2015
Program content:
- Cut a rectangle, folded along the boards, for the windows of the house, place the windows on the same level.
- Strengthen the ability to cut corners.
- Strengthen the ability to correctly compose images from details (geometric shapes).
- Practice gluing parts carefully.
- Strengthen the ability to work in a team.
- Foster children's interest in their surroundings and applications.
- Develop imagination and sense of composition.
Integration: Communication, Cognition, Artistic Creativity
Handouts: tinted Whatman paper, colored paper rectangles, blue rectangles, black rectangles, colored paper squares, ready-made machines, glue, glue brush, oilcloth, brush stand, napkins, scissors.
Demonstration material: illustrations depicting streets and houses of the city of Bryansk.
Progress of the lesson:
Q: Guys, today we have guests, let’s say hello to them and smile at them, and now let’s smile at each other.
There is a knock on the door. The teacher comes to the door, “Who’s there?” Look, the postman brought us a letter from Lesovichok.
Q: Let us read it and find out what Lesovichok writes to us.
Letter from Lesovich.
Hello guys!
I want to see your city, but I can’t come to you. I live far in the forest and am very busy with forest affairs. Please show me your city.
Goodbye.
Q: Guys, where do you live?
D: in the city of Bryansk.
Q: Yes, you and I live in the city of Bryansk. Our city is big and beautiful. It has many streets and wide avenues. It has many beautiful buildings. What beautiful buildings do you know?
The teacher invites the children to look at reproductions depicting various city streets.
Q: Guys, let's send Lesovich a picture about our city.
- Look, on a large sheet of paper I drew a road, a sky, planted trees, but this picture is missing something to make it a real city street. What do you think is missing? (Children's answers).
- That's right, we need to build houses, glue cars.
- Today we will do it at home; do not draw, do not sculpt, but with the help of appliqué.
And whoever completes his task will help me stick the cars on the road.
The teacher explains how to do the work:
To make a house:
- Take a large rectangle and place it in front of you on the table.
- Take one blue rectangle. We fold the blue rectangle corner by corner, and then smooth it along the fold line, unfold it, cut it - this will be 2 windows, do the same with the rest of the blue rectangles. Place them on a large rectangle.
- Take a black rectangle and cut off its corners on one side - this will be the roof. Place the scraps back into the plate. Lay out the roof on a large rectangle.
- We smear each part with glue on oilcloth and glue it into place where we took it.
Whoever has the house comes up to me to glue his house to our street.
Finger gymnastics
Q: You are already tired. Let's do gymnastics for the fingers.
We are building a house, knock and knock all day long - a ringing knock is heard. Hands clenched into fists, thumb raised, tapping index fingers.
The hammers are knocking, knocking fist on fist. We are building a house for the children (hares, squirrels). Connect your fingers and show the roof.
This is such a nice house, clench and unclench your fingers. How gloriously we will live. Rotate your hands.
Repeating the stages of gluing the house.
You can start working.
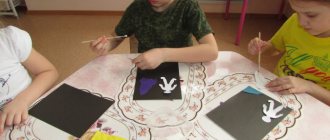
During the lesson, the teacher reminds how to work with scissors and glue. Monitors the children’s work, compliance with the required color scheme, and gives advice on creating the details of the drawing.
Safety precautions when working with scissors
- Store the scissors in the specified location and position.
- When working, carefully monitor the cutting direction.
- Do not hold scissors with the blade facing up.
- Do not leave scissors with open blades.
- Don't cut with scissors as you go.
- Do not approach your friend while working.
- Pass the closed scissors rings forward.
- As you work, hold the material with your left hand so that your fingers are away from the blade.
Safety precautions when working with glue
- Handle the glue with care. Glue is poisonous!
- Apply glue to the surface of the product only with a brush.
- Do not let glue get on your fingers, face, especially eyes.
- If glue gets into your eyes, rinse them immediately with plenty of water.
- After finishing work, be sure to wash your hands and hands.
- When working with glue, use a napkin.
At the end of the lesson, the teacher asks the children to look at the finished picture and pay attention to whether all the houses turned out smooth, neat, and also look carefully to check everything else. Children examine their work, find their favorite details, and explain their choice. The teacher praises those children whose houses or trees turned out to be the most neat, beautiful and straight.
I think that Lesovich will like our city street and he will see how beautiful our city is. Well done boys.
And now the workers on duty will remove their workplaces.
| Next > |
Applique city
The “City” applique made of colored paper will be a worthy decoration for any classroom and any room in the apartment. Even the smallest child can cope with its production,
if you help him overcome some difficulties.
Applique city
It is better to take cardboard in a light blue shade as the basis for the application. Against this background, the “City” application will look most organic. At the first stage of work, we glue a fairly wide black stripe to the bottom of this sheet (folded lengthwise).
In the center of this strip we glue a narrow (distributive) strip of white color. It turns out to be a road.
Road
Above it we glue an uneven strip of light green color. This will be the lawn. Cut out four rectangles from beige, light orange or brown paper. We make four square slits in each of them. The result is multi-storey houses, which we glue to the main background - on the “lawn”.
Lawn with houses
We cut out silhouettes of Christmas trees from green corrugated paper, and stems from brown paper. We glue Christmas trees between the houses.
Christmas trees
We cut out trapezoidal roofs for houses from pale yellow corrugated cardboard. Glue them. We cut out a traffic light from black paper and glue it next to the road. Opposite it, we lay out a pedestrian crossing with pieces of a white stripe.
Traffic light and pedestrian crossing
Cut out two cars from paper of different colors. We send them along the road in different directions.
Cars
All that remains is to decorate our urban landscape: cut out flowers from colored paper and plant them on the lawn. We make small clouds from white paper, napkins or cotton pads and stick them on the sky.
Flowers and clouds
Between the clouds we place in the sky a bright, radiant sun cut out from a sheet of yellow paper.
Application favorite city
Our application on the theme “City” is ready! In front of us on the table lies a simple, but clearly recognizable landscape. If desired, you can make various variations of this picture - for example, evening and night views. To do this, you will only need to change the main background and the design of the sky.
Source: https://montessoriself.ru/applikatsiya-gorod/
DIY “Cardboard City” craft
To create a themed gift for loved ones, you can make “City” paper and cardboard crafts. To create such a city, the following tools are needed:
- glue;
- scissors;
- thick cardboard;
- thick marker;
- a simple pencil;
- acrylic paints;
- brush;
- glass of water.
- You need to take thick cardboard and cut out the silhouette of a building from it. Thus, it is necessary to create several houses.
- Draw the resulting template in the middle with a simple pencil.
- Draw a small line with a pencil next to the main one to the middle of the house. Cut out the resulting strip of cardboard.
- On some houses it is necessary to cut out the middle from the top or bottom of the house, since in the future the two parts will be connected to each other.
- We connect the two halves of the house.
- We draw out the location of windows and doors on the house with a simple pencil.
- We paint both parts of the house with acrylic paints.
- Let's connect them together.
- In a similar way, we produce several houses of varying thickness, height, and width.
- We take a sheet of Whatman paper and draw the markings of the lawn and paths with a simple pencil.
- We paint whatman paper with acrylic paints.
- We place the resulting houses on a sheet of Whatman paper.
You and your child can make paper crafts and create a city in the same way: first we draw and paint the houses with paints, then we cut out and glue the bottom part of the houses to a sheet of white paper.
Thus, in the process of creative activity, the child will develop the importance and significance of such a festive event as City Day.
Source: https://womanadvice.ru/podelki-na-temu-moy-gorod
