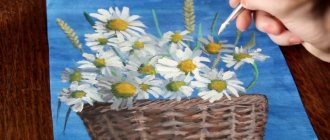
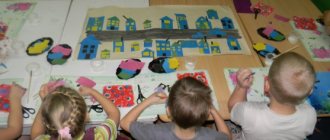
Summary of a lesson on appliqué in the senior group “Autumn Flowers”
Tasks:
Educational:
— Introduce children to the method of symmetrical cutting from paper folded several times (taking into account the characteristics of the inflorescences);
— Teach how to compose a composition on the plane of a sheet (a sign of beauty can be found in the combination of a dark background and a light bouquet and a light background and a dark bouquet);
— Activate the dictionary;
- To form a generalized idea of autumn flowers - asters, dahlias, calendulas, chrysanthemums.
Educational:
— Develop a sense of color, a sense of composition;
— Develop attention, memory, logical thinking, imagination of children;
— Develop interest in completing tasks and creative activity.
Educational:
— Cultivate accuracy in working with scissors and paper;
— To cultivate a caring and aesthetic attitude towards nature, a sensitive attitude to the beauty of autumn flowers.
Methods and techniques: verbal, practical.
Materials and equipment: Reproductions from paintings by famous artists, postcards with images of autumn bouquets, bouquets of fresh flowers, background paper - dark, light, square paper blanks for flowers (also light and dark), scissors, glue, napkins.
Preliminary work: Examining autumn flowers in flower beds; search for contrasting combinations (plants, objects) in the surrounding world; reading fiction about flowers; viewing reproductions, pictures, postcards depicting still lifes with flowers.
Progress:
1. - The Sorceress Autumn gave us many gifts - these are mushrooms, fruits, vegetables, and berries; she decorated the trees with rich clothes and grew beautiful flowers.
— What autumn flowers do you know?
— Look at the bouquets in vases. What does an aster flower look like? Dahlia? Please note that these flowers have many petals and are lush.
- And if we place all the light asters and calendulas on the table against the background of a light wall, and dark dahlias, gladioli, chrysanthemums against the background of a dark curtain, what will happen? (not bright, the background blends in with the colors)
- Let's swap our bouquets - what happened? Why?
- Now we will also try to create our own unique bouquets, we will be magicians, magicians. Let's make light flowers on a dark background, and dark ones on a light background.
Phys. just a minute
2. There are materials for work on the table; children independently select the ones they need.
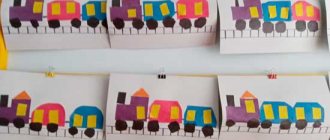
— To get a beautiful aster or chrysanthemum, you need to fold the leaf diagonally in half 3 times, holding it by the blind corner of the fold, make several cuts on the open side, cutting out the pointed petals of the flower, and unfold it. (Show.)
— For dahlia and calendula petals, you need to follow the same steps, only cut out the rounded petals. (show)
— In order for the flower to be lush, several cut blanks are needed. The tips of the petals can be bent using a pencil or scissors. Next, cut out the stems and leaves.
- After finishing working with scissors, we try to create a composition on the background sheet - make the bouquets the way you like.
- Apply glue only to the middle of the workpiece, assemble it - you get three-dimensional flower heads. (Show.)
Children's work. Individual assistance.
3. Lay out the work on the table.
— Dear wizards, do you think we succeeded in turning paper into luxurious autumn flowers?
— Did you get the right combination of background and bouquet?
— Which bouquets do you like best? Why?
- Let's collect all the compositions and arrange an exhibition for parents, so that they can also admire your magical bouquets of autumn flowers.
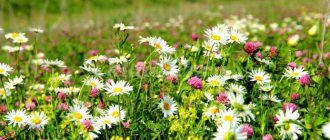
Flower meadow
The fabric applique attracts with its brightness. It can become a wonderful decoration for clothing, interior items, or an original souvenir.
The master class presented in the article will tell beginning needlewomen how to easily make an applique “flowers from fabric” with their own hands.
You need to prepare for work:
- sketch paper;
- needles, scissors, threads;
- glue;
- fabric (it is advisable to use different types of fabric).
Stages of work:
- Draw the petals (you can print ready-made templates or use flower-themed coloring books).
- Carefully cut out the blanks.
- Place the prepared samples on a cloth and secure with needles. Then draw the contours of the petals and cut them out, not forgetting to make room for hemming the edges of the parts.
- The edges need to be folded and ironed carefully. Make up a composition at your own discretion, first secure each element with needles, and then baste (for ease of work at the next stage).
- All parts are carefully sewn to the product using an invisible seam.
These appliqués can be used to decorate sofa cushions, summer hats, and dresses. The panel will look beautiful. To do this, take thick cardboard, stick green velvet paper on top and “scatter” bright flowers throughout the space and glue them.
The picture can be inserted into a frame under glass. An amazing gift, the price of which is the love of creativity.
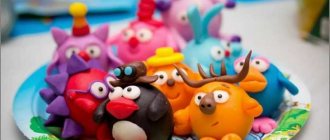
Family tree making technology
If you want to try something new in your work, then I suggest you do some applique work in the form of a family tree. In this case, it is advisable to make the crown of the tree whole; voluminous leaves are not suitable here. In this photo they look very sloppy.
What will happen on the crown depends on your imagination. You can stick apples on which children will write members of their family (suitable for a preparatory group) or flowers. You can also ask parents in advance to bring photographs of family members in the form of small circles. Such a craft can even take pride of place in the living room and become a family heirloom. There are a lot of options, choose depending on the age of your students.
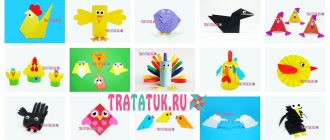
Features of the application
Applique is real magic for any child, allowing you to create magnificent crafts and show your imagination. Children perceive this as an exciting game, the benefits of which are obvious.
As early as two years old, you can begin to teach your child how to create simple applications. This type of art helps develop imagination, learn colors and their combinations, develop fine motor skills and learn to recognize shapes.
There are many different types of applique, and the main material for it is paper. Children's appliques are created from paper of different colors; they look very bright and original.
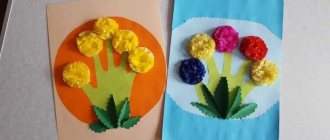
Flowers are a great theme for any craft; they look very impressive and can serve as a great gift for loved ones.
Master class: simple flower
Simple instructions for children will help you make a cute applique that can serve as a gift card.
We take the following materials:
- Cardboard, you need to take colored one;
- Colored paper;
- Scissors;
- Glue;
- Pencil;
Work progress:
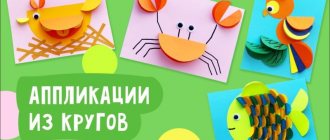
- From paper of different colors you need to cut out five blue circles, one yellow circle (stamen), two medium-sized green circles and one stripe.
- Blue circles (petals) bend their edges inward.
- A round yellow stamen is glued to a cardboard base, with a stem attached to it.
- The petals are glued around the stamen, then the leaves.
The simple flower applique is ready!
Where to start?
So, regardless of which group you are conducting the lesson with, it is initially necessary to introduce children to the varieties of trees and shrubs.
After all, only a few of them will be able to name you more than 2 types of trees, not to mention shrubs. How can you do something you don’t know? Therefore, the teacher’s task is not only to tell, but also to show what this or that tree looks like. Perhaps you have teaching material on this topic: hand-drawn or printed from the Internet. But I recommend that you purchase demonstration pictures “Trees and Shrubs”, which can later be used in other classes. They cost just a penny, and the thick cardboard and large size of the cards will make you very happy.
The thematic picture dictionary “Flowers, Trees” will also serve well in classes where you need to get acquainted with the diversity of the plant world, depict it in the form of an applique or draw it. These two manuals will provide invaluable assistance to the teacher both in the initial stages of preparation for creative work, and in the case of a more in-depth study of the topic.
And of course, you will need templates to work. For the little ones, you will need to cut them out yourself, leaving only small elements for cutting - you need to practice using scissors from an early age. Students will only have to glue the necessary elements. For older children, “patterns” will be useful for tracing them on colored paper and then cutting them out yourself.
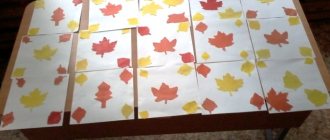
Application “Autumn tree” made of autumn leaves
To work you will need:
- autumn leaves,
- cardboard with a silhouette of a tree,
- glue.
It is advisable to use bright colors of cardboard, so the tree will be more noticeable.
For work, you need to choose beautiful and undamaged dry leaves. They are cut into strips. To continue the task of appliquing autumn leaves, you need to prepare glue and a brush. The branches of the tree are coated with a brush. Dry leaves are placed on these branches. All that remains is to let the work dry.