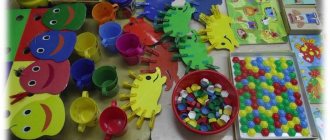
Children's button piecing templates are sheets of illustrations containing blank spaces, usually in a circular shape. It is this kind of pass that the child is asked to close with a button.
In fact, button lining templates can also be successfully used with pompoms, round stickers, plasticine patches, finger painting, etc.
Fine motor skills involve using the small muscles of the hand. Exercising and strengthening these muscles allows children to improve functions such as holding small objects, buttoning clothes, and coloring, and eventually writing .
Buttons and pompoms are items that most of us have around the house. We use these colorful parts to make crafts together with the children and carry out minor household repairs. You can also use these simple objects to develop your child's fine motor skills .
Print templates for button lining
In addition to effective fine motor development, practicing with button patterns improves attention, sensory abilities, perseverance and concentration, ability to distinguish and select colors , etc.
DIY toys for developing fine motor skills in children
The shelves of children's stores offer a wide range of educational aids. It's no secret that their cost is quite high. For interested moms, making your own fine motor toys is a no-brainer. And the main thing will remain uniqueness - after all, they will be made with great tenderness.
Sensory bags
Sewing sensory bags with your own hands is not difficult at all. You will need thick fabric of different colors and textures and filler, which can be used as:
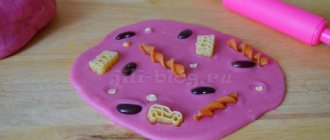
- pasta (spirals, shells, bows, tubes);
- cereals (millet, buckwheat, pearl barley, rice, oats);
- flour and starch;
- legumes (beans, peas, soybeans, beans, corn);
- sweets;
- nuts;
- natural materials (acorns, chestnuts, shells, pebbles);
- erasers of different shapes;
- cotton wool or padding polyester;
- buttons and beads.
Pasta of different sizes and shapes - an original and safe filler for sensory bags
Safety regulations
Natural materials must be washed and dried thoroughly before use, and toys with food must be stored in a dry place - pasta and cereals are afraid of moisture. The bags must be sewn or tied in such a way that the baby cannot, under any circumstances, reach their contents.
Video: how to make sensory pads with your own hands
Photo gallery: homemade sensory bags
These bags are easy to make yourself, even without a sewing machine.
Filling can be placed not only in fabric: dense balloons are suitable for this
Tactile perception can be developed not only with the help of filler, but also by using fabrics of different textures
Bags can be of different colors and sizes
Touch Cube
This toy is a cube, on the sides of which there are three-dimensional objects of different shapes and shades or applications made of various materials.
The sensory cube stimulates the baby to perform different actions: pulling, touching, tugging, fingering
How to make a cube to develop fine motor skills
To make a sensory cube with your own hands, you will need:
- small pieces of fabric of different textures and colors;
- synthetic winterizer or foam rubber as filler;
- interlining;
- decorative elements (buttons, ribbons, ropes, rings, remnants of fabric, iron-on stickers);
- threads;
- iron;
- sewing machine.
From scraps of fabric (it can be cotton, silk, velvet and others) you need to cut out 6 squares with edges of the same size.
It is better if all the faces of the cube are made of fabrics of different texture and color
You need to cut squares from non-woven fabric with a side 1–1.5 cm smaller than from fabric. Non-woven blanks are placed on fabric ones and ironed - both parts will stick together, get a rigid structure and will keep their shape well.
The non-woven base will give the workpiece strength and rigidity
Each square is designed in accordance with an idea: these can be figurines of animals and birds, geometric shapes made of fur or felt, iron-on stickers, buttons, clasps and much more.
Decorative elements are sewn onto each face of the cube
When the design is finished, you need to sew 4 squares into one strip.
The four faces of the cube are stitched into one line
The two remaining blanks are sewn to one of the squares at the top and bottom.
The remaining edges are sewn to one of the squares from different sides
The seams are made along the contour of the non-woven edges and then secured. Next, the development is sewn together to form a cube.
All edges are stitched together to form a cube.
On the last edge in the corner you need to leave a small hole and carefully turn the cube out through it. The toy is filled with foam rubber or padding polyester and sewn with a hidden seam. You can also place rustling paper or a bell in the cube along with the filler.
Each face of the touch cube is designed differently and evokes different tactile sensations
Video: how to make a developing cube with your own hands
Tactile pillow
Sensory (tactile) pillows are suitable for babies from 2–3 months to 3 years. It all depends on the set of elements that are placed on it. For the little ones, a small amount of simple materials is suitable. Before giving such a toy to a child, you need to make sure that all the elements are firmly attached: if the baby pulls one of them into his mouth, it should not come off.
Additional Templates
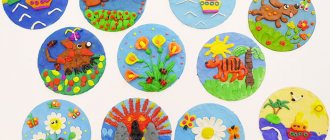
The site has many templates with round gaps for finger painting, filling with plasticine, gluing round stickers, etc. “Circles” can also be stamped with bottle caps, a cut-out stamp made from potatoes, sponges, eva, etc.
Of course, all these templates are similar and interchangeable. You can download finger painting templates and fill it with buttons and vice versa.
Where can I download additional patterns for laying out buttons ? Here:
- Templates for finger painting,
- Plasticine patches.
Circle stickers
Once the patterns for laying out buttons are mastered, you can move on to a slightly more complex step - gluing round stickers. This doesn't mean buttons should be a thing of the past! A familiar and understandable activity gives children a pleasant feeling, a “situation of success.” Further activities should not be associated with torture and tears “I couldn’t!”, but with joy: “ I did it !”
Babies over 1 year old are very interested in stickers. And they are quite capable of gluing round reusable stickers! The Dragonfly publishing house has a whole series of brochures with round stickers that have become real bestsellers!
A series of books “Reusable stickers Circles” on the Labyrinth, on Myshop. Here are examples of spreads from these manuals:
Round stickers, like templates for laying out buttons, will improve fine motor skills of the fingers, help you get acquainted with the world around you, and develop imagination and intelligence. Give your child freedom of action , and he will be able to cope with them by completing tasks in a playful way. You just need to control him sometimes and don’t skimp on praise.
Here are examples from another, similar series of tutorials, “Circle Stickers,” also from Dragonfly.
Round stickers from Iskatel and Prof-Press are also good, but they are not as loved by kids as those suggested above.
Why you need to develop fine motor skills
Many people know about the need to develop children's fine motor skills from an early age. However, not everyone understands why this is needed and what such activities are.
Fine motor skills are the ability to perform precise movements with the hands and fingers. It is coordinated by the work of the nervous, muscular, skeletal and visual systems. Its development begins in the first months of a child’s life with looking at his own fingers and hands. Then the baby gradually learns to master them by picking up toys. Motor skills have a positive effect on manual dexterity, the formation of a student’s future handwriting, and reaction speed.
It has been established that the level of development of a child’s speech directly depends on the degree of formation of finger movements. In the human brain, the centers responsible for speech and motor skills are located nearby. Thus, when one area is stimulated, the other is also activated.
