In search of new creative activities that would appeal to children and captivate them, teachers and parents are experimenting with well-proven techniques and materials. Plasticineography for children is an example of combining modeling and drawing; it takes the best from each of the two types of fine art. The possibilities of this technique are wider than those of conventional flat modeling, familiar to us from childhood. Little artists can start making plasticine as early as 3–4 years old.
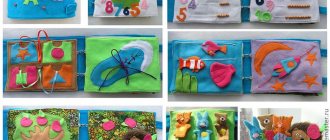
The benefits of using different drawing techniques in classes with children
Kids intuitively strive to diversify their activities, because they have so much to learn, so many things to learn! This is also justified from the point of view of benefits for the development of children. Changing educational and creative activities allows you to train various cognitive skills (memory, speech, thinking), awaken the ability to think outside the box, and imagination.
Drawing is one of the most beloved, accessible, and therefore popular types of creativity among children of all ages. At the same time, there are practically no restrictions in the visual arts: you can draw with pencils, or with your finger on foggy glass, or with sand, or plasticine. The process of developing fine motor skills using any of the listed techniques has its own characteristics. For example, using a pencil or brush prepares the hand for writing, and contact with sand gives a unique tactile sensation and calms the child. Modeling classes teach your fingers to be strong and neat, and most importantly, they give you endless scope for creativity.
Methods of drawing with plasticine and necessary materials
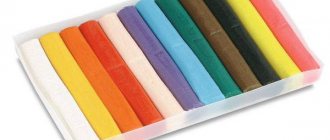
The plasticine for work needs to be selected soft and pliable enough so that it is easy for the child to change its shape, for example, wax. Any other safe modeling mass will do. There doesn't have to be a lot of colors - the important thing is that they are bright and mix well. It is advisable to have white and black in the palette so that the baby understands the principle of changing color saturation.
To get started, you will also need the following materials and tools:
- board for rolling out plasticine;
- stencils, templates or ready-made drawings on cardboard, plastic, glass;
- stacks, toothpicks, rolling pins, molds, stamps;
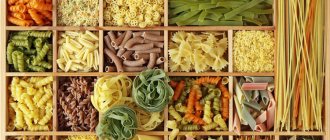
- decorations - beads, cereals, painted pasta, small buttons, rhinestones, sequins, shells;
- a syringe for squeezing out sausages (useful for advanced plasticine artists to create large-scale paintings);
- wide tape for gluing the surface of the drawing on cardboard before applying plasticine, to make it more convenient to correct flaws;
- baby hand wipes.
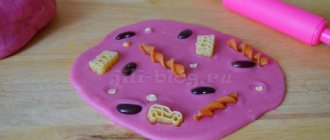
It is very convenient to use disposable plastic plates as a base. The plasticine adheres well to them, and at the same time the drawing is easy to adjust. The round shape looks neat, the work takes on a finished look.
The complexity of the technique used should increase in stages depending on the age and abilities of the child:
- For novice artists, a suitable option is to smear the sculpting mixture with your fingers within the designated contour.
- Children over 5 years old who can roll small balls or sausages from plasticine will be able to make three-dimensional drawings.
Planar modeling for the little ones
It is best to start getting acquainted with the basics of plasticineography by drawing with strokes. Invite your child to randomly smear several small multi-colored pieces of well-mashed plasticine on a dense surface (cardboard or plastic board). After this, you can begin to “color” simple drawings of large geometric shapes - the sun, a tree, a flower, animal figures. Typically, children use the index finger of their dominant hand to work, but it is useful to use the other hand, the thumbs. Such exercises develop synchronization of the work of both hemispheres of the brain.
When the child has mastered the smearing technique well, offer to apply 2-3 layers of plasticine of any color to the work surface, and then move it with pressure with your fingers or a stick. Depending on the pressure applied, different shades will begin to appear on the palette - the effect will amaze the baby’s imagination.
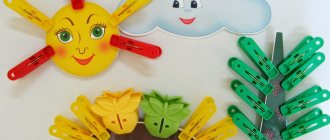
Mosaic made of plasticine balls
This technique is available to children in the middle or even junior group of kindergarten. As soon as the baby has learned to roll small balls of plasticine, you can invite him to fill the finished outline with multi-colored lumps, lightly pressing them onto the base. Such activities perfectly develop fine motor skills and imagination. Using this technique, you can depict anything, and any errors can be easily corrected by simply moving the ball to another place.
This property can be used. Try making a plasticine cartoon with your child based on a simple picture, moving the lumps so that it “moves.” Even a camera on a mobile phone is suitable for filming, and the baby will be delighted!
Plasticine sausages and spirals
In the older group, children can already make simple compositions from plasticine rolled into a thin sausage. Here they will need even more accuracy and patience - these are the qualities that work in this technique develops. By combining stripes of different shades, children can depict space with stars and comets, and by placing a layer of plasticine snow on the green branches of fir trees - real winter. This technique successfully produces autumn trees, the underwater world, and landscapes. The complexity of the work can be increased by placing objects on top of each other, giving the picture depth.
Plasticine flagella, curled into spirals, look like flowers. From such blanks you can assemble a whole bouquet, or you can make a curly birch tree or a fluffy cat. The palette of designs will become richer, and the works themselves will become more beautiful, if you roll up plasticine of similar shades without mixing them to a uniform color. To get an elegant candy, you need to carefully twist two thin flagella (preferably made with a syringe) of bright colors together, then roll the resulting strip into a flat spiral or cut into short sticks with a hook at the end.
Place 1-2 blue, green and pink stripes among the strips of white plasticine, then apply picturesque zigzags across them with a spatula stack. The colors will mix slightly and you will get the northern lights.
Drawing with scratches and dents
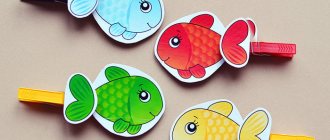
Even a 3-year-old child can scratch patterns on a surface covered with plasticine using a stack or any other suitable stick. The result will be a kind of grattography. Older children use similar tools to detail the drawing, giving it additional volume and realism. Small scratches will help to depict fluffy spruce branches or a luxurious fox tail; a sharp stick is convenient for drawing scales on multi-colored fish.
Kids can squeeze out ready-made figures on smeared plasticine using special molds. Older preschoolers are interested in creating ornaments using the same technique. In this case, solid silhouettes are replaced with small curly stamps, which can be decorative buttons or interestingly shaped pasta. A tool with a tip in the form of a hemisphere will help you make indentations for the eyes of animals or fairy-tale characters: with such a device, the quality of the picture will immediately improve.
Buy your child a set of various stacks. A large selection of tips - sharp, flat, round, jagged - will spur the imagination of the young artist and inspire him to search for new images.
Plasticineography is an excellent option for conducting creative activities with both children and school-aged children. Using this technique, children get original cards for mom on March 8 or dad for February 23, New Year's and competition crafts. There are a lot of different techniques and tricks in the execution of plasticine paintings, it all depends on the imagination and experience of the young artist.
How to make a dinosaur from plasticine. Master Class
Dinosaurs are unusual animals that lived in ancient times. During the modeling process, the child can be told facts about their life and varieties.
Step-by-step diagram for sculpting a dinosaur:
- Cut off a third of the green block of plasticine and roll it into a ball-shaped dinosaur head. Next, a triangular shape with soft corners is created from the ball.
- For the body you will need a whole block of green plasticine. It must be kneaded thoroughly, then given an oval shape, which should be transformed by stretching into an oblong drop.
- Using a toothpick, both parts are connected together.
- To make massive dinosaur paws, you need 4 green balls of the same size.
- Sausages are rolled out from the balls, then the legs are formed.
- The paws need to be connected to the body; to do this, their edges should be slightly flattened.
- Making a large collar for the dinosaur. To do this, roll out a cake from a piece of green plasticine.
- An arc-shaped strip is cut out of it in a stack, then a zigzag pattern is created along the edge with a jagged stack.
- The collar is glued to the top of the dinosaur's head and the scalloped edge folds back nicely.
- On the head near the collar we attach a pair of beige horns.
- A green horn is glued to the nose.
- Triangular green plates are attached along the back and tail.
- Now you need to make a two-color plate. To do this, roll a piece of brown plasticine into a sausage, which is then wrapped in a thin black cake.
- From the resulting part you need to form a rectangle and cut it into 7-8 strips.
- Stick them on the back of the dinosaur and press it into the body.
- Attach white eyes with black pupils to the head.
- Along the entire surface of the back of the ballpoint pen, the dinosaur skin is given relief.
- In a stack, stripes are drawn along the collar, the line of the mouth and the tips of the paws.
The dinosaur is ready.