SOHO Tools
One of the satellite's main instruments is EIT, which stands for Extreme ultraviolet Imaging Telescope.
It shows images of our star's atmosphere taken at wavelengths of 171, 195, 284 and 304 angstroms. The bright areas in the photograph taken at wavelength 304 have temperatures between 60,000 and 80,000 degrees Kelvin. 171 corresponds to temperatures of 1 million degrees, 195 corresponds to bright areas having a temperature of 1.5 million degrees, and finally, 284 corresponds to a temperature of 2 million degrees Kelvin.
The MDI instrument also makes magnetograms showing the magnetic field in the solar photosphere. Black and white areas indicate opposite polarity.
The images shown here were taken near 6768 angstroms by our sister satellite SDO. The most prominent features in the photograph are the spots.
With rays
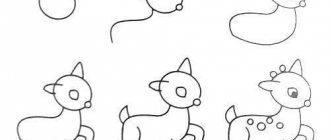
The sun with rays is considered a classic drawing with which children begin to teach basic fine art skills.
The simplest algorithms for creating such a picture look like this:
| Sun drawing option for children | Recommended Workflow Algorithm |
| 1. Draw an even circle in the middle of the sheet of paper you are using. 2. Depart from the main outline 2-4 cm, depending on the format of the sheet of paper used. At the indicated distance, draw a zigzag line, the bends of which should be different, but periodically repeating (rays). 3. Color the distance between the outline of the main figure and the rays yellow. 4. At the top of the inner surface of the circle, draw 2 small semicircles, placing them at the same level (eyebrows). 5. Under the eyebrows, retreating 2-3 cm, draw 2 identical circles. 6. Inside each of the circles, draw 1 more circle, smaller in size. 7. Paint over the inner part of the smaller circle, leaving a small area white - the highlight (eyes). 8. Under the eyes, between them, draw a small oval, placing it vertically (nose). 9. Under the nose, draw a semicircle curved downwards (mouth). 10. If desired, detail the picture by adding freckles, hands or hair to the sun. | |
| 1. In the middle of the working plane, draw a circle of medium size (the main outline), the inside of which must be painted in yellow. 2. Inside the circle, draw 2 large ovals or circles (eyes). Divide the inner part of the eyes into 2 parts using a slightly curved horizontal line. The upper part should be painted dark, leaving one small area (highlight) unpainted. 3. Draw several smoothly curved lines (eyelashes) from the boundaries of the drawn eyes. 4. Draw a horizontal line under the eyes. 5. Draw a triangle down from the horizontal straight line, slightly rounding its corner (mouth). Detail the image by drawing teeth and tongue (optional). 6. From the main contour, along its entire length, draw several triangles with slightly rounded corners, placing them at the same distance from each other (rays). 7. Fill the inner part of the triangles with curves arranged in a chaotic order. 8. Color the picture using yellow, red and orange. |
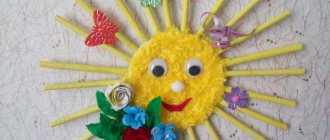
Fabric sun
Let's look at another beautiful craft on the theme of the sun, but it is more complicated. Prepare for work:
- a piece of fabric and yellow thread;
- cardboard;
- padding polyester (cotton pad or foam rubber);
- wooden skewer or thin stick;
- glue "Titan" or "Master".
Stages of work:
Cut an even circle from cardboard, size as desired. From yellow fabric we cut out a circle 1-1.5 cm larger.
Place a cotton pad (foam rubber) on a cardboard circle, cover it with a yellow cloth and turn it over. Now you need to sew the edges of our sun with light threads.
To do this, first we sew over the edge in a circle of fabric, then with a needle we firmly tighten the ends of the fabric from one side to the other, as shown in the figure.
You can glue the edges of the fabric to the wrong side without threads, having previously trimmed the ends of the fabric by about 0.3 cm. Glue the edges of the fabric on top of each other.
Pull one thread at a time horizontally from the rectangle so that 0.5-0.7 cm remains. You get a fringe. From the inside we glue the fringe in a circle. Glue a wooden skewer or thin stick to the inside.
From cardboard or thick yellow material, cut out a circle slightly smaller in size than our base. Glue it to the wrong side, covering the stick and threads.
On the front side we draw eyes for the sun and a red mouth in a semicircle. You can paint with a brush and acrylic paints. Our craft is ready. Instead of fabric, the rays can be thin, long strips of foam rubber or foil.
We offer a lot of photo ideas for sun crafts for kids.
Don't become a hostage to photography
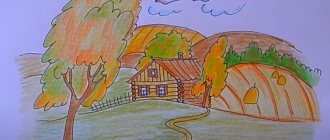
If you draw from a photograph, do not be afraid to abandon certain elements in the photo that will not decorate the composition of your future work. It may be a good idea to, for example, adjust the cloud line or move trees, blur the shoreline, etc.
Give yourself permission to make changes that will make your painting more interesting. After all, your work won't hang next to the original photo, and no one will know what the shape of that cloud actually was or whether all the trees were the same size.
When drawing from a photo, it is important to remember one more thing: the camera changes color relationships. Dark areas look darker in the photo, shadows lose a lot of detail
In fact, even in the shadows we can observe a sufficient amount of color, different color variations.
Read in context: John Lovett: painting clouds in watercolor
Umbrella for your beloved sun
Especially during the rainy season, after a hot sunny summer, sadness suddenly comes. You shouldn't wait until it develops into dull melancholy.
In order to get rid of unnecessary unpleasant expectations, you can simply use a simple pencil and bright colors to depict the radiant sun under an umbrella for your own pleasure.
For this:
- A cloud is drawn with gray paint;
- A circle is drawn under it with a pencil. A button-like nose and laughing cute eyes are drawn;
- The resulting “bun” is complemented by rays, as well as the main attribute this time – a folded umbrella.
- This time the character’s hands are wearing gloves, which doesn’t seem out of place at all;
- The rays for such a “sun” should “wriggle” unevenly, resembling something alive and moving, and you can decorate the umbrella with colored “polka dots”.
May the sun smile upon us widely
An extremely stressful and gloomy day will instantly be filled with new colors of life. Draw the sun with an open, radiant smile whenever such an opportunity presents itself, then you will be guaranteed to be in high spirits for accomplishing important and less important things.
So:
- Draw a small, even and beautiful circle with a pencil;
- Two ovals appear for the eyes, and a wide smile is added;
- Now the rays are depicted. If you imagine for a moment flaming tongues of fire, then they will need to be done on paper in a slightly curved form.
- The originality and charm of this design is also associated with the alternation of short and long rays;
- At the last stage, all previously designated contour lines are simply clearly drawn. To do this, you should use felt-tip pens; you can use a marker that matches the color.
Ready! We smile at our wonderful sun, which can warm you in any bad weather.
Emphasis on large eyebrows
There is another version of the sunshine from the animation theme, which this time favorably allows you to add a few cute freckles and rich density of dark eyebrows to the huge eyes and blinding smile. The example will be very funny.
It is best not to disturb the sequence of work, and also to draw the sun in stages.
For this:
- An even circle is drawn as the basis of the future image;
- Rays are emerging. They are somewhat angular and have different sizes. This shape looks much more natural;
- The face will look like this. Elongated dark eyes and a large beautiful mouth are drawn.
- Then you need to start drawing the eyebrows, making them as thick as possible in a dark shade.
Don't forget to add a few "chic and cheerful" freckles.
Zigzag design
The rays look unique in the form of a cardiogram. To depict the sun this way, you will need the following:
- eraser;
- series of markers.
- a simple pencil;
- horizontal sheet of paper;
You should start working by placing a piece of paper in front of you. The next steps will be as follows:
- Draw and color the circle yellow, adding a face and feathers if desired.
- Draw the outlines clearly.
- On the cardiogram with yellow-orange tints, create the outlines of the rays in the form of jumps. Jumps should be of different lengths and with different frequencies. Colors for dyeing can range from bright yellow to dark red.
Sun made of plasticine, modeling dough
Plasticine sun is a simple and, at the same time, fascinating work that will interest anyone. A plasticine sun can be a craft for kindergarten or school, or just something to do in your free time.
Making a plasticine craft is not at all difficult: you just need to select the plasticine of the desired shades and sculpt the sun and rays from it.
For younger children, you can offer plasticine coloring: draw a sun on paper and instruct the little one to “cover” it with plasticine of the appropriate color.
An alternative option is to make a craft from play dough. The range of materials for creativity is now so wide that you can easily select the dough of the required bright colors and put it to use. Note that the dough craft can be dried and you will get a wonderful souvenir.
Another interesting way to make a sun with your own hands is by modeling it from salt dough. This activity will be doubly interesting: first you need to prepare the dough, then sculpt a figure, dry it and paint it with paints. You can prepare salt dough like this: mix fine salt, flour and cold water in equal proportions.
Modeling not only develops fine and gross motor skills of the hands, but also helps to reveal creative potential, develop imagination and fantasy.
The lightest shade is even lighter than it seems
This is another important point that took me a lot of time to realize at the very beginning.
Yellow is a light color, right? Then why doesn't the yellow sky at my sunset look bright enough? While checking my drawing and photograph using a tone scale, I noticed that the light shades I had chosen were much darker than I thought.
We are talking about the difference in the perception of color when we mix it on the palette and then add it to the picture.
The perception of a color shade also depends on what surrounds it. For example, it may appear warm on the palette, but after we add the shade to the canvas, it begins to appear cooler.
I find myself usually mixing up some paint and testing it on the canvas to see if it's the shade I'm looking for.
As experience shows, even if you paint a foggy day, the sky will remain the brightest area in your picture.
Tip: If you want to get a light shade, take white paint and add the desired colors to it a little at a time. It is easier to darken a color than to lighten it.
Tone scale
When looking at clouds, try to immediately pay attention to how they change as they go into the distance (in perspective), color, size, light, etc. The photo shows a beautiful cloudy day
The photo shows a beautiful cloudy day.