Plasticine hare: step-by-step master class on sculpting a plasticine hare with children in step-by-step photographs.
Plasticine is an amazing material for creativity. It not only gives children the opportunity to realize their creative potential and helps develop aesthetic taste, but also teaches them to live in harmony with nature. After all, children must express their feelings, emotions and imagination, their attitude towards the world around them.
Every child can easily master this technique and sculpt the desired figures and objects. To do this, you just need to correctly structure the modeling lesson and observe the necessary sequence in the work.
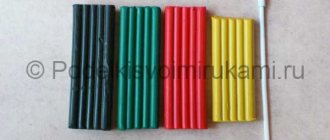
Which plasticine is best to choose for sculpting a hare? Good plasticine in bright colors, elastic, kneads easily in your hands and does not stick to them, does not leave stains on your hands or work surface.
The master class from this article was prepared by Vera Parfentyeva, a reader of “Native Path”. Vera is the leader of a children's art group, a technology teacher, and a participant in our Internet Workshop of educational games “Through play - to success!”
The main secret in sculpting a hare is the basic elements from which you can make the body of any animal or bird.
The craft - a plasticine hare - consists of three elements: plasticine balls, rollers and cakes.
Preview:
Summary of direct educational activities on artistic and aesthetic development (sculpting)
in the preparatory group
on the theme “Child with a kitten.”
Educational field: artistic and aesthetic development (sculpting)
Integration of areas: physical development, speech development.
Teach children to depict a simple scene in modeling, to consolidate the ability to convey the proportions of a person and an animal. Strengthen the ability to use techniques: pinching, pulling, rolling, rolling, joining.
Developmental: develop techniques for creating proportions between humans and animals, a sense of composition, and imagination.
Educational: to cultivate hard work and accuracy.
Preliminary work: Familiarizing children with animals (based on the works of V. Bianki, S. Marshak, E. Charushin, M. Chizhikov, etc.), their appearance, habits. Reading fairy tales, stories about animals, about their friendship with humans. Looking at illustrations.
Individual work: Continue to teach Egor and Raibek how to perform sculpting techniques correctly.
Materials: Plasticine, modeling boards, illustration “Child with a kitten”, stacks, napkins.
Motivation: let the children determine for themselves what we will sculpt (show illustration)
Source
Modeling a hare from plasticine step by step. Master Class.
Creating miniatures of animals from plasticine with children is incredibly exciting. Kids perceive this soft, pliable mass of bright colors as a magic wand. From ordinary blocks you get separate parts that can be assembled into a beautiful craft. You need to practice such exercises at least once every two weeks, and maybe more often. The results will not take long to arrive. Within a few months, the child will independently create his own simple crafts from plasticine or wonderful masterpieces.
Every child knows what a hare is. This is a small animal that changes its gray coat to white in winter. He loves carrots, cabbage and grass. Often the hare appears as a character in cartoons or fairy tales. This lesson provides a detailed master class on sculpting a bunny from plasticine, after which you will know exactly how to sculpt a hare from plasticine step by step.
- Grab a set of plasticine for some fun work.
№1
- The bunny can be sculpted from white material. But it’s better to show your child that mixing white and black will result in gray. Mix the required number of pieces.
№2
- From the resulting gray mass, mold the hare’s body in the form of a drop and a smaller head.
№3
- Press your head tightly against your body. If you doubt the strength, connect the two parts with a match.
№4
- To create small details you will need some gray and white plasticine and a spatula. Make cakes of different sizes: ears, cheeks, breasts. To create a fluffy effect, use the tip of a spatula to slash the white elements.
№5
- Attach the ears to the head, add a nose and cheeks to the face, and an apron to the chest.
№6
- To make the front legs, roll small gray sausages, place a dot of white plasticine on the ends, then use a spatula to score the small toes.
№7
- Place the paws against the body and press firmly so that the plasticine sticks. Also glue the nose and eyes onto the face.
№8
- Leave a little more gray plasticine to create the hind legs and tail. Make two pieces of the same size, use white balls instead of fingers. Place white plasticine on the tip of the ponytail and rinse it with the tip of a spatula.
№9
- Add the prepared parts to the main craft.
№10
- All that remains is to treat the cute bunny with cabbage. It can be assembled from several green cakes.
The final look of the craft.
The gray plasticine bunny is ready!
Node progress
-What kind of animal is playing with me?
Children's stories about their pets (habits, favorite activities, etc.)
_What benefits do cats bring to a person’s life?
— Today we will sculpt a cat .
What parts do we need to sculpt to make a cat ?
(head - round, body - oval, ears - triangular, 4 legs - “sausages”
, tail –
“sausage”
)
