Where to begin?
The most important thing is to carefully think through every step in such an activity. For example, before an applique is made in the second junior group, it is worth leading the kids to this topic with some introductory words.
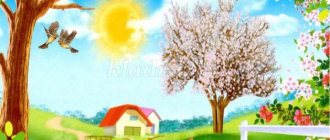
For example, you can start with the fact that every person loves his native land. They are beautiful at any time of the year. However, in spring, the lush pink and white colors of fruit trees are especially pleasing to the eye. The blue sky, birds soaring in it, lilacs and tulips, green grass... All this lifts the mood, brings satisfaction and joy to a person.
Application “Spring” from colored palms
It's cloudy and cold outside. However, the guys are sure that spring will soon replace winter. She will bring with her March drops, gray-blue puddles, sunny weather and, of course, a good mood. The first shoots of crocuses will hatch in flowerbeds and beds, and snowdrops will emerge from the ground in forests and parks. Spring usheres in the season of flowers and bright colors. What does this mysterious stranger look like? No one has ever seen her. So, let’s make the kind of spring from colored palms that we come up with ourselves. For the application you will need:
- colored and white paper
- a drawn girl's head (this can be a fragment of a coloring book, a clipping from a magazine or gift wrapping)
- scissors
- glue.
Palms can be cut out of paper in different ways. For example, find a black and white picture of a glove on the Internet, print it and cut out a cardboard template. We always do things differently. We fold an A4 sheet (landscape) into 4 parts, place our daughter’s palm on the resulting stack, trace it with a pencil and cut out four parts at once.
After the multi-colored elements are cut out, you need to take care of the base of the applique. Unfortunately, we don’t have huge sheets (whatman paper), so we’ll have to glue 4 A4 sheets together. On the resulting base of the applique in the upper part, strictly in the middle, glue the heroine’s head, leaving space for the future flower wreath. Let's make a red collar on the dress. Apply glue in the center of the palm, just 1 drop. Subsequently, we will have to lift our fingers and push new parts under the glued palms.
For the second row, four yellow elements were needed. To make the work more accurate, it is better to first “try on” the parts without PVA.
Two palms turned upside down are a kind of belt for our heroine’s dress.
Then we continue to sew the outfit, forming a full skirt in the spring. You can't do without green colors here. We suggest finishing work on the dress with blue colors.
Finally, we weave a wreath for the girl from two green palms. All we have to do is cut out bells, leaves, herbs from paper and decorate the spring headdress with vegetation.
What are we missing? Of course, gloves. Lightly cut along the contour of the standard palms, reducing them in size. The heroine's hands are ready.
We have a bright, interesting and truly spring applique.
All the kids will like this picture at the festival dedicated to welcoming spring. Join us!
Gifts for parents
By the way, it is not at all necessary to decorate the group with these crafts. The “Spring” applique in the second junior group can also be a wonderful gift for parents, for example, for a mother on March 8th. You just need to glue the sun, flowers, grass on which bunnies and squirrels bask, and leaves with butterflies and insects grow on the trees.
Parents always appreciate gifts from their children. Moreover, they are made by yourself! Therefore, do not forget about the spring holidays! Adults should see what their little ones have been taught and how hard they try!
Collective composition
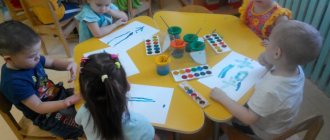
By the way, one caveat. It is better to conduct the “Applique” lesson in the second junior group as a group. Children will find it much more interesting to cut out different shapes at one table. In addition, they will learn to work together, respect the opinions of others, and make compromises.
At the same time, the application will turn out to be very original, because the kids will cut out petals of various shapes and colors - these could be red poppies, white daisies, and blue cornflowers. In a word, every child can be proud of the panoramic collective composition. In addition, the children will learn to divide colored paper, scissors, brushes, and glue.
Before starting work, you can also look at photographs, postcards and calendars with images of various flowers, talk about spring and plants, and solve riddles on this topic.
Interesting option
What should be the applique in the second junior group on the theme “Spring”? You can make it non-standard, incredibly interesting, unique.
So, an example. We begin to create elements for the composition. Colored threads are used for trees. They are cut in three pieces (beige and brown) about fifteen centimeters long. The edges are aligned and tied into a loose knot. After this, a trunk is made - a pigtail is braided. The threads (tree branches) straighten out.
After this, take velvet brown paper. On the back of the sheet, a child's palm is outlined and cut out. This will be a bush.
The grass is made from crumpled green paper. The dimensions are not very large - about two centimeters wide and five centimeters long. The paper is folded four times. On one side the edges are slightly cut. The paper unfolds - the grass is ready!
Next, the composition itself is created. Trees, grass and bushes are placed on a sheet of paper and glued.
And here’s the main point – flowers! They are made from white, pink, yellow and beige napkins. Each of them is cut into four squares, from which balls are rolled. These will be small flowers.
They are glued around the branches of bushes and trees. It turns out to be a blooming garden!
