Photo: discoverymacomb.org Origami is perhaps one of the most versatile hobbies in the world, because it is difficult to find someone who is not interested in it. For children, this is the necessary development of fine motor skills, accuracy, perseverance, attentiveness and logical thinking. For adults, this is a very simple and accessible way for everyone to relieve stress, relax, take a break from routine and switch gears. Even if you look at a piece of paper for the first time with thoughts of making something out of it, it doesn’t matter! We have already prepared several simple patterns for beginners!
Origami swan
Take a square white sheet, mark one diagonal and bend the upper and lower corners to it. Fold the ends of the corners in the opposite direction, fold the piece in half and place it on the table like an open book. From a long, elongated corner, form the neck and head of a swan. Make a beak by bending the tip of the head back and forth, and then draw the swan's eyes.
Photo: yboard.ru
Origami paper bunny
Fold a square piece of paper in half and mark the middle of the triangle. Bend its base back a little, and then fold the triangle ears up. Tuck and hide the top and bottom corners of the square to form a muzzle and color it.
Photo: infourok.ru
Photo: mastersamodelok.ru
Origami whale
Take a gray or blue square, mark a diagonal and bend the lower fragment towards it. Turn the workpiece over and bend the upper and lower (already folded) parts towards the middle. Fold another small corner at the top to form the back, flip the piece over again and make a whale's tail.
Photo: infourok.ru
Photo: zuzino.mos.ru
How to make origami flowers from paper: 8 best patterns
Paper fox
Mark the diagonals of the square and fold it in half into a triangle. Fold the corners of the base up to create a small layered diamond again. On one side, bend the corner and turn it around so as to form a muzzle with ears. Now you just need to draw a nose with eyes and bend the tail so that the fox can stand.
Photo: zen.yandex.ru
Photo: vzryvmozga.ru
Origami flower
Fold a square piece of paper in half horizontally and tuck in the top corners to form an isosceles triangle. Bend the corners of the base of the top layer up, slightly at an angle to the middle, and do the same on the other side - you will get a square. Bend its side corners to the middle from all sides, straighten it and slightly inflate the figure. Form the petals and straighten the bud by hand on all sides.
To make a flower stem, take a green square, mark a diagonal and bend the side corners to it. Repeat the action for the bottom part, and then again to get a thin rhombus, as in the diagram. Fold the lower elongated part up - this will be the stem of the flower, and bend the wide part and fold it into a leaf.
Photo: savimina.ru
Photo: aprilis.ru
The educational role of origami
Origami helps to spend leisure time and solve many educational problems .
By folding paper figures, you can develop in a child confidence in his abilities, creativity, love of art, and imagination. By improving finger movements and developing fine motor skills with the help of origami, you can influence intellectual and speech development. Exercises have a beneficial effect on memory formation. In the process, children remember the actions they perform and reproduce them in the future.
The educational role of origami is to develop independence and the formation of aesthetic taste.
The process of folding figures brings children pleasure . With the help of step-by-step actions, the child receives a car, plane, ship or frog that comes to life in his hands. Therefore, such activities are interesting to them.
Does your child do origami?
Not really
Paper is a universal constructor . It allows you to get a finished toy from an ordinary sheet. Educators use these activities in kindergartens and recommend repeating them at home.
Making crafts helps:
- develop perseverance;
- create positive feelings (after all, a toy can become a gift for loved ones);
- discipline;
- show creativity;
- favor theatrical, constructive and visual talents.
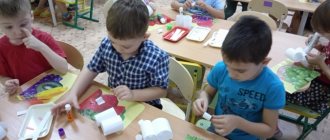
In kindergarten, origami helps prepare children for school. Classes contribute to the formation of important skills:
- the ability to listen carefully;
- take a responsible approach to the task and its implementation;
- reorient consciousness from the outcome of the task to the search for its completion;
- self-control;
- awareness of one's cognitive processes.
The main form of training is recommended to be carried out in small subgroups . Making toys requires precise finger work. The teacher needs to provide individual assistance to each child.
The main tasks of origami in the middle group:
- teach your child to design and be able to create three-dimensional crafts using this technique;
- develop finger motor skills;
- show creativity and artistic taste;
- instill patience and love of work.
When the child has formed and consolidated an idea of how to work with paper, his imagination will begin to manifest itself, and he will be able to follow the teacher’s verbal instructions. Making origami also helps with mathematical preparation. In the process of paper creativity, children study geometric shapes, including polygons, focusing on the sheet. Putting together crafts in a group helps develop communication skills and foster a desire to interact with peers and adults.
Origami paper dove
Fold the square sheet diagonally and turn the corners at the base of the triangle upward. You will get a rhombus, which needs to mark the middle and side verticals, as in the diagram. Hide the side corners of the diamond inside, fold the piece in half and turn it over.
On both sides, lift up the future wings of the dove and give them shape. Bend your torso into a trapezoid so that the tail goes down and spread your wings. All that remains is to bend the head-beak on the neck, and the messenger of peace is ready!
Photo: melkie.net
10 best plans for making a paper airplane
Paper cracker
A paper cracker is folded from a rectangular sheet - you can even use a double notebook. Fold all four corners towards the middle and fold the piece in half into a trapezoid. Fold the corners of the trapezoid down and fold it in half again to create a three-dimensional triangle. You need to take it by the sharp end and shake it sharply so that all the air comes out of the figure with a characteristic pop.
Photo: novamett.ru
Photo: tytmaster.ru
Plan of work for the circle for the year on "Origami" in kindergarten in the preparatory group
Circle work in the preparatory group “Rainbow” “Origami”
Explanatory note. Preschool age
is a bright, unique page in the life of every child.
It is during this period that the child’s connection with the leading spheres of existence is established: the world of people, nature, the objective world. There is an introduction to culture, to universal human values. Curiosity develops and interest in creativity is formed. Origami classes allow a child to satisfy his cognitive interests, expand awareness in this educational field, enrich communication skills and acquire the ability to carry out joint activities in the process of mastering the program. It also promotes the development of fine motor skills of the hands, which is of no small importance for the development of a child’s speech. This type of art has a beneficial effect on the development of attention and memory formation: children remember terms, techniques and folding methods, and, as needed, reproduce the knowledge and skills stored in memory. The goal of the program: to create conditions for the aesthetic development of children in the process of mastering the basic techniques of origami technique, as an artistic method of designing from paper. Objectives of the program: - To introduce children to the basic geometric concepts and basic shapes of origami. — Develop the ability to follow oral instructions. — Teach various techniques for working with paper. — Introduce children to basic geometric concepts: circle, square, triangle, angle, side, vertex, etc. — Enrich the child’s vocabulary with special terms. — Develop attention, memory, logical and spatial imagination. — Develop fine motor skills of the hands and eye. — Develop artistic taste, creativity and imagination of children. — Cultivate interest in origami creativity. — Form a work culture and improve work skills. — Contribute to the creation of play situations, improve children’s communication skills. — Improve labor skills, develop a work culture, teach accuracy, the ability to use materials carefully and economically, and keep the workplace in order. Methods used in the circle lesson: conversation, story, fairy tale, showing a sample of the work sequence. The methodology for working with children is based on the following principles: - Selection of content accessible to children 6-7 years old; — Gradual complication of program content, methods and techniques for managing children’s activities; — Individual approach to children. Expected results: As a result of training in this program, children:
- will learn various techniques with paper;
- will know the basic geometric concepts and basic shapes of origami; - learn to follow oral instructions and create origami products; - will develop attention, memory, thinking, spatial imagination, fine motor skills; Forms for summing up the implementation of the additional educational program: - Drawing up an album of the best works; — Holding exhibitions of children's works. The program is based on: 1. “Origami in kindergarten” Musienko S.I., Butylkina G.V. 2. “Theory and methodology of creative design in kindergarten” Paramonova L.A. 3. “Origami for older preschoolers” Sokolova S.V. 4. “Magic Paper” by N.N. Chernov. Work is carried out outside of class in the afternoon. Lesson duration is 25 minutes.
Calendar plan.
October. 1. Topic: “Flag”. Goal: To teach children to fold a square in half with a “kerchief”, combining opposite corners. Material: Two red squares 15/15 cm, two strips 1 cm wide, 20 cm long made of cardboard, glue. 2. Topic: “Glass”. Goal: To consolidate the ability to fold a square diagonally, to learn how to bend the sharp corners of the resulting triangle to opposite sides, and insert it into the resulting gap. Material: Square 10/10 cm any color. 3. Topic: “Book”. Goal: Learn to bend a rectangle in half, combining the short sides. Material: Three A4 size rectangles: two of them are white, the third is colored, glue. 4. Theme: “Christmas tree”. Goal: to teach children to fold a rectangle in half, combining opposite corners, bend the resulting triangle, learn to form a Christmas tree from triangles, starting from the bottom with the largest part. November 1. Topic: “Kite”. Goal: to increase children’s interest in making crafts using the origami technique, to consolidate the skills of decorating a finished figurine, and to practice free choice of colors. Material: 10/10 cm paper squares of any color, strips of multi-colored paper, glue. 2. Topic: "Frog". Purpose: To introduce the making of simple crafts using the origami technique by folding a square diagonally (the basic shape is a triangle). Material: Green square 10/10 cm, blanks for frog eyes, glue. 3. Topic: “Bunny”. Goal: Continue to teach children how to make crafts using the origami technique. Material: 10/10 cm square, blanks for eyes and muzzle, glue. 4. Theme: “Butterfly”. Goal: Learn to bend a square diagonally, fold the resulting triangle in half, bend the upper sharp corners in different directions. Materials: Paper squares 10/10 cm, blanks for eyes, glue. December 1. Topic: “Snowflakes.” Goal: To teach children to connect parts in pairs, tucking the corner of one inside the other part. Material: 12 blue squares 5/5 cm, a blue circle with a diameter of 3 cm and a white circle with a diameter of 2 cm, glue. 2. Topic: “Gnome”. Goal: Continue to teach children to make paper figures from two parts, teach clearly, and follow the teacher’s instructions. Material: Squares 8/8cm, 6/6cm, different colors, paper trim, glue. 3. Topic: “New Year’s decorations.” Goal: Continue to learn how to make simple crafts from paper squares, using already familiar paper folding techniques. Material: Multi-colored squares of different sizes, paper scraps, glue, threads. January 1. Topic: “Kolobok”. Goal: To teach children to bend all corners of the rectangle evenly, to continue to teach how to decorate a craft with details (mouth, nose, eyes). Material: Yellow rectangle 20/10cm, orange and red squares 3/3cm, two orange circles, glue. 2. Topic: “Bunny”. Goal: to consolidate the ability to bend a square with a “book” and twice with a “scarf”, lower the opposite corners to the center of the square, getting a “candy”. Material: Gray squares 8/8cm and 10/10cm, blanks for eyes and muzzle, glue. 3. Theme: "Wolf". Goal: Continue to learn how to bend a square with a “scarf”, bend one of the corners diagonally towards the top, strengthen the ability to glue a head, and draw eyes. Material: Two gray squares 15/15cm, 10/10cm, blanks for eyes and nose, glue. 4. Topic: "Fox". Purpose: To introduce in practice the basic geometric concepts. Material: Orange (red) square 15/15cm, rectangle 15/7.5cm, blanks for eyes and muzzle. February 1. Topic: “Bear”. Goal: To learn to bend the “kerchief” in half, to learn to understand that the parts of the head and body are made separately from squares of different sizes. Material: brown squares 15/15cm, 10/10cm, two squares 6/6cm, glue. 2. Topic: “Boat”. Goal: to introduce children to making crafts using the origami technique from a rectangular sheet of paper, to practice free choice of colors, and the use of ready-made figures in games. Material: Rectangular sheets 20/15cm. 3. Topic: “Stars”. Goal: To consolidate the ability to fold the basic “kite” shape, learn to alternate colors, fold parts by applying the short side of the workpiece to the inflection line of the previous one. Material: 8 squares 10/10cm, 4 of them one color, 4 of another, glue. 4. Topic: “Chicken”. Goal: Learn to fold a square twice with a scarf. Material: Red square 3/3cm, yellow (orange) square 15/15cm, glue, pencil or felt-tip pen. March 1. Topic: “Chrysanthemum”. Goal: To introduce children to a new way of making flowers using the origami technique, to strengthen the ability to use scissors. Material: 16/20 squares 4/4cm white or purple, yellow paper, scissors, glue. 2. Topic: “Gift for Mom.” Purpose: To introduce the design of postcards using figures made using the origami technique. Material: Multi-colored cardboard, squares of yellow, blue, red paper 10/10cm, green paper for leaves and stems, glue, scissors. 3. Topic: “Turntables.” Goal: Learn to make new crafts from a square, circle, triangle, learn to use the designations of the cut line on the workpiece. Materials: Squares 15/15cm, scalene triangles with a side of 20cm, circles with a diameter of 20cm with cut lines, cardboard circles, glue, scissors. 4. Topic: “Kitty”. Goal: To reinforce folding and the names of basic shapes with children, teach how to make a torso and head separately from squares, learn how to fold a triangle with a “kerchief”, raise the corners from the middle of the long side, but not reaching the top of the upper corner. Materials: Two 15/15cm squares of the same color, pencils or felt-tip pens for designing the face, glue. April 1. Topic: “Gifts for kids.” Goal: Using the origami technique, teach how to make models of birds and boats. Material: Multi-colored squares 10/10cm. 2. Topic: “Fish”. Goal: Learn to fold paper using different basic shapes, joining in pairs to create a marine composition. Materials: Blue cardboard, multi-colored squares, scissors, glue, paper scraps. 3. Topic: "Owl". Purpose: Remind how the basic shape of a kite is folded, teach how to bend the upper triangle forward and return to the starting position, make cuts along the fold line, and fold the ends. Material: Square 10/10cm, blanks for eyes, muzzles, glue. 4. Topic: “Hedgehog”. Goal: Continue to teach children to fold a square in half with a “book”, understand the terms “upper corner”, “lower corner”. Material: 10/10 cm gray or brown square, pencil or felt-tip pen to draw eyes and corners on the fur coat. May 1. Topic: “The rooks have arrived.” Goal: continue to teach children how to make crafts from the basic “kite” shape, and improve their skills in working with paper and scissors. Materials: Black squares 15/15cm, blanks for eyes, scissors, glue. 2. Topic: “Rowan branch.” Goal: to consolidate the ability to make crafts from the basic “arrow” shape. Material: Cardboard, 1.5/1.5cm squares of orange or red, 3/3cm green for leaves, glue, scissors. 3. Topic: “My favorite origami.” Goal: To consolidate the methods and forms of origami learned in classes, to improve the skills of fine and precise finger movements of both the right and left hands; cultivate interest in the results of your work. Materials: Multi-colored squares 10/10cm, scissors, glue. 4. Topic: “Final lesson.” Purpose: Registration of children's work during the period of study; development of communication skills and the ability to coordinate one’s interests with the interests of other children. Material: Album, origami crafts, glue.
We recommend watching:
Using modular origami in working with children Summer application for children using the origami technique. Strawberry Volumetric applique made of colored paper and napkins for older preschoolers Summary of a game-lesson in a preparatory group on origami
Similar articles:
Summary of parental education on the topic: Development of fine motor skills of the hands
Modular origami for beginners. Master Class
Volumetric application “Underwater world” using origami technique for children 5-6 years old
Origami paper frog
Mark the diagonals, central vertical and horizontal lines of a square sheet of paper. Fold it in half and bend the corners inward, as in the diagram, to form an isosceles triangle. Fold the corners of the top layer towards the middle, fold it back halfway and turn the figure over.
Fold the triangle into a rhombus, bend its side corners to the middle, and then straighten the top one into another triangle. Fold the lower part (legs) up and down like an accordion, as in the diagram, turn the toad over and watch how it jumps if you press with your finger.
Photo: bestdiy.ru
Photo: hobobo.ru
Variety of origami types
Experts distinguish several types of folding art:
- classic. For it, take one square sheet, and the figures are folded without scissors and glue;
- modular. Several sheets of different shapes and sizes are used, from which modules are assembled according to the origami scheme. Then the individual figures are connected using the nesting method;
- kusudama. A type of modular assembly, as a result of which a large figure in the form of a ball appears. You can put souvenirs or aromatic herbs inside it, using the ball as a sachet;
- Kirigami. This version of origami allows the use of scissors and glue.
Origami mouse
Mark the diagonal of the square sheet and bend the upper and lower corners towards it, and then bend them back and forth to the middle again. Straighten the diamond as shown in the diagram and turn its corner down. Turn the corner of the main diamond in the opposite direction, and then fold the edges again.
Turn the figure over and straighten the protruding triangles into the mouse's ears. Bend the long triangle twice into a mouse tail and tuck it so that the figurine can be placed on the table. All that remains is to finish drawing the face with eyes and nose.
Photo: pinterest.de
How to make a paper crane: 8 simple ideas
First steps
In the middle of the last century, the famous origamist Akira Yoshizawa developed a universal system of signs that described the process of folding paper figures. Today this unique “alphabet” is used all over the world. Conventional signs indicate precisely and without words what needs to be done to achieve a result.
First, children need to be introduced to the most important symbols that are found on almost any diagram.
These are different types of folds:
And options for working with the workpiece:
It’s good if the acquaintance takes place in a playful way, so little origamists will remember it better.
Basic forms
Folding any, even the most complex paper figurine, begins with simple steps that are performed in a certain sequence. This is how a basic shape is formed - the master then builds on it, adding folds, bending or turning to get a specific model.
The entire diversity of the world of Japanese papermaking is based on this system. Experienced craftsmen use 11 basic forms; for children aged 5–6 years old, for origami crafts it will be enough to know the following elements:
- "triangle";
- "book";
- “cabinet” or “doors”;
- "kite";
- "Crap";
- "water bomb"
The video tutorial will tell you how each of the basic forms is made:
Skills and techniques
Children who can fold basic shapes and recognize them in diagrams are ready to dive into the endless sea of origami ideas. The next stage of their training will be to develop the skills of carefully handling paper so that the figures look aesthetically pleasing and do not “creep”. What should you pay attention to first?
- The fold lines, if they then do not open again, should be smoothed well with a finger, a ruler or the tips of scissors. Then the figure will not lose its shape.
- Bend the model clearly in the directions indicated in the diagram, maintaining symmetry around the central axis.
- When folded, opposite corners and sides are completely aligned with each other.
- The so-called “pockets” - the opening internal parts of the workpiece - must be handled carefully so as not to tear.
The patience, attentiveness, dexterity, and caution developed in the process of practicing these techniques will be very useful in the process of schooling, which is just around the corner. The more independence children show when making figurines, the more useful skills they will gain.
Paper crane
An origami crane is a little more difficult to make for a beginner, but quite possible. Fold the square of paper diagonally twice to form a small triangle and place it “book” side down. Unfold the top layer into a square and flip it over, as in the diagram. Turn the trapezoid over to the reverse side and arrange the second triangle into a square with the book facing down.
Fold the side corners of the top layer back and forth towards the middle and unfold it into a long elongated diamond, and then do the same on the other side. Fold the side corners towards the center, as in the diagram, and bend the long “legs” to the sides - this will be the neck and tail. Form a head on the neck and finally spread the wings of a crane.
Photo: tverigrad.ru
Photo: vsesvoimirykami.ru
Senior group. Senior preschool age. Children 5-6 years old
Summary of GCD on application using the origami technique with decorative elements in the senior correctional group “Fir branch with balls”
Goal: the ability to create a three-dimensional postcard from separately prepared elements. Objectives: • learn to make a spruce branch using the origami , conveying the features of its structure and coloring; • improve the ability to fold paper in different directions to create the image of balls,...
Paper craft using the origami technique “Herringbone” for children from 5 years old
This work may be interesting and useful for children from 5 years old , educators, additional education teachers, and parents for joint activities with children. Purpose: the craft can become an interior decoration for the New Year, a toy for the Christmas tree, a gift for family and friends...
