Where to start learning to read and write?
L.S. Silchenkova believes that it is necessary to begin learning to read and write during the period of development when mental functions begin to mature. The learning process will be effective only if the characteristics of the child associated with his age are taken into account, as well as his individual capabilities, which are determined by speech, perception, thinking and memory
It is necessary to devote enough time to form the child’s speech hearing. It is also necessary to develop the child’s ability to remember letter styles.
The human brain, according to N.G. Altukhova, contains cells that perform the function of remembering the outline of a letter without making any effort. These same cells allow you to use those letters that a person has already memorized.
The process of developing modern methods of teaching schoolchildren to read and write has a rich history.
K.D. Ushinsky proposed the so-called sound method of studying literacy. It had certain advantages and disadvantages. Much attention was paid to introducing schoolchildren to the sound aspects of speech, as well as to developing sound analysis.
According to P.S. Zhedek, there is a more advanced method of teaching literacy. According to his approach, it is necessary to divide words into individual syllables. And each syllable can also be divided into separate sounds.
In this case, sounds that stand out must be indicated using a printed letter. And after that you need to read the written word. But this approach does not reveal the mechanism of the reading process, the moment when individual sounds merge into syllables.
Another technique was developed by V.A. Kiryushkina and other researchers. They based their approach on speech sound analysis. What is new in this system is the different order in which letters and sounds are learned. Letters and sounds are learned in an order based on the frequency of their use in the native language. The most frequently occurring sounds and letters are studied first, and then in descending order.
A.A. Nazarenko also offers an interesting approach that deserves special attention on our part.
Schoolchildren need to be taught methods of mental action: children analyze sounds, engage in positional reading, relying on the entire alphabet. In this case, it is necessary to follow strict stages of development of reading methods.
The important thing about this technique is that during training, students begin to master first quantitative and then qualitative sound analysis of words.
After analyzing the program, we realized that the main attention in it should be paid to the sound structure of the word, developing the ability to conduct sound analysis, and subsequently teach children to read and write at school.
Literacy lesson in 1st grade on the topic “My family and friends”
Motivation1.
Organizational moment:
Good morning, guys. I'm glad to welcome you.
Good morning! Have a rainbow day! May autumn sadness not touch you!
The bright sun is shining through the window, as if with its rays it is trying to warm us on this autumn day, to wish us well and good luck in our lesson today.
Let us now wish each other well and smile.
Starter
- Teacher:
— Guys, today we have an unusual lesson - a travel lesson.
Guess what we will travel on:
I eat coal, I drink water, When I get drunk, I speed up. I’m carrying a train of one hundred wheels and I call myself... (Steam locomotive)
- And what locomotive can you guess on now?
Let's watch a fragment of the cartoon.
- What kind of engine will we travel on? (on the Steam Engine from Romashkovo).
You and I will take a journey to an interesting, very wonderful country. There are a lot of different, respectable, decent residents here. And believe me, friends, We can’t live without them.
— Does everyone have tickets? Check your backs, head high. Then let's go. What sounds does a steam locomotive make? Movements? Get ready! Go!
Updating of reference knowledge
- Some station outside the window... Smekalkino... The residents of this station know geometric shapes very well and offer us riddles about them.
1. He has been my friend for a long time, Every angle in him is right. All four sides are the same length, I’m glad to introduce him to you, And his name is... (square)
2. You look at me, you look at him, look at all of us. We have everything, we have everything, we only have three. Three sides and three corners, and the same number of vertices. And three times difficult things We will do. (triangle)
3. No corner, no side, And relatives are just pancakes. (circle)
4. Trace the whole brick with chalk on the asphalt, And you will get a figure - You, of course, are familiar with it. (rectangle)
Mid-lesson
1. Introduction of new knowledge
Great, we can move on. The train has left.
We arrive at the Znaykino station
- Look, guys, different figures live at this station. You are already familiar with some of them. They are on the edge of your desk. Let's try to put together the locomotive we are traveling on from these figures.
— You have a template on your desk on which you must glue your figures. Are there enough figures? One template, one figure missing... What to do? (work in pairs)
- Now let’s test our figures. Gently but firmly press the sheet with your palms with the pasted figure.
— Has the appearance of the figure changed? Why? - What are the names of the figures that we already know and that fit on a sheet of paper? (Flat).
2.
Statement of a problematic question and creation of a problem situation
Practical work (I)
- Now put a plasticine board and a piece of plasticine in front of you. And sculpt one of the figures (ball, cube, cylinder)
— Try to flatten your figure without changing it? (does not work)
- What conclusion can we draw?
- This is confirmation that the figures are different.
What types of figures are there? What groups can we divide the figures into? What should these groups be called? (on the board under the word figures
a question mark appears)
?
– The first group of figures is completely placed on a sheet of paper; they are well known to us.
– And the second group of figures did not fit completely on the sheet, these figures have a part that does not fit on the sheet of paper, rises above the surface (prevents them from being pressed). – What should we call the second group of figures?
Setting a lesson goal
T: Let’s set
a goal
for ourselves for the lesson (what we want to learn). (Find out the names of figures that rise above the plane and change their shape when flattened)
(K) Working with the textbook.
– To get an accurate answer, you need to refer to the textbook. – Find information in the textbook that will help us solve the problem. Read the name of each group of shapes.
– What do you call figures that are completely placed on a sheet (plane)? (flat)
– What do you call figures that cannot be completely placed on a plane? They have a protruding part. (volumetric)
Conclusion:
figures cut out of paper are flat, while figures sculpted from plasticine have volume.
They are called volumetric figures
.
We look at the poster “Flat figures”.
- So you know flat figures well, let’s now try to name three-dimensional figures. Some names are easy to remember because they resemble something.
We look at the poster “Volume Figures”, read the names of the figures.
3. Primary consolidation of the material
- Let's try to guess what three-dimensional figures are hidden in the objects around us: box, cube, glass, pyramid, moon
- Do you think we can depict the Moon on a piece of paper? And what kind of figure do we need for this? (circle) Guys, pay attention to how differently flat and three-dimensional figures are depicted. Three-dimensional figures are depicted using chiaroscuro, otherwise it is impossible to show that they rise above the sheet of paper.
But it turns out that modern technology has come so far that it is enough to wear special glasses, and the objects depicted on the sheet appear three-dimensional (3D glasses)
- My eyes are a little tired... Let's do some exercise for the eyes.
Without turning our heads, we just watch the sun with our eyes.
Exercise for the eyes.
4. Generalization and systematization of knowledge.
- Well, before we go to the next station, let’s check whether our visit to Znaykino station was useful.
- What groups can the figures be divided into? (volumetric and flat)
— Circle three-dimensional flat figures on the board in one group. Name them.
(AND)
— Select the necessary items in each row in the table.
— Use an arrow to show which items you will add to the table.
Consolidation of what has been learned
- Well done, let's move on. Zadachkino station is ahead
But in order to get off at this station and warm up, we need to practice solving problems
- Listen to the problem.
The picture contains a rectangle, a cube, a circle, a triangle, a square, a parallelepiped and a cylinder. Which shapes are more numerous: flat or three-dimensional?
— What figures are mentioned in the problem? (the student comes to the board, selects the desired figure and hangs it on the board.)
- What two groups can the figures be divided into? (flat and volumetric)
- Let's divide the figures into groups.
— How many flat figures?
- How many volumes?
- Which figures are there more?
- Well, now we can go out to the station and warm up!
Group work.
– And in life, where three-dimensional figures are often used? (in construction)
– Let’s try to work as builders.
We will build an interesting building or something else at this station. On the first desks of each row there are three-dimensional parts of the construction set (and the children bring their figures from their seats). – Create a structure in groups, rows, in an organized, friendly manner. Peer assessment.
Working with a printed textbook and notebook.
5. Lesson summary.
Reflection of activity. Receiving feedback.
- Well, it’s time for us to go back. While we’re driving, let’s discuss what new we learned in class, what did we learn? (revised knowledge about flat figures, became familiar with the concepts of three-dimensional figures; learned to distinguish between flat and three-dimensional figures)
- Let's remember what tasks we completed today while traveling with the Engine.
— Which task did you find difficult?
- And so we returned home. It's time to say goodbye. You have 3 trains left in the envelope (red, green, yellow), before leaving the class, attach a red train - nothing is clear yet, you have not learned the knowledge about three-dimensional geometric shapes, green - if you felt confident in the lesson, and yellow, if there were any difficulties,
- Thank you for the lesson! You did a great job!
I want to reward you with three-dimensional parallelepiped bodies. Can you guess what the reward is? (I hand out small chocolates). Thank you for your active work! The lesson is over.
Differentiation – how do you plan to provide more support? What challenges do you plan to set for more capable students?
| Assessment – how do you plan? check the level of mastery of the material by students? | |
| Increasing the level of motivation in strong students. Weak students should be given attention and supervision. Help is provided to children who have difficulty cutting out their palms. | Observing the work of students in a group, their independent work. Asking questions about progress of the lesson. Reviewing student work in notebooks (tasks). Asking questions while watching the presentation. |
| Overall rating What two aspects of the lesson went well (think about both teaching and training)? 1: 2: What could improve the lesson (think about both teaching and learning)? 1: 2: What did I discover during the lesson about the class or the achievements/difficulties of individual students that I need to pay attention to in subsequent lessons? | |
Literacy teaching methods
Today there are many different programs, the content of which has significant differences. Therefore, the requirements for preparing children depend on whether children are taught the basics of literacy and at what age this is supposed to be done.
At the same time, there are many facts that allow us to highlight certain directions in teaching literacy to children of primary school age. There are known patterns that work in the field of teaching reading and writing.
There are various proven teaching methods. Positive results were obtained from the use of these methods, which significantly influenced the intellectual and speech development of schoolchildren. And these are the areas of work:
- you need to introduce the child to the word: he must learn to isolate words as an independent unit of speech;
- introduce children to sentences: children should also be able to isolate sentences as speech units;
- introduce the verbal composition of a sentence: children must learn to divide sentences into words and compose sentences from two to four words;
- introduce children to the syllabic structure of words: children can divide small words into syllables and make words from different syllables;
- To introduce children to the sound structure of a word, it is necessary to develop their ability to analyze the sound composition of a word, determine the number of sounds, their sequence, compose words with given sounds, and understand the meaning of the phoneme.
The main role is played by the development of children’s ability to analyze the sound composition of words. And as we already wrote about this above, the processes of writing and reading are processes of translating oral speech into graphic images and vice versa.
Speech environment as a means of teaching literacy
Speech space is a very broad concept that consists of many components. This can include different speech samples that are accessible to children. At the same time, not only people can talk around, but radio and television can also sound.
L.P. Fedorenko believes that the speech environment can play a developing function. He believes that this makes it possible to intensify verbal communications. And this environment makes it possible to reveal the student’s full speech potential. But such an environment cannot arise spontaneously. It comes about as a result of deliberate effort.
The author believes that there are two components of the speech environment: this is the natural environment of communication, as well as communication with other children. The second component is an artificially created speech environment.
A free environment is a child’s communication with peers and adults. It occurs naturally during different regime moments. But it can be used to achieve maximum effect.
The artificial environment is a speech space that is purposefully organized by the teacher to achieve the assigned tasks. To do this you need to use certain techniques.
You could even develop a communications center. It will consist of the following elements:
- theaters;
- various visual aids;
- bookshelves.
The aids used may be:
- didactic board games;
- albums on sound pronunciation;
- illustrated materials;
- paintings.
At the same time, all materials used must be selected so that they coincide with the age characteristics of schoolchildren.
N.K. Usova also studied this topic in detail. She wrote that kindergarten staff should organize a speech environment that would help children actively develop their speech literacy.
The speech environment should be created so that schoolchildren have the best conditions for the development of speech literacy. At the same time, children’s speech should develop not only during classes, but also during independent pastime.
Related posts:
- What is folklore and how to use its forms? Small forms of folklore are successfully used in various types of activities for…
- Logorhythmic classes and correctional means By various means, speech therapy classes contribute to the effective correction of speech in children...
- Means for the prevention of dysgraphia in preschoolers with general speech underdevelopment Prevention of dysgraphia in preschoolers with OSD - means of prevention, games,…
- What is "War and Peace" about? Summary of the novel “War and Peace” by chapters. All answers...
Literacy Techniques
During the lesson, the teacher should strive to use different techniques so that the children change types of activities. It is necessary to diversify the form of presenting new information. Let's discuss a few techniques:
- Lull rings: this is an interesting tool that allows you to shape the intellectual abilities of schoolchildren and their creative impulses. There are many different materials that this device can be used for.
- to teach schoolchildren to read and write, you can also make Lull rings, and place letters on one of them, and on the second - objects whose names begin with these letters. Children must correctly connect the letters and the corresponding images.
This interesting technique helps to captivate children, create an atmosphere of ease, and help them perceive new material.
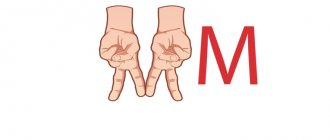
By studying letters with children, you can help them better assimilate new material. To do this, you need to play with these letters in different creative tasks. For example, you can draw a letter and decorate it with different patterns.
You can also fashion letters, sew dresses for them, lay out letters from peas or buttons. They can be drawn on the sand, made from sticks and other materials available to children.
It is also necessary to test children's knowledge using test materials.
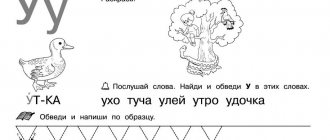
The exercises that are included in this work are material with images of objects for studying vowels. Schoolchildren connect a letter and an object that contains this letter in its name. You can also draw diagrams for words, showing the number of syllables and stressed syllables.


