Application “Chicks in the nest”
To make this craft you will need cardboard, colored paper, cotton wool, glue, pencil and scissors.
In progress:
- draw parts of a tree – trunk and branches – on a sheet of brown paper;
- cut out the drawn parts and glue them onto a sheet of colored cardboard;
- Leaves are made from green paper and glued to the branches;
- For the nest, cut out a semicircle from brown paper and attach it to any tree branch. To imitate twigs and blades of grass, from which birds usually make nests, the same brown paper is cut into thin strips, folded in the shape of an accordion, unfolded and glued to the semicircle of the nest;
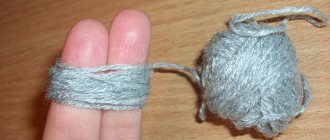
- form small cylinders from cotton wool - these will be chicks;
- cut out beaks and eyes from colored paper and attach them to the body;
- All that remains is to plant (glue) the chicks into the nest and the craft is ready.
The implementation of such an application can be completely entrusted to the baby, guiding his actions. You just need to take care of safety when working with scissors.
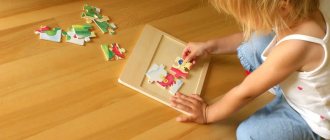
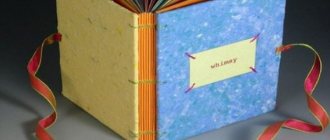
Making a layout for a house model with your own hands
The process of making reamers yourself is no less exciting than working with ready-made samples. To do this, you will need almost any program for working with graphic images installed on your computer. CorelDraw or something similar that processes vector images is best. In it, with an increase or decrease in the image size, both the thickness of the lines and the loaded textures change in the same ratio. This allows you to obtain more realistic images. And the library of textures built into its shell is impressive. At the same time, by filling the sweep element with texture, you can get the finished appearance of the main layout elements.
The entire process, including filling parts of the scan with the selected texture, applying visual effects and architectural elements, and inserting images from the symbol library, takes from 10 minutes to half an hour if the house is not very complex. Print the scan on a color printer and start prototyping.
For testing, you can also use this one we made by copying the image to your computer and enlarging it to the required size.
Owl
Such a toy can become a worthy exhibit for a crafts exhibition in a kindergarten. In this case, you will need an ordinary pine or fir cone, which is probably in the arsenal of every family with a child, multi-colored pieces of felt, glue and scissors.
In progress:
- make an owl's face and wings from brown (black, gray) felt. To do this, you must first draw them with a pencil and then cut them out;
- From felt of a different color, cut out 2 sets of circles of 3 colors each, and each subsequent one should be slightly smaller than the previous one. Ideally, make the smallest circle white, because this will be the white of the eye. For the other 2, you can choose a color of your choice (blue, green, yellow, blue, etc.);
- glue the eyes to the muzzle, placing small circles on top of large ones. The pupils are made from buttons or cut out of black felt;
- for the beak, a yellow or red triangle is cut out of the same material;
- attach the wings and muzzle to the cone. The owl is ready.
Making such a toy will not require much time and will certainly bring pleasure to the child.
Snowman made of cotton pads
The New Year is just around the corner, and what New Year's holiday could be complete without winter crafts for kindergarten? The process of making a snowman is quite simple, so your little one can easily handle it. Of course, not without prompting from parents.
In the process of making crafts:
- Draw rectangles on paper of two colors and cut them out. These will be houses;
- glue future houses to a sheet of colored cardboard (preferably blue);
- the windows are cut out of paper of a contrasting color, and the roof is made from half a cotton pad;
- cut out a tree trunk from brown paper (it is better for parents to do this) and place it behind one of the houses;
- snow, the crown of a tree and the body of a snowman are made from cotton pads (as in the picture);
- cut out of colored paper and glue a scarf and a cap, eyes and a carrot nose to the snowman. The nose, mouth and hands are drawn with a felt-tip pen.
The snowman is ready. The picture can be supplemented with snowflakes cut out of paper or painted with white paint.
You are here:
- Home
- house
- DIY paper house layout diagrams
Layout of a house made of paper with your own hands.
Architects usually create miniature models (models) of buildings. Before you start building a house or an entire residential complex, you first need to make a sample of it to scale (photo). Real architects make models from PVC (polyvinyl chloride), and parts for future buildings are cut out on a special milling machine, which is programmed with a specific computer program.
Such a machine is capable of not only cutting out microscopic parts with pinpoint precision, but also applying a cross-section to their surface that imitates brickwork or other coating. Thanks to this, maximum reliability of the layout is achieved. The machine cuts out tiny windows, doors and other parts. After this, the architect connects them together using a solvent, which melts the edges of the PVC plates and tightly fastens them to each other.
The same thing can be done at home, but only without a milling machine, PVC and solvent, but with the help of cardboard, paper, PVA glue and scissors. The production technology is very similar to what the pros use. The difference lies only in the materials and, of course, the quality of the model produced in this way.
But if you try really hard, you can make a paper building no worse than what an architect creates using a high-tech milling machine. So, how to make a house model with your own hands using a basic set of stationery?
Snowman made from a sock
A great option for overly busy parents. By spending just a little time, you and your child can make a beautiful winter craft from scrap materials.
To do this you need:
- cut off the top of the sock to the heel (preferably white) and make a bag, gathering it into a bun and tying it tightly on one side;
- fill the bag with soft material, for example, padding polyester, and separate the body from the head, tying the snowman in the right place with thread. You can make a snowman more stable if you use any small grain as a filler;
- The snowman's hat and scarf can be made from paper or colored fabric, and the nose, eyes and mouth can be made from multi-colored beads.
The cheerful snowman for kindergarten is ready. To complete the look, you can sew colored buttons to the body.
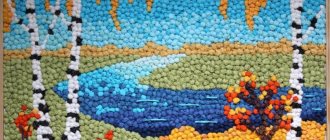
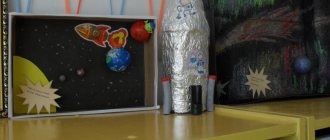
Layouts for kids
This work participates in the regional publication competition “Kindergarten: day by day.” The author's spelling and punctuation have been preserved!
Young children are real explorers, they actively seek to obtain information about the world around them. I always wanted to make the process of children receiving this information fun.
It is quite difficult to organize an interesting subject-spatial environment for children of two or three years old. Children quickly get bored with ordinary dolls, cars, and pyramids; modern children have higher cognitive demands.
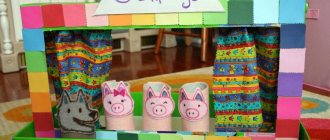
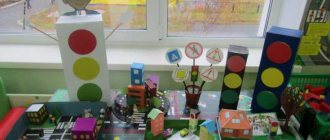
I would like to share with you my experience of working with children in organizing a developmental environment in our early age group “Kolobok”. We are all familiar with the concept of “Layout”; teachers often use them in working with children, especially in older and preparatory groups. But, unfortunately, it is difficult to use layouts in an early age group, because they are usually fragile, made of paper and cardboard, which is not suitable for children. So I decided to create layouts that would suit my kids. But what are they made of? And I came up with the idea of using ordinary wooden multi-colored cubes for this. For example, on the theme of the week “In the world of animals and birds,” together with the children, we made models of a farm and a zoo, built pens for domestic animals and enclosures for wild animals.
The most important thing is that the layout started working and came to life, because the child not only wants to look at objects, but also act with them. The children were emotionally involved in the actions with the model, actively named the animals and their cubs, looked after them, fed them, and even went for walks. In this way, children form primary ideas about the objects of the surrounding world.
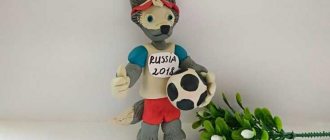
In accordance with the theme of the educational process, we implemented the idea with layouts on the theme “Winter Fun”, using all kinds of available materials. The children and I made a slide, snowmen, and plasticine bunnies. The bunnies cheerfully dance around the Christmas tree, play snowballs, and slide down the slide. And on the football field, a new sport, “Snowball,” has been opened; children blow snowballs into each other’s goals or simply throw them. Children's play, cognitive and research activity is stimulated. The guys are delighted!
Thus, depending on the educational situation, the subject-spatial environment of our group is constantly changing with the help of layouts, that is, it is being transformed. When making models, I use available materials (wooden houses, cubes, plasticine, object figurines), everything I can find in the group. The periodic change of game material and the appearance of new objects in the layouts provide variability in the subject-spatial environment in the group. The models are freely available to children and are absolutely safe, that is, they comply with the requirements of the Federal State Educational Standard for a developmental environment.
The holiday “Defender of the Fatherland Day” is approaching, the kids and I are already working on this topic and bringing it to life.
I invite you to join the use of “working” layouts in the early development group, involve the kids in their production, fantasize, experiment and everything will work out!
Teacher of MADOOU TsRR-ds No. 167
city of Tyumen (building 2)
Lyubich Olga Yaroslavovna
From the editors of the online publication “Kindergartens of the Tyumen Region” All authors of reports in the “Preschool News” section, which are published under an editorial agreement with a preschool educational institution, can order a “Certificate of publication in the media” at any time. Sample: Certificate of publication in the media.pdf
Go to order form >>>
Dear Colleagues! Tell us about interesting events in your kindergartens. How to become an author >>>
Your material will participate in the regional competition “Kindergarten: Day by Day” for the best coverage of the activities of a preschool educational organization in the Internet space in the 2021/2022 academic year. Awarding on the Day of teachers and preschool education workers at the regional holiday Pedagogical Forum in the Department of Education and Science.
Share
Craft "Forest"
To complete this craft, you need to try hard. But the result is worth it.
In progress:
- prepare 4 spruce or pine cones: 2 are painted brown, and 2 are painted green;
- make the base of the craft, for which a thin layer of cotton wool is glued onto a sheet of thick cardboard (this will be snow);
- 3 rectangles are cut out of thick brown cardboard and cylinders are made from them (tree trunks and stumps);
- secure the workpieces on the prepared base;
- The legs, muzzle and antlers of a deer are made from solid wire, wrapped in brown paper or thread of the same color and attached to the body;
- The head and wings of an owl are made from white paper and attached to the body;
- green cones are attached to the trunks - these will be Christmas trees.
You can simplify the process by installing Christmas trees without “trunks”. It will also turn out beautiful.
Plasticine snail
Crafts made from plasticine are easy and beautiful. If you choose the right color of the material, the toy will turn out bright and interesting. How to make a craft for kindergarten from light plasticine, further in the article.
In progress:
- make an oval cake from green plasticine and form a leaf out of it;
- a “sausage” (snail body) and a ball (head) are made from pink plasticine;
- a thicker sausage is formed from blue plasticine and rolled up like a shell;
- connect the fragments of the snail and place it on a green leaf.
They make horns, eyes and a mouth, as in the photo.
Smeshariki from CDs
To complete this craft, you will need an old disk, colored paper, markers and the artistic abilities of your parents.
In the process of work, you just need to draw and cut out the face, arms and legs of the cartoon character about Smeshariki, and then glue them in the appropriate places to the disk.
If you attach a loop of thread to such a craft, you can use it as a Christmas tree decoration.
This is just a small part of the ideas. There are a lot of options for DIY crafts for kindergarten - birds, animals, heroes of your favorite fairy tales and cartoons. You just need to choose the one that suits you and show a little imagination.
Making a layout: method 1
After the entire diagram is drawn on paper, all that remains is to cut out the future building, bend the lines marked with a blue dotted line and cut the windows with a construction knife. Use a modeling board. It allows you to cut out parts from cardboard and then glue them together much more conveniently. The scheme presented in the photo above is suitable for the production of the simplest houses. A more complex structure will literally have to be made up of several parts. By the way, the layout can also be made to open (so you can see the interior of the house). It is on this principle that children's doll houses are made, which can be purchased in the store.
To make such a layout (photo), it is advisable to use the thickest cardboard you can find. In order for part of the wall to open, an appropriate fastener is used (this can be found in old Soviet-made boxes) or simply a piece of cardboard bent in half. Doors can be made to open in the same way.