Notes on sculpting "Kitten" lesson plan (senior group)
SUMMARY OF NODS
on productive activities (modeling) for children of the older group
Theme: "Kitten"
Tasks:
Educational:
Create an image of an animal in sculpting; convey the pose of a kitten in sculpting.
Strengthen the ability to sculpt an animal figurine in parts, using different techniques: rolling clay between the palms, pulling out small parts, connecting parts by pressing and smoothing the joints.
Educational:
Develop fine motor skills of children's hands.
Educational:
Cultivate a love for pets.
Integration of OO: artistic and aesthetic development, cognitive.
Progress of the lesson: Children sit on chairs placed in a semicircle. The teacher comes in with a basket. Guys, today one pet came to visit us. But it is very sad, because he has no friends. And in order to find out who is sitting there, we need to solve several riddles.
What kind of animal is playing with me? Doesn't moo, doesn't neigh, doesn't bark, attacks balls, hides claws in its paws.
Mustachioed muzzle Striped fur coat Washes often But doesn’t know how to handle water.
He cries at the threshold, hides his claws, quietly enters the room, purrs and sings. That's right, guys - it's a kitten.
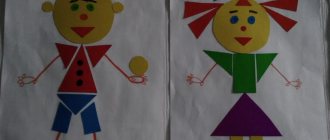
Do you agree to help him (children's answers). Let us make friends for our kitten from plasticine. And in order to make friends for him, we must pass several tests. 1. Does anyone know a poem about a cat? (reading a poem by Natalya). 2.The second task is called “What’s missing?” (finish the kitten) 3. Third task - “Fold a kitten from geometric shapes” (children take turns folding a kitten from geometric shapes).
Physical education minute:
The window opened (arms to the sides) The cat came out onto the ledge (cat’s smooth gait)
The cat looked up (the head was thrown up)
The cat looked down
I looked to the left
I watched the flies
Stretched and smiled
And she sat down on the ledge.
So we got to our modeling table. We have already sculpted a horse. Let's remember where to start sculpting (knead the plasticine and divide it into parts). What shape is a kitten's body? Head? Tail? (oval, elongated head, long tail). We will sculpt from a whole piece of plasticine. Tamara, tell us how we will sculpt (we need to roll out a thick sausage, cut it into a stack on both sides - these are the legs. Then we roll out the ball - stretch out the muzzle and ears. We attach the muzzle to the body and smear it well. The tail should be thin and long). Guys, to warm up our hands before work, we will do some finger exercises.
Cunning, little Kitten (ball squeezed between palms) Just got out of diapers, (palms open) Did a lot of things: (palms close) Ate a fish from a raccoon, (circular movements between palms) Started a fight with a hamster, (Squeeze the ball in your right hand) Only the dog was scared. (squeeze in left hand) Ill-mannered child (circular movements on the table with one hand) This little Kitten. (circular movements on the table with the other hand) Let's start sculpting. Children sculpt, the teacher helps individually as needed. Well done guys, you all coped with the task. Now our cat is very happy, and thanks you all for new friends.
Summary of a modeling lesson in the preparatory group “Child with a kitten”
Lyudmila Kovalevskaya
Summary of a modeling lesson in the preparatory group “Child with a kitten”
Summary of the modeling lesson “ Child with a kitten ”
Teacher Kovalevskaya L.N.
Topic: Child with a kitten . Preparatory group .
Goal: To teach children to depict a simple scene in modeling , showing the movement of human and animal figures.
— consolidate the ability to sculpt a human figure in motion.
— Strengthen the ability to sculpt an animal figurine in parts.
- consolidate the ability to use techniques: pinching, pulling, rolling, rolling, joining.
Materials: boards, napkins, plasticine, illustration “ Child with a kitten ”
,stack.
One balloon kitten
If you are considering the topic of plasticine crafts for children and are looking for something simple but beautiful, then the next cat is for you. This character is funny, well-fed and very cute.
Making such a fat cat is very simple, for this:
- Preparing plasticine for work. Choose any shade you like. Heat the material and roll it into a ball. The main figure can be any size. Do you want to get the most well-fed cat? Make a very large ball.
(Step 1) - Additionally, roll a few more balls. We form ovals from the obtained parts. We attach it to the body. Pay attention to the photo of the cat; the hind legs should be slightly larger than the front ones.
(Step 2) - We complement the main figure with a tail. The presentability of our fat man will depend on the length. Roll out the worm, attach it to the ball and wrap the end. Entrust this work to your child, because these plasticine crafts for children are very simple.
(Step 3) - Forming the ears. Roll two small balls or one large one and flatten the workpiece. Cut out the triangles. Carefully attach the finished triangles to the ball and slightly turn the ears at the end inward for volume.
We figured out how to mold the base of a cat from plasticine; it needs to be supplemented with small elements so that a certain facial expression appears.
Follow these steps:
- We continue to work with the main color. Let's make two peas. They will become cheeks. We attach them to the muzzle and carefully smooth them out.
- To make the cat have the same facial expression as in the photo, make a third ball and place it below the cheeks.
- Let's make a nose. Choose a color. Of course, pink will look cutest. Roll the ball and secure it in place.
- Now you need to make the eyes. Wash your hands before handling them, because you will have to work with white. Dirty hands may leave marks on the material.
- Roll out two white peas. We attach the pupils to them; it is not necessary to use plasticine as the pupil, you can place beads of the color you need here.
- We can't leave our furry pet without a mustache. To make them you can use white thread or fishing line. Gently insert the mustache into your cheeks.
- We complete the creation of the cat. Use small white triangles to make fangs for the cat. Draw the animal’s fingers, holes on its nose and cheeks.
Look, we learned how to mold a well-fed cat from plasticine! This toy is ideal for any children. If you want to keep this plump cat company, you can choose a friend for him from the article on how to make animals from plasticine.
Modeling a cat for the little ones
The first principle of sculpting will be similar to sculpting dogs, which we talked about in the previous article. This modeling from plasticine for children 3-4 years old is especially relevant, since the process is simple, interesting and, of course, useful. Due to the fact that the figurine is miniature and the material itself is plastic, children will develop fine motor skills and activate their imagination.
In order for your child to learn how to make such a figurine, be sure to participate with him in the creative process. If your child is still very young, try to choose the softest plasticine for work, which does not need to be prepared for work by warming up and warming up.
Before molding a cat from plasticine, prepare:
- plasticine (the baby can choose any color, since the finished kitten does not have to be natural, perhaps it will be fabulous);
- plastic knife for working with material;
- a board or other substrate to protect the table from plasticine.
Let's get started:
- The first thing you need to do is sculpt the cat’s body. Roll out a sausage from the chosen color. This will become the basis of the cat.
- When the base is ready, you can start making the paws. Roll out four small balls and shape them into an oval. Using the same pattern, we make a tail for the future cat. It should resemble a sausage with a curved end.
- When the previous parts are ready, start making the head. Roll a large ball and give it a slightly flattened appearance. This is the future face.
- At the top of the flattened ball you need to form ears. Find the middle and gently press with your finger to create an indentation. We give the protruding sides a triangular shape.
- Let's decorate the cat with a bib. Roll out the ball and give it the appearance of a “coin” and attach it to the cat.
We connect all the received elements. Attach the paws and tail to the body, hide the joints by carefully smoothing the plasticine. Our cat is almost ready, and instructions on how to make a simple cat out of plasticine continue. A craft cannot be considered complete if it does not have a pretty face with a certain expression. It remains to add a few details.
Let's start making the muzzle:
- make the eyes (use white as a base and green or blue for the pupils);
- a pink ball is suitable for the nose;
- We will make the cheeks and mouth from gray peas.
Attach all the small parts to the muzzle. The cat is ready. You learned how to make a cat out of plasticine for small children. The cat will not necessarily stand; your baby can give it a sitting or lying appearance.
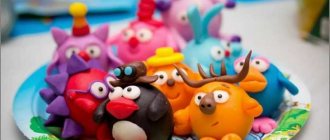
Modeling a cat family from clay
If you want to make a real figurine, then instead of plasticine, take another material. For example, clay. This is a popular mass for sculpting souvenirs; it is very easy to work with. Polymer clay (plastic) for crafts is sold in handicraft, art and online stores. This material has its own characteristics:
- Self-hardening clay hardens in air. This may take 2 days.
- Baking clay hardens when heated. It is kept in the oven for 10-30 minutes.
- Clay can be tinted, that is, mixed with paint to obtain all kinds of colors.
- To reliably fasten clay fragments, you need to moisten them with water.
Clay cat
First, make the simplest figurine . For the master class you will need:
- clay;
- modeling board;
- toothpick;
- water in a bowl;
- brush and paints (acrylic or watercolor).
Take the amount of clay with the expectation that you will get a craft of the required size. Let's get started with some fun sculpting:
Divide a piece of clay in two. One segment will make a body. From the second part, sculpt the paws, tail, ears and cheeks.- The body should be shaped like a rounded cone. Press the bottom of the shape onto a flat surface to make it stable.
- Break off fragments from a smaller piece of clay to form ears. These will be two pointed triangles. Moisten these parts with water and connect them to the body.
- In a similar way, mold the remaining elements for the muzzle: voluminous cheeks, eyes, nose. Don't forget also about the last important detail - the tail. Moisten all this in water and secure it to the body.
- Add details to the finished figurine using a sharp toothpick. You can make pupils, a charming smile and dots on the cheeks. The mustache will be made from wire or fishing line.
- Wait for the craft to dry for a couple of days and paint the cat to your taste.