Author - Olga Anatolyevna Korotaeva, teacher of kindergarten No. 22, Votkinsk
The design of a kindergarten is of great importance for the harmonious development of a child. The design of the kindergarten is a modern design of group and locker rooms, aesthetically designed stands, themed corners, walking areas, sports and music halls. For learning to be effective, a properly prepared developmental environment is very important. One of the conditions necessary for the comprehensive development and education of children in kindergarten is a nature corner equipped in the group.
The nature corner is one of the play and learning areas of the group room.
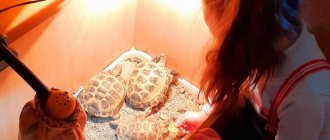
A corner of nature that fits organically into the interior will decorate the group room and allow children to conduct observations and experimental activities. In addition, preschoolers are instilled with feelings such as responsibility and care, as children learn to care for animals and plants.
Each kindergarten group has its own corner of nature. The selection and placement of objects in a corner of nature is carried out in accordance with age, guided by the Kindergarten Education Program and the Sanitary Rules and Norms. Due to the fact that Sanitary and Epidemiological Rules and Standards SanPiN 2.4.1.3049-13 clause 6.11. It is not allowed to place aquariums, animals, birds in group rooms; only plants are placed here.
Plants that are placed in a natural area must be safe. It is not allowed to have poisonous and thorny plants in a corner of nature. And, of course, daily plant care is mandatory. It is advisable to have nameplates on the flowers.
All inhabitants of a corner of nature in a kindergarten can be divided into permanent and temporary.
Permanent inhabitants of this corner of nature will be indoor plants:
- In the younger group of indoor plants, 4-5 types of unpretentious plants are recommended. These are plants that bloom beautifully and for a long time, with distinct stems, leaves and flowers. For example, ficus, primrose, balsam, coleus, geranium.
- In the middle group, the number of indoor plants increases to 5-6 species. These will be plants with different shapes and sizes of leaves. For example, asparagus, agave, chlorophytum.
- In the older group, 6-7 plant species, 2-3 specimens each, with various stems (climbing, creeping), having bulbs and corms are placed in a corner of nature. For example, tradescantia, ivy, amaryllis and others.
- In the preparatory group, 6-7 species of plants are placed in a corner of nature, which reproduce in various ways: by bulbs, viviparous. As well as flowers with different growing conditions. For example, bryophyllum, saxifrage, cyperus.
In addition, in a corner of nature in each group it is necessary to have:
- Natural vegetables and fruits, or their dummies.
- Sets of pictures depicting animals, birds, insects and more.
- Albums "Seasons"; books with illustrations depicting animals; paintings by famous artists.
- Children's drawings about nature and crafts made from natural materials.
- Material for labor. Aprons, watering cans, spatulas, loosening sticks, and rags are useful for caring for indoor plants. Brooms and dustpans - to maintain cleanliness in a corner of nature and a group.
- Equipment for experiments. Molds, funnels, shovels, sieves will be needed for playing with sand. To play with water, you can use pipettes, disposable syringes, and containers of various shapes. To make crafts, you need natural and waste materials (shells, pebbles, pine cones, acorns, chestnuts, twigs). For children in the preparatory group, working with a magnifying glass, microscope, and scales will be interesting.
- Didactic games with natural content “Who eats what?”, “Whose house?”, “Whose baby?” and others.
Filling the corner of nature with the necessary material will depend on the age of the children and the requirements of the Education Program.
A corner of nature is necessary not only for observations. It also contributes to the formation of labor skills. Already from the younger group, children are involved in carrying out individual work assignments. And from the senior group, duty in a corner of nature is introduced.
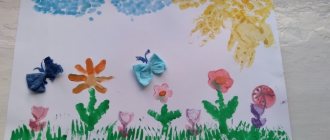
Crafts from garbage
Children love Kinder surprises, so they almost always have packaging for the gifts inside. Teach children by showing them what can be made from such waste material.
The result will be wonderful funny chickens. To make them, the kids will need:
- plastic containers for kinder eggs;
- glue;
- beads or pins;
- yellow and red cardboard;
- scissors.
To one plastic package you need to glue wings made of yellow paper and scallops made of red paper, and attach beady eyes in the same way.
You can pierce the top of the Kinder egg package with two pins. Then the remaining beads on the outside will become the chicken's eyes.
To make the shells, have parents cut the top of each package half in a zigzag pattern. This will be more difficult for children. Together with them, make a nest from straw or dry grass, or from thin twigs, fastening the elements with threads or glue.
You can make such a picturesque bouquet out of garbage. To create it, take:
- Kinder egg packaging of different colors;
- scissors;
- sisal or green plastic bottles;
- cocktail straws;
- nail.
Making master class:
- Also cut the egg halves in a zigzag pattern. On the reverse side, use a heated nail to make a hole.
- Insert a straw into each, first push the edge further to cut it into 2 parts. Then tie them in a knot, then this “stem” will be firmly fixed in the flower.
- Arrange them all in the same way. Connect the flowers, cover with sisal, tie with ribbon.
- If there is no sisal, then you need to cut off the top and bottom of the green plastic bottle and cut the remaining part into a thin strip in a spiral.
For the next craft on the theme take care of nature you will need:
- Kinder egg packaging;
- toothpicks;
- scissors;
- plasticine;
- paints;
- thin colored rope;
- flat lid from a cardboard box;
- green colored paper;
- glue.
Step-by-step production:
- Let the child glue colored paper inside the lid of the box, this is a carpet of green grass. Toothpicks need to be pre-painted, when dry, stick along the edge of the box, like a picket fence. These pickets are tied with rope in several rows to form a fence.
- Pierce the bottom parts of the plastic blanks with an awl and have the child insert toothpick legs here. He will coat them with black plasticine, make small circles from it, and attach them to the cow’s body. Then you need to sculpt the horns, and the muzzle from yellow plasticine.
- In the same way, let the child create other animals: a pig, a cat, a dog, a sheep. Then you’ll get a whole village farm, and you already know how to make kinder chickens.
The following crafts, take care of nature, are no less interesting in execution. After all, after a feast or celebration, plastic cups and disposable plates remain. Make a clown out of them together with your children.
For it you will need:
- strong wire;
- disposable plates and glasses;
- plastic tray;
- latex gloves;
- padding polyester;
- buttons;
- multi-colored threads;
- cardboard;
- plastic bottle;
- glue.
Manufacturing sequence:
- Make a frame of a man out of wire. Thread cups onto each wire that became arms and legs, piercing their bottom.
- Glue 2 plates together, first placing plastic hair between them. Glue threads in the shape of a mouth, cheeks, eyelashes onto your face. And the pupils can be made from a plastic bottle.
- Two trays will become the back and front of the clown. Decorate his clothes with buttons, sparkles, cardboard, which will turn into a jacket collar.
- Stuff the gloves with padding polyester and attach them in place. This is how the theme of natural ecology came into play. After all, this garbage will not harm her if you make crafts like this for the dacha or for a competition.
And an empty container from “Toilet Duck” or other household chemicals can easily become a toy bus. And the other bottle - by helicopter.
To make the first toy, you need to take an empty plastic bottle of a similar shape, for example, from a “toilet duck”, rinse it well, and remove the label.
Draw the windows and doors of this minibus with a felt-tip pen, cut them out with a knife and scissors. To prevent your child from getting hurt on the sharp edges of the plastic, sand them first with coarse, then fine sandpaper.
The covers can be glued with super glue, making wheels or using wire axles. Use an awl to make two punctures on one side and the same number on the other side of the bottom of the bottle. Insert one and a second wire into them, onto the ends of which you need to glue the lid, which will become the axes.
And to make a helicopter, you will need:
- 2 bottles of drinking yogurt;
- glue;
- 2 plastic bottle caps;
- cocktail straws;
- 2 nails;
- scissors.
The first bottle of drinking yogurt will be the main one.
You can simply draw a cabin on its bottom or cut off the bottom and glue half of a plastic package from a Kinder egg here. Make runners from two straws, attach them to strips of plastic cut from the second bottle.
Using a hot thin nail with a wide head, make a hole in the lid and its attachment point, as well as at the ends of the straws. Match these parts to create the top propeller. In the tail part, make it out of straws.
If you need to quickly make a craft about the ecology of nature, use plastic bottles. Tell your child that those who throw them away in the forest harm nature. After all, such containers will rot only after 200 years! It’s better to make a craft out of it for a competition. It will take very little time and materials to make the next one, here they are:
- milk bottle;
- plasticine;
- 2 buttons;
- black and white cardboard;
- glue;
- pliers;
- wire in a white winding.
Cut 4 pieces of wire with pliers and glue them to the bottom of the bottle, turning it horizontally.
Make a tail from the thinner wire in the winding. Have your child smear black play dough onto a bottle cap to create a nose for this rat. He will cut out ears from white cardboard, and a mustache for her from black cardboard. Using plasticine, attach the eyes to the muzzle.
To make fun snowmen, show children how to draw on Actimel bottles with a marker to create the characters' facial features. You can teach your child to knit. Cast on 2 knitting needles and show him how to knit a rectangular fabric using garter stitch. Then you need to sew it on the wrong side. After that, thread the needle and pass the thread into the upper part of the cap, tighten it.
How to make a fan from forks was described in the corresponding article. Next to him, such an animal made from a plastic bottle will look wonderful.
You need to cut off the necks from the other two and glue them directly with the partings to the main container. The legs are done. The ears are cut out from the remains of the auxiliary bottle.
It's easy to create an adorable horse using two colorful bottles and a thread mop attachment.
To make a cat you will need:
- 3 identical bottles;
- scissors;
- paints;
- brush;
- glue;
- piece of fur.
The necks of two bottles are cut off; they need to be inserted one into the other to form the body of a cat. From the third bottle you will only need the bottom; glue it instead of the head. Make ears from scraps of plastic and glue them in place. All that remains is to paint the base to make a cat, glue a piece of fur on the head, and the tail can be made from cardboard or plastic.
Flowers from a plastic bottle will also help turn waste into a decorative item or into an entry for a competition. Petals are cut out from this container. In order for them to bend like that, you need to hold the workpieces over the flame for a short time.